2.1.9. Analyze the performance of my vendors

If your company regularly buys products from several suppliers, it would be useful to get statistics on your purchases. There are several reasons to track and analyze your vendor’s performance:

  • You can see how dependent from a supplier your company is;
  • you can negotiate discounts on prices;
  • You can check the average delivery time per supplier;
  • Etc.

For example, an IT products reseller that issues dozens of purchase orders to several suppliers each week may want to measure for each product the total price paid for each vendor and the delivery delay. The insights gathered by the company will help it to better analyze, forecast and plan their future orders.

Configuration

Install the Purchase Management module

From the Apps menu, search and install the Purchase module.

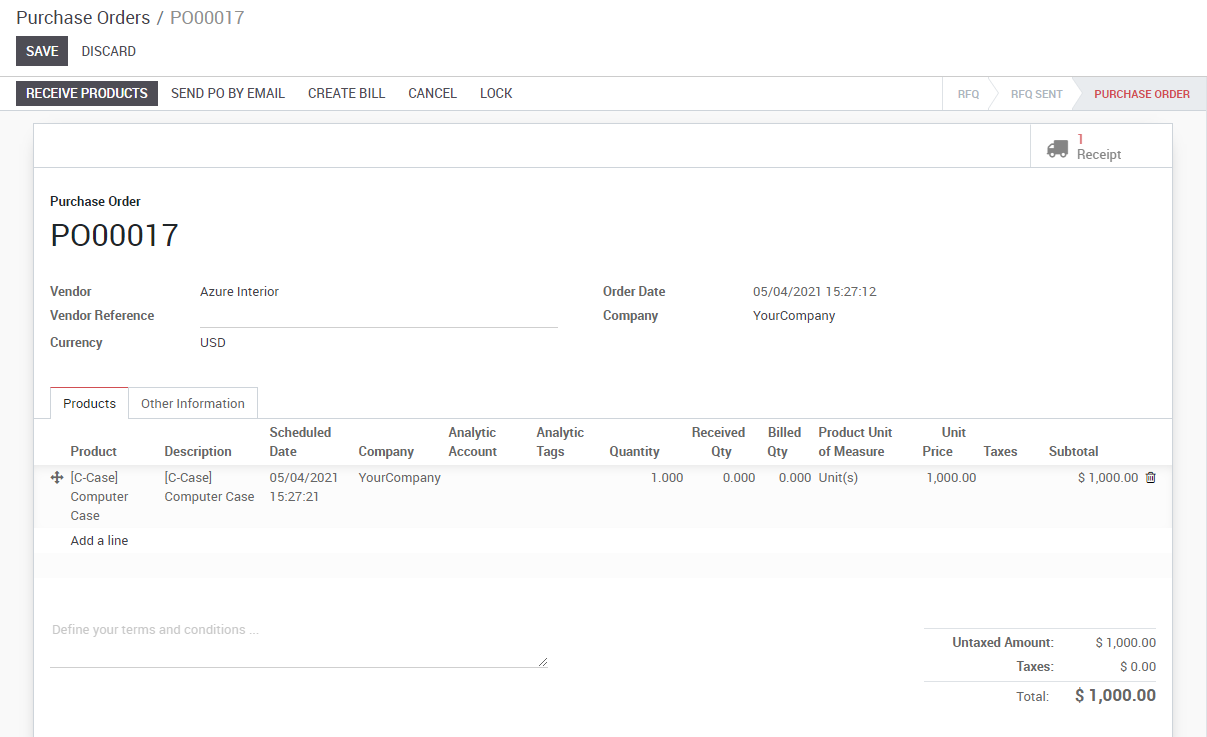
Issue some purchase orders

Of course, in order to analyze your vendors’ performance, you need to issue some Request for Quotations (RfQ) and confirm some Purchase Orders.

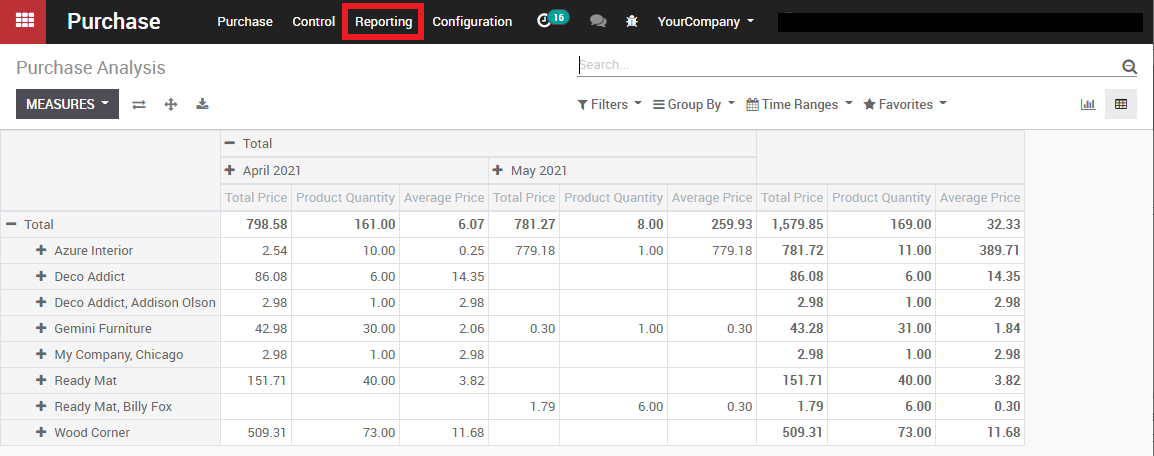
Analyzing your vendors

Generate flexible reports

You have access to your vendors’ performances on the Reports menu. By default, the report groups all your purchase orders on a pivot table by total priceproduct quantity and average price for each month and for each supplier. Simply by accessing this basic report, you can get a quick overview of your actual performance. You can add a lot of extra data to your report by clicking on the Measures icon.

Tip

By clicking on the + and  icons, you can drill up and down your report in order to change the way your information is displayed. For example, if I want to see all the products bought for the current month, I need to click on the + icon on the vertical axis and then on “Products”.

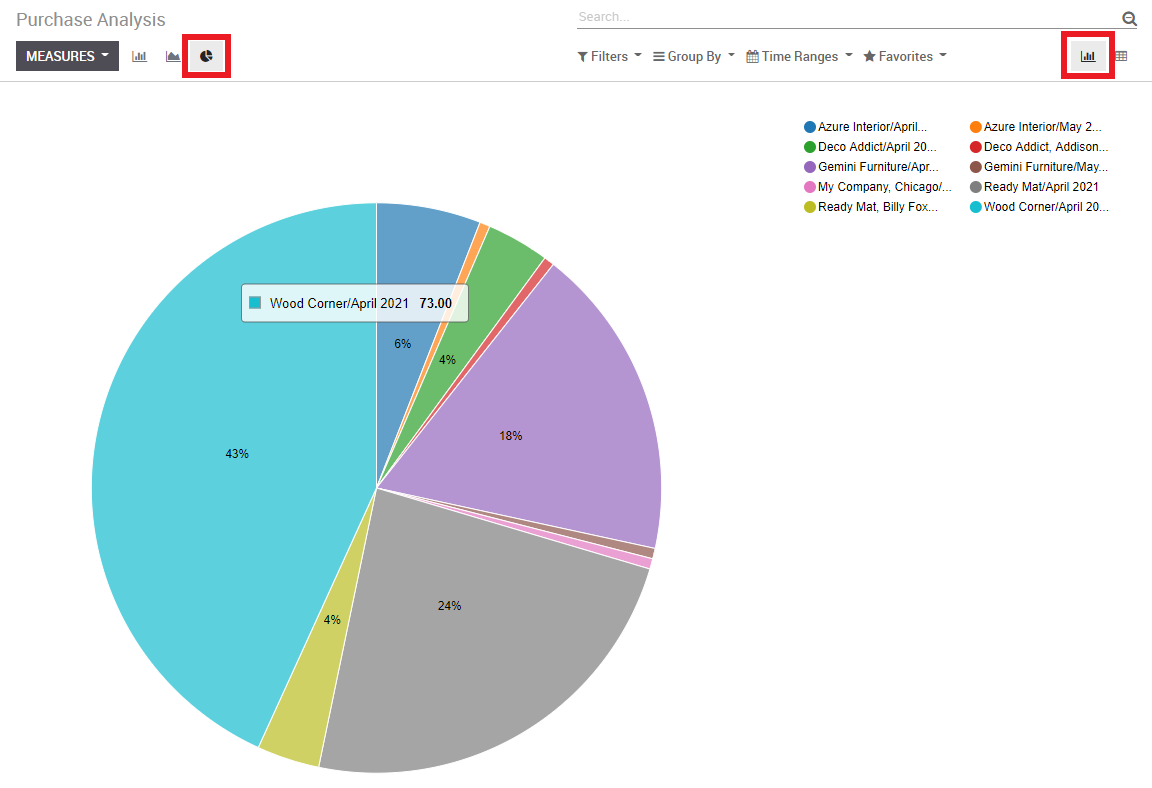
Depending on the data you want to highlight, you may need to display your reports in a more visual view. You can transform your report in just a click in 3 graph views: a Pie Chart, a Bar Chart and a Line Chart: These views are accessible through the icons highlighted on the screenshot below.

Note

On the contrary to the pivot table, a graph can only be computed with one dependent and one independent measure.
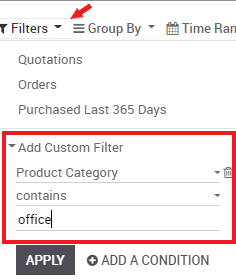
Customize reports

You can easily customize your purchase reports depending on your needs. To do so, use the Advanced search view located in the right hand side of your screen, by clicking on the magnifying glass icon at the end of the search bar button. This function allows you to highlight only selected data on your report. The filters option is very useful in order to display some categories of datas, while the Group by option improves the readability of your reports. Note that you can filter and group by any existing field, making your customization very flexible and powerful.

Tip

You can save and reuse any customized filter by clicking on Favorites from the Advanced search view and then on Save current search. The saved filter will then be accessible from the Favorites menu.


2.1.8. Request managers approval for expensive orders

In case of expensive purchases you may want a manager approval to validate the orders, KiuBMP let you easily set that up.

Configuration

For this feature to work, go to Purchases ‣ Configuration ‣ Settings and activate the Order Approval feature. From there you can also set the minimum amount required to activate this feature.

Create a new Request for Quotation

While working on a new RfQ, if the order is made by a user and not a manager and the amount of the order is above the minimum amount you specified, a new To Approve status will be introduced in the process.

Approve the order

If you are a purchase manager, you can now go to the purchase order and approve the order if everything is alright with it. Giving you full control of what your users can or can’t do.

Once approved, the purchase order follows the normal process.

2.1.7. Cancel a purchase order

Due to misunderstandings, human errors or change of plans, it is sometimes necessary to cancel purchase orders sent to suppliers. KiuBMP allows you to do it, even if some or even all of the ordered goods already arrived in your warehouse.

We will first take as example the case where you order 3 Office Chair that haven’t arrived in your transfers yet. As the installation of the inventory application is required when using the Purchase module, it is also interesting to see the case of partially delivered goods that you want to cancel.

Create a Purchase Order

The first step to create a Purchase Order is to create a Request for Quotation (RFQ) from the menu Purchases ‣ Purchase ‣ Requests for quotation. Confirm your RFQ to have a confirmed purchase order

Cancel your Purchase Order

Use case 1 : you didn’t receive your goods yet

If you confirmed your purchase order and did not received your goods yet, you can simply cancel the PO it by clicking the cancel button.

KiuBMP will automatically cancel the outstanding shipments related to this PO and the status bar will switch from Purchase order to Cancelled.

Use case 2 : Partially delivered goods

In this case, 2 of the 3 Office Chair arrived before you needed to cancel the PO.

Register good received and cancel backorder

The first thing to do will be to register the goods received and to cancel the arrival of the third Office Chair that is still supposed to be shipped. From the PO, click on Receive products and, on the Office Chair order line, manually change the received quantities under the Column Done.

Note

To learn more, see Control product received (entirely & partially)

When clicking on Validate, KiuBMP will warn you that you have processed less products than the initial demand (2 instead of 3 in our case) and will ask you the permission to create a backorder.

Click on No backorder to cancel the supply of the remaining product. You will notice than the quantity to receive has been changed accordingly and, therefore, the delivery status has switched to Done.

Create reverse transfer

Now, you need to return the Office Chairs that you have received to your vendor location. To do so, click on the Reverse button from the same document. A reverse transfer window will pop up. Enter the quantity to return and the corresponding location and click on Return.

Process the return shipment and control that the stock move is from your stock to your vendor location.

When the reverse transfer is done, the status of your purchase order will be automatically set to done, meaning that your PO has been completely cancelled.


2.1.6. Lock a purchase order

Once an order is confirmed, you can lock it preventing any further editing.

Configuration

For this feature to work, go to Purchases ‣ Configuration ‣ Settings and activate the Lock Confirmed Orders feature

Lock an order

While working on a purchase order, when you confirm it, you can then lock the order preventing any further modification on the document.

Note

You can unlock the document if you need to make additional changes


2.1.5. Bill Control

With KiuBMP, you can define a setting to help the control of your bills. Bill Control lets you choose if the supplier sends you the bill before or after you receive the goods.

Configuration

For this feature to work, go to Purchases ‣ Configuration ‣ Settings and select which way you want to control your bills.

Change the control policy

While the setting above will be your default method of bill control, you can always select which way you want to invoice your product on each product page under the Purchase tab.

You might want to use different settings for different types of products.

Verify your Vendor Bill

If you didn’t receive any of your product yet on Purchase Order under the Shipment tab,

Depending on the billing policy defined above. If you’re supposed to be billed based on ordered quantity, KiuBMP will suggest a bill for the number of units ordered. If you’re supposed to be billed based on the received quantities, KiuBMP will suggest a bill for 0 as shown above.


2.1.3. Control product received (entirely & partially)

The Purchase app allows you to manage your purchase orders, to control products to receive and to control supplier bills.

If you want to get product forecasts and receptions under control, the first thing to do is to deploy the Odoo purchase process. Knowing what have been purchased is the basis of forecasting and controlling receptions.

Configuration

Install the Purchase and Inventory applications

Start by installing the Purchase application from the Apps module. This will automatically trigger the installation of the Inventory app (among others), which is required with Purchase.

Create products

Then, you need to create the products you want to purchase. Go to the Purchase app, then Purchase ‣ Products, and click on Create.

When creating the product, the Product Type field is important:

  • Stockable & Consumable: products need to be received in the inventory.
  • Services & Digital Products (only when the eCommerce app is installed): there is no control about what you receive or not.

Tip

It’s always good to create a Miscellaneous product for all the products you purchased rarely and for which you don’t want to manage the stocks or have purchase/sale statistics. If you create such a product, we recommend to set his product type field as Service.

Control products receptions

Purchase products

From the purchase application, create a purchase order with a few products. If the vendor sent you a sale order or a quotation, put its reference in the Vendor Reference field. This will allow you to easily do the matching with the delivery order later on (as the delivery order will probably include the Vendor Reference of his sale order).

Receive Products

If you purchased physical goods (stockable or consumable products), you can receive the products from the Inventory application. From the Inventory dashboard, you should see a button X To Receive, on the receipt box of the related warehouse.

Click on this button and you access a list of all awaiting orders for this warehouse.

If you have a lot of awaiting orders, you can use the filter bar to search on the Vendor (also called Partner in Odoo), the product or the source document, which is the reference of your purchase order. You can open the document that matches with the received delivery order and process all the lines within it.

You may validate the whole document at once by clicking on the Validate button or you can control all products, one by one, by manually change the Done quantity (what has actually been received). When a line is green, it means the quantity received matches to what have been expected.

Note

If you work with lots or serial numbers, you can not set the processed quantity, but you have to provide all the lots or serial numbers to record the quantity received.

When you validate the reception, if you have received less products than the initial demand, Odoo will ask youthe permission to create a backorder.

If you plan to receive the remaining product in the future, select Create Backorder. Odoo will create a new document for the awaiting products. If you choose No Backorder, the order is considered as fulfilled.