Before proceeding to regular purchase process, we will find out how to create new products in KIU BMP. There are many ways to create new products such as go to Purchase module/ Purchase/ Products or Sales module/ Sales/ Products or Inventory module/ Inventory control/ Products then select Create to create new products
Fill in Product name and select “Can be sold” or “Can be purchase” or “Can be expenses”. The first is “Can Be Sold”, which as the name implies denotes a product that your company sells. Similarly, the second check box “Can Be Purchased” denotes a product that your company can buy. The final check box “Can Be Expensed” is for items which can be attached to employees’ payroll for reimbursement purposes. Examples of items which can be expensed are hotel rooms, conference fees, or airline tickets)

In tab General Information in the form of the product, there are three types of product: Consumable, stock product, service and digital products.
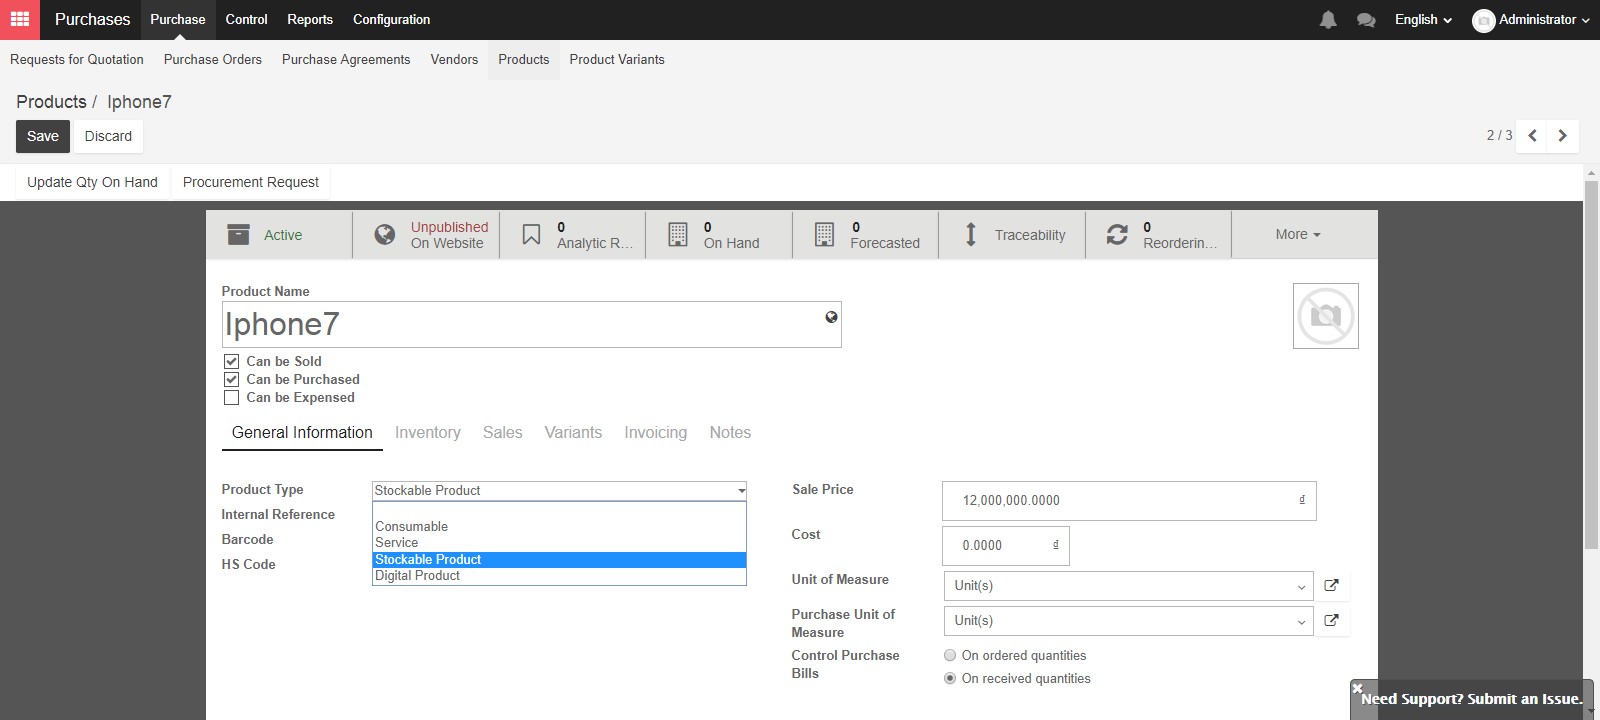
“Consumable products” are physical products which are treated like a stockable product, with the exception that stock management is not tracked by the BMP System. This means that there are no minimum stock rules or automatic procurement rules. Examples would include stationary for employees, or cleaning supplies for your office. These are typically not the main products which your company will sell or the raw materials to manufacture the products you will sell. You can buy consumable products, deliver them or produce them but the Kiu BMP system will always assume that there is enough of them in stock and there is no Journal Entry for your related Stock move.
For Stockable Products: are the physical products which your company has stock management rules to ensure they are in your inventory. These products are those that you will sell to customers, or the raw materials of your manufactured products. For stockable product, Kiu BMP will create shipment transaction against purchase order & delivery order against sales order by choosing the shipment icon in the top right hand side, before vendor bills/ customer invoices in purchase order or sales order.
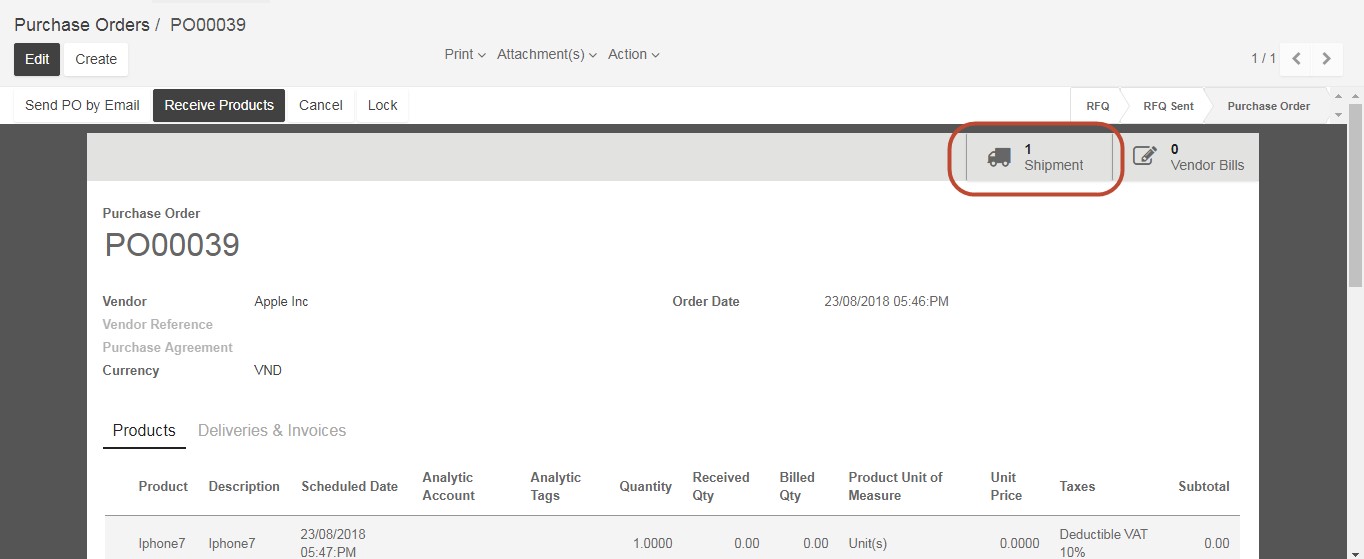
The shipment tracking transaction has been created in accordance with the purchase order/ sales order.
“Service” type of product is an intangible product and not applied in any stock operation. Examples of “Services” are accounting, cleaning, insurance, or transportation. There are special features to track services in the “Invoicing” tab.
“Digital product” can be sold on Kiu BMP’s e-commerce module and can be downloaded by customers.
You can set Internal reference for internal control of the products or barcode field allows you to enter a barcode number to track your products. You can either type the barcode, or use a barcode scanning modules to enter the product’s barcode here. And HS code stands for the Harmonized System Code, which is a set of standardized names and numbers to classify traded products for international shipping and goods declaration.

In the “Sale price” field you can set a price for your product, if you will sell that product at a fixed price. Or you can leave it blank if you follow variable pricing strategy, where you will change the price depending on the customer, the time, sale quantity, or other variables. This can also be affected by the price list that you use for different customers or sales orders. For unit cost, The “Cost” field refers to either the purchase cost, or the production cost of the product. If the product follows standard price costing method, the value entered here, normally once per year, is also the cost price of the product. However, if it applies the average or real price costing method, this value will vary and automatically update according to actual purchase or production costs. If the cost of the products are set in the product form, this cost will be displayed automatically in the purchase order and be used to calculated inventory valuation in Inventory module.
Unit of measure is the selling unit of measure used in meanwhile purchase unit of measure is used in purchase order. Selling unit of measure can be different with purchase unit of measure, for example the company can buy products with unit of measure is ton(s) then sell to the customer with unit of measure is kg or g. The purchase unit of measure must be in the same category with the unit of measure.
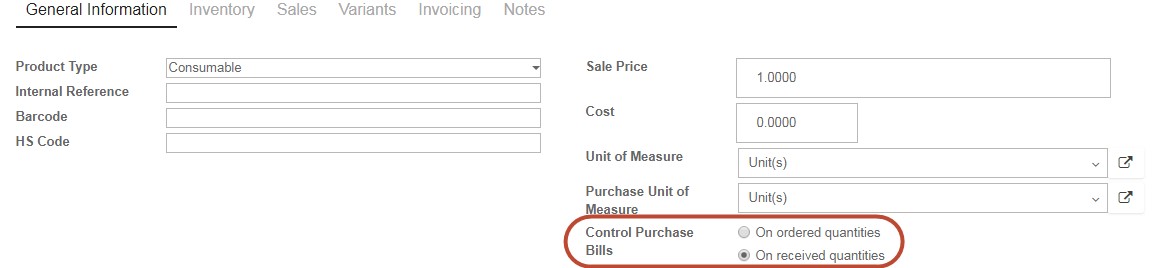
The Control Purchase Bill is based on the ordered quantities or the received quantities. If you would like to create a vendor bill before receiving shipments from a supplier, select “On Ordered Quantity” in the “Control Purchase Bills” section. The draft bill will be automatically created with the ordered quantity when you click on create bill. If you select Bill “On Received Quantity” you can bill based on the amount your vendor has delivered to you. After you receive products, you will have the opportunity to create a vendor bill at that time. If you received part or all of the shipment, the draft bill will reflect that corresponding amount.
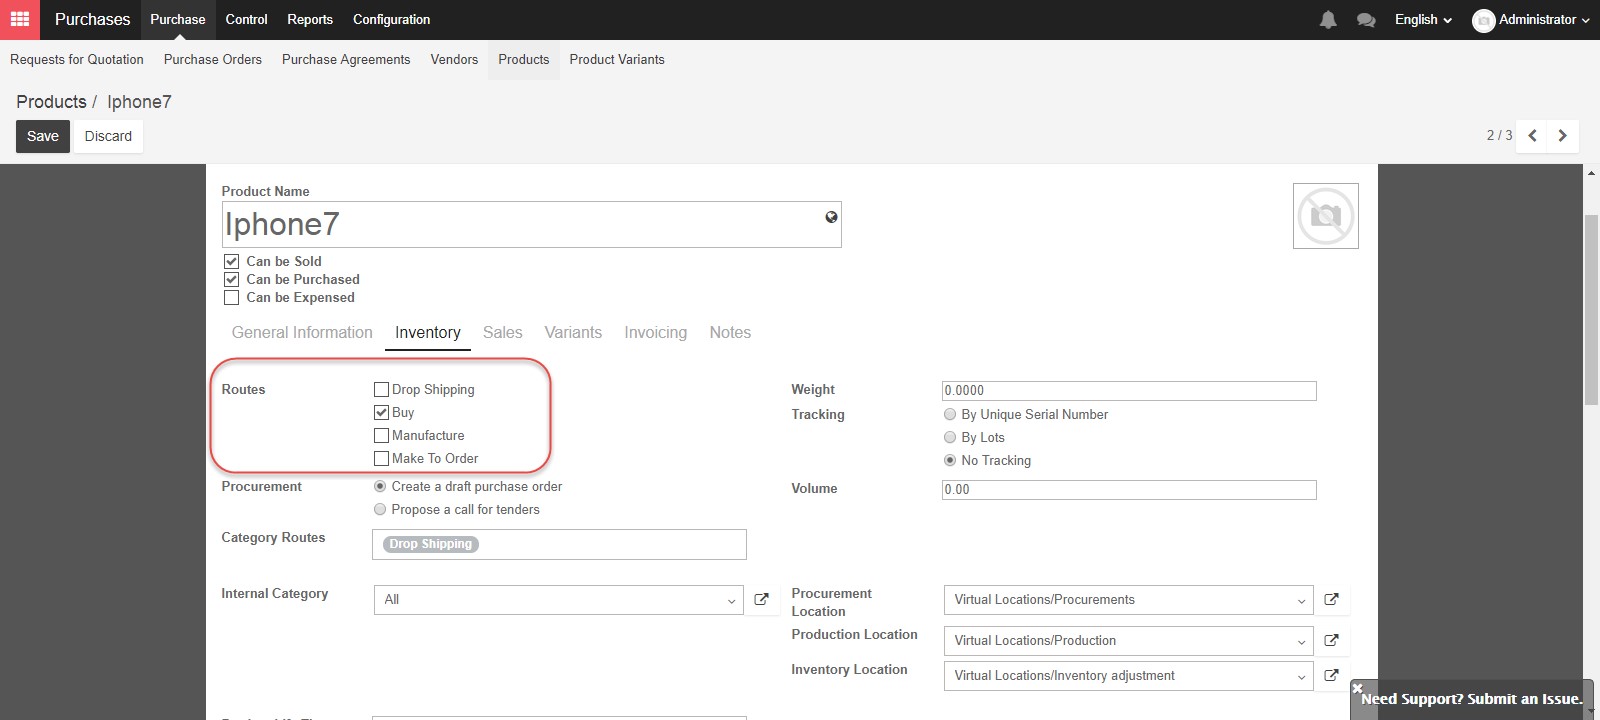
In tab Inventory in the product form, you can set the route for the product: Buy, drop-shipping, manufacture, order. These routes can be configured specifically in Inventory/ Configuration/ Routes. Routes in Kiu BMP depict the journey of the product whether the product will be travel from your vendor directly to your customer, as a “Drop Ship” product, be delivered to you and stored in your warehouse as a “Buy” product, or manufactured by your company as “Manufacture”.
“Make To Order” is a route used in combination with “Buy” or “Manufacture”, meaning you don’t store this product in your company’s warehouse. Instead you will “Buy” or “Manufacture” if there is a sales order for it. You can choose more than one option depending on the product you are creating, however these options are not available if the product type you selected earlier was “Service”.
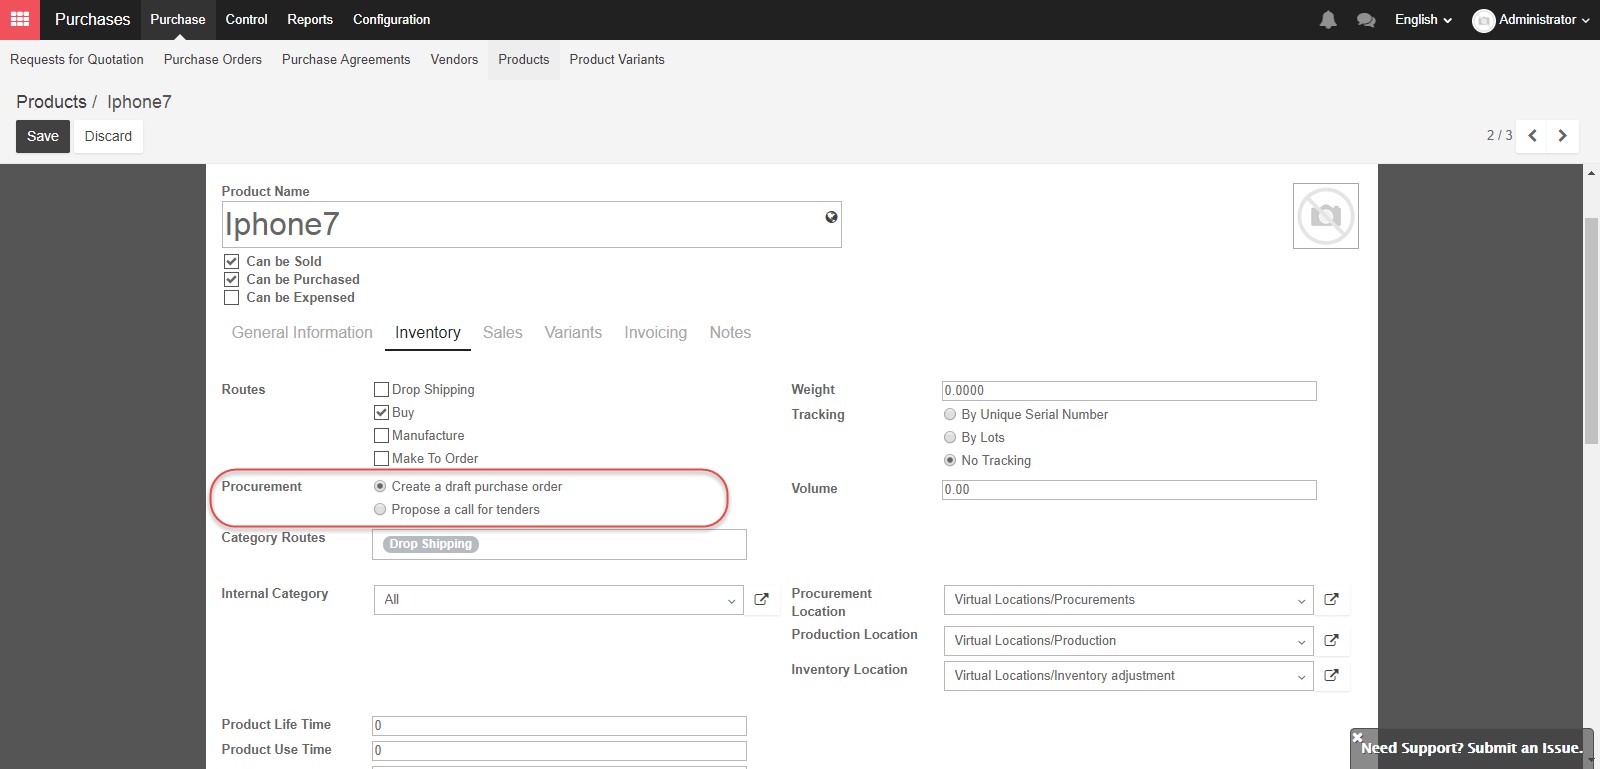
The next option for “Procurement” controls what kind of purchase order will be created when automated procurement is triggered. You can select either “Create a draft purchase order” or “Propose a call for tenders”.
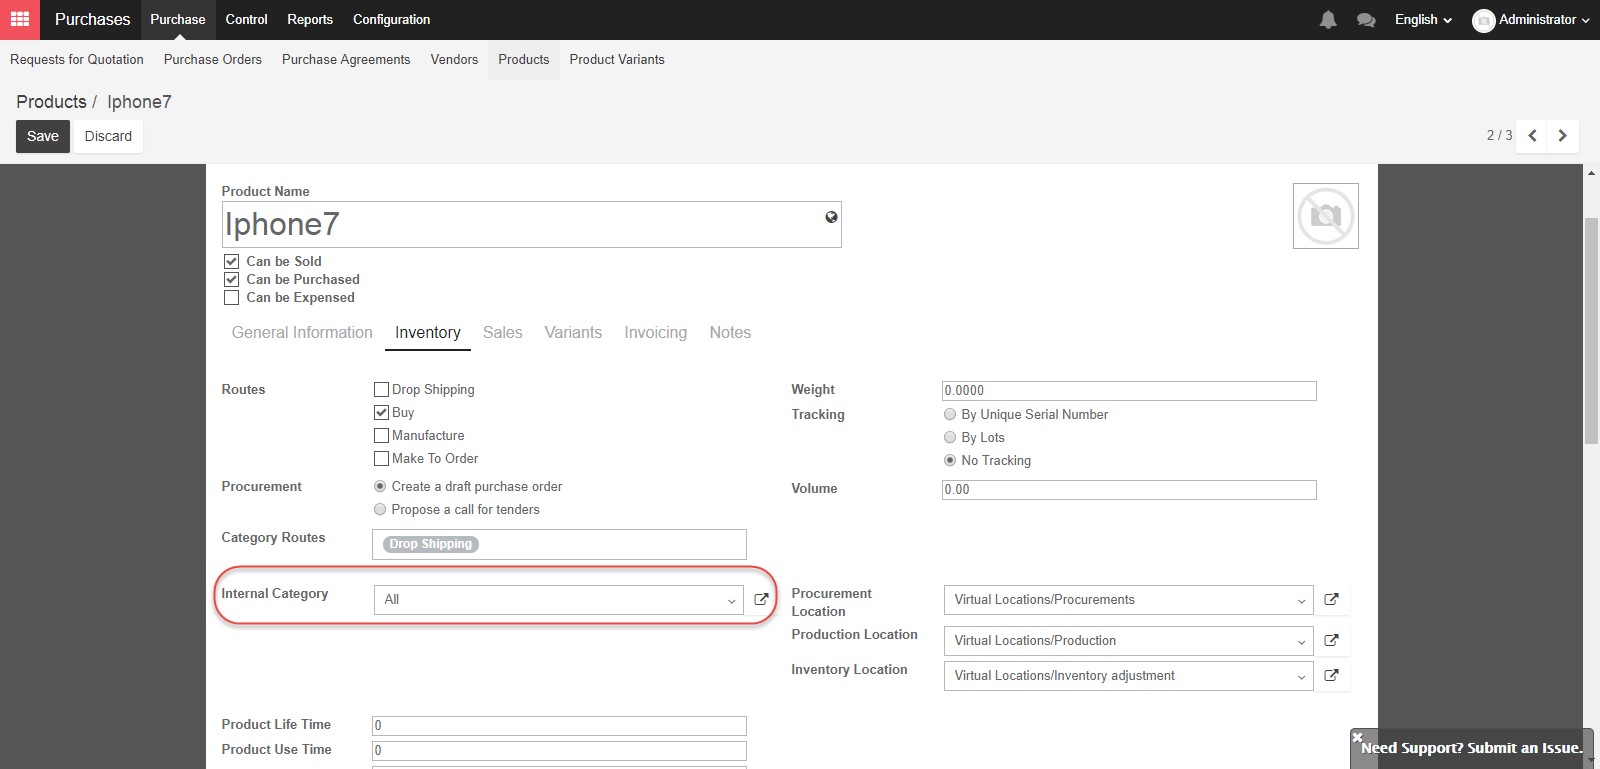
An Internal category defines how transactions, such as “Sold”, “Purchased”, “Stock Input”, “Stock Output”, “Manufactured”, or costing, inventory valuation, bookkeeping and stock removal methods for the product will be recorded in the accounting and inventory modules.
The weight of the product in kilograms and the volume in cubic meters can be entered in these fields. You may need these details for calculating shipping costs.
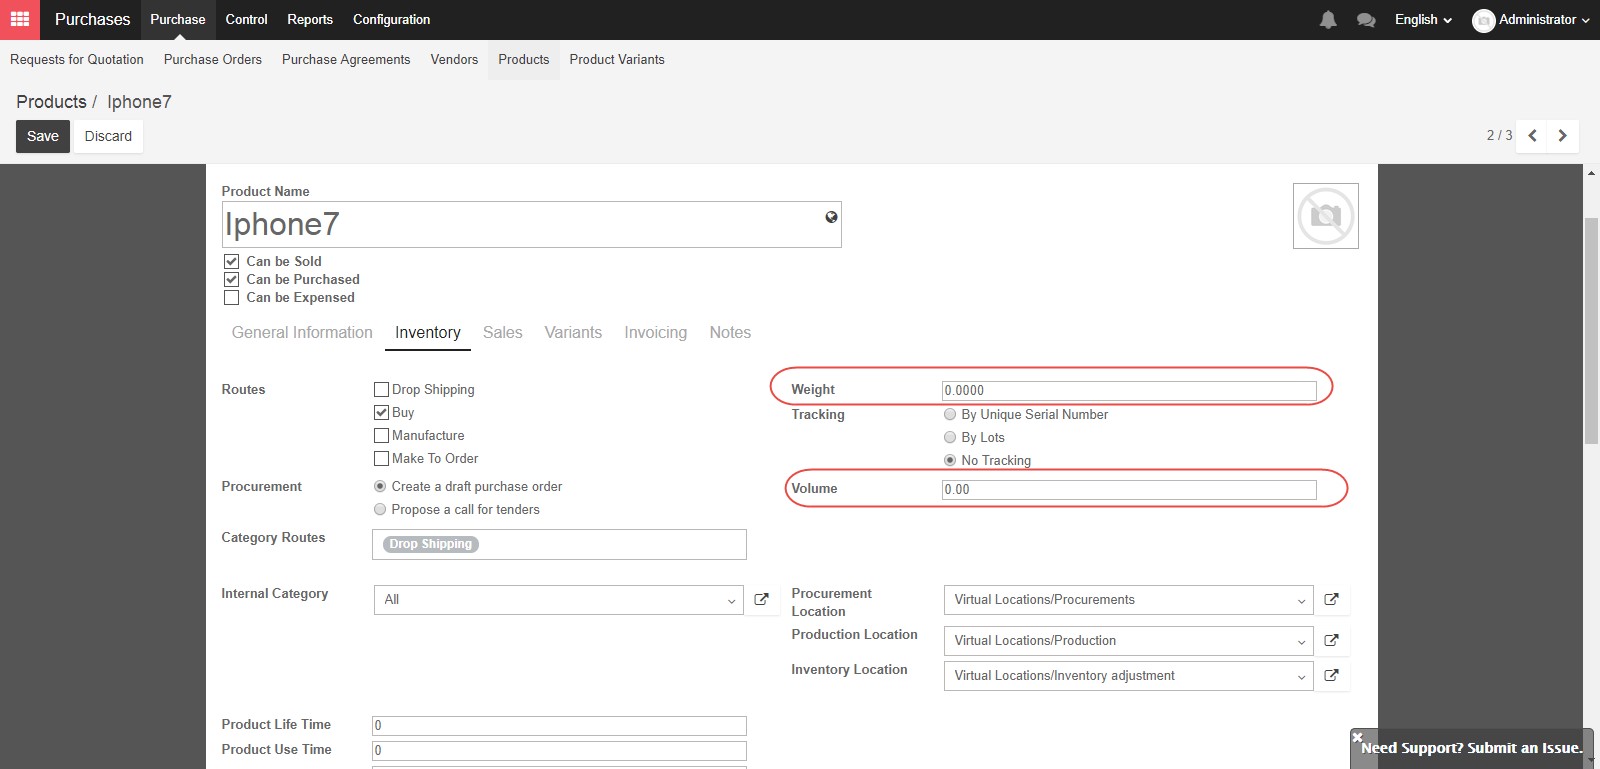
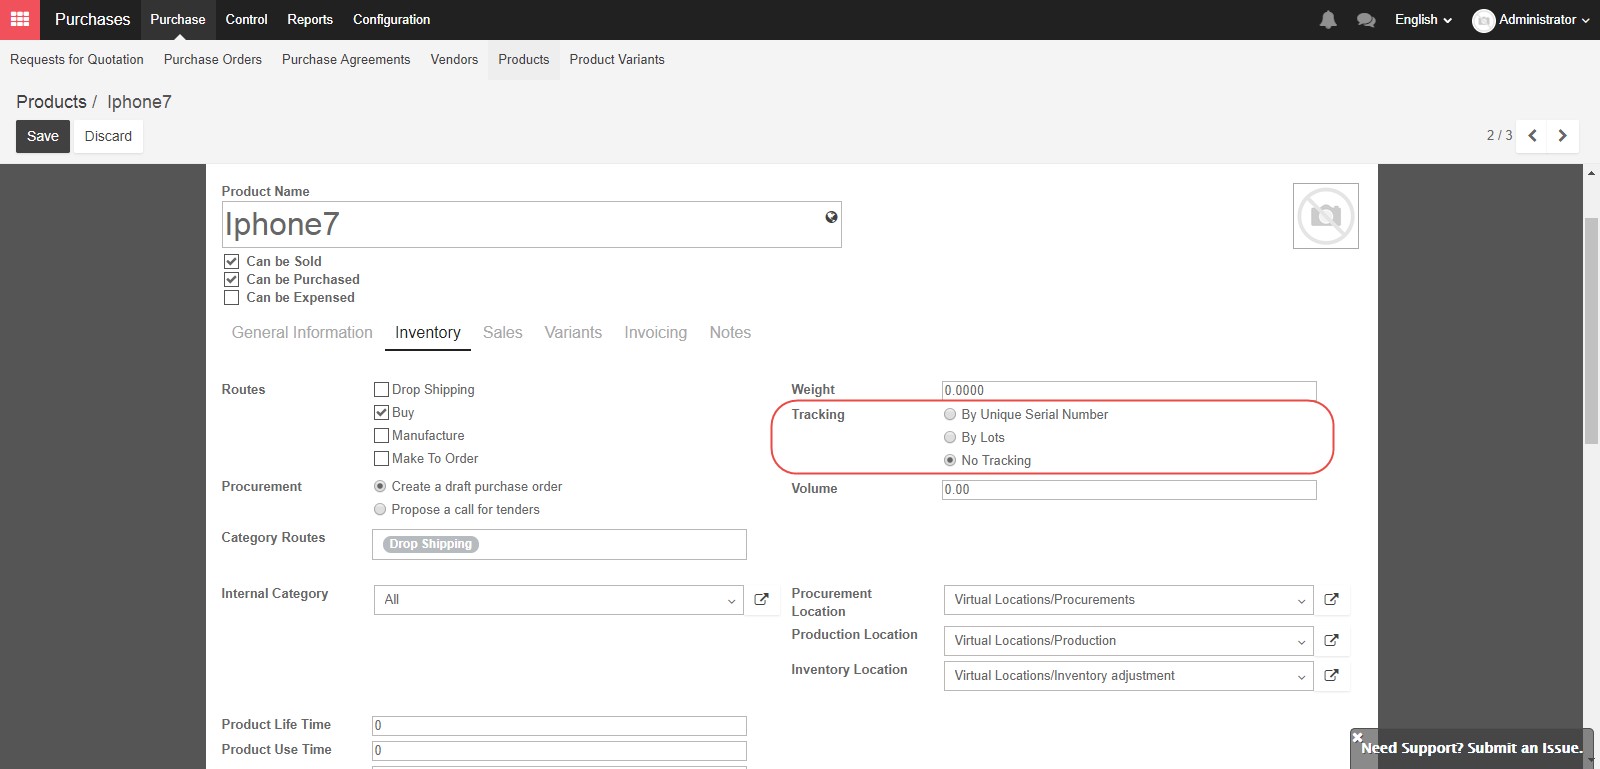
The three options for “Tracking” allow you to decide if you will track an item by unique serial number, where you will need to assign a unique serial number to each product unit, by lots, where you will assign an identification number to each lot, or with no tracking, where all of the products will be treated the same.
The Procurement location, Production location, and Inventory location are set by default. Procurement location is the source location used for stock moves generated by procurement, production location is the source location used for stock moves generated by manufacturing order, and inventory location is the source location used for stock moves generated by you do an inventory.
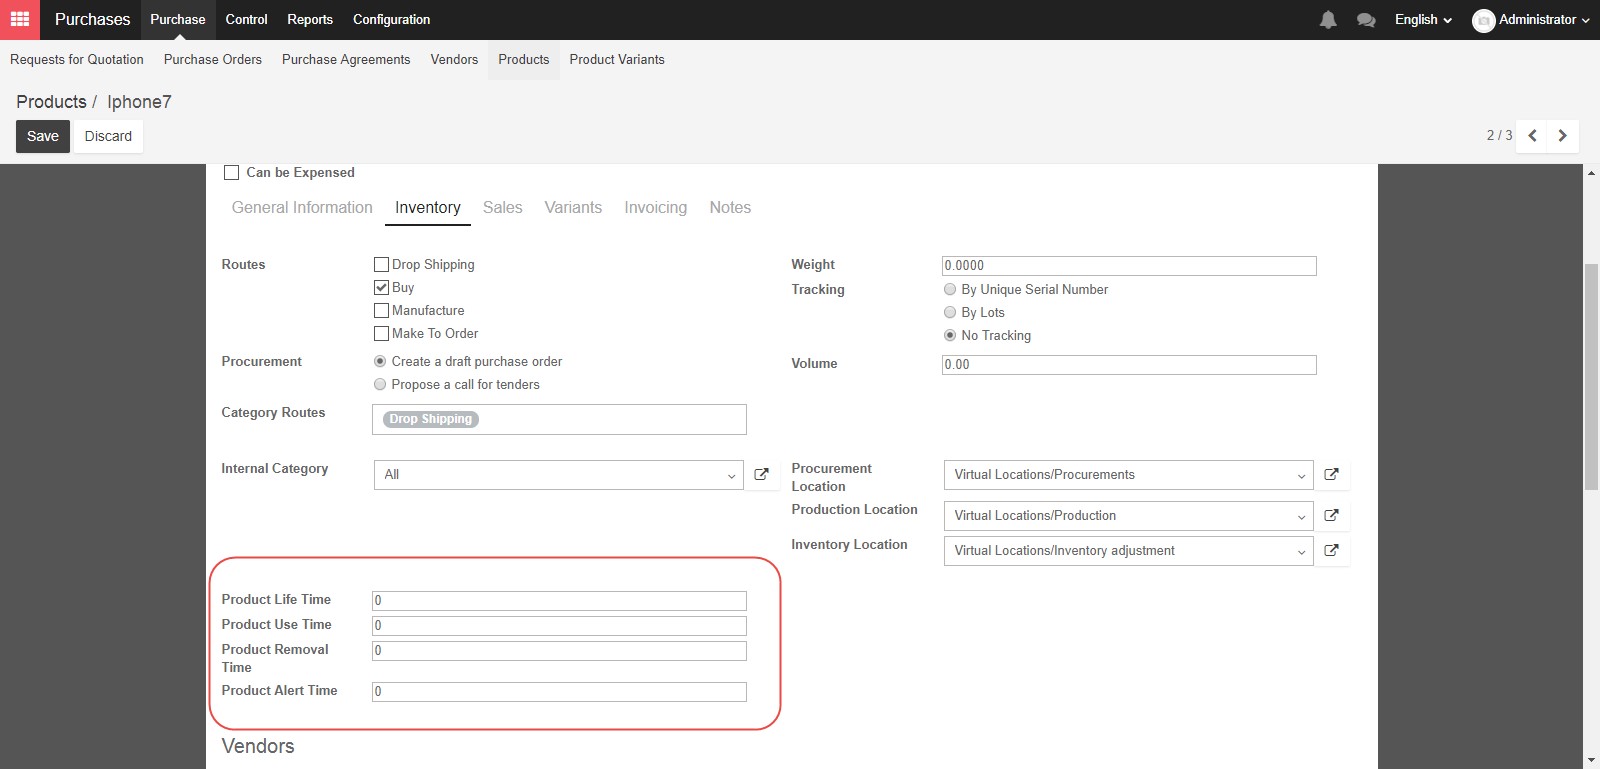
Next, Product Alert Time is when a generic alert about the product age is issued. Product Removal Time is when the product should be removed from stock. Product Use Time is when the product begins to deteriorate and is no longer useful. And finally Product Life Time is the amount of time after which the product is dangerous to use.
The Vendors section allows you to select a contact for this product, for use with Stockable products, to allow for automated procurement. Vendor’s information is a prerequisite if you want to run automated procurement. Otherwise, the system will not know which vendor should be included in the draft Request For Quotation. The first vendor listed will be selected by default for your draft Request For Quotation.
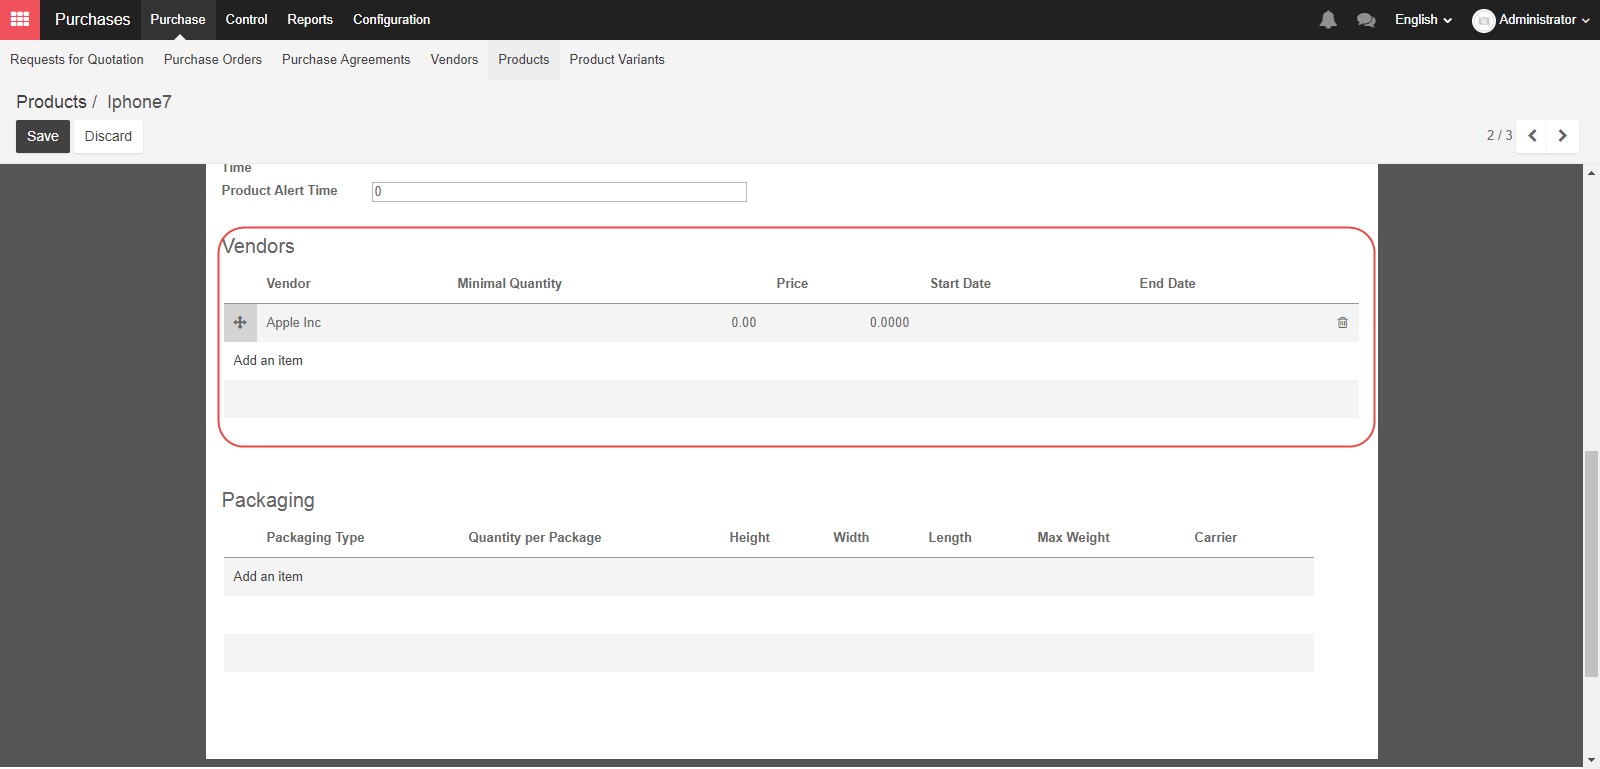
When you click Add an Item you will open a pop up window to enter more information.
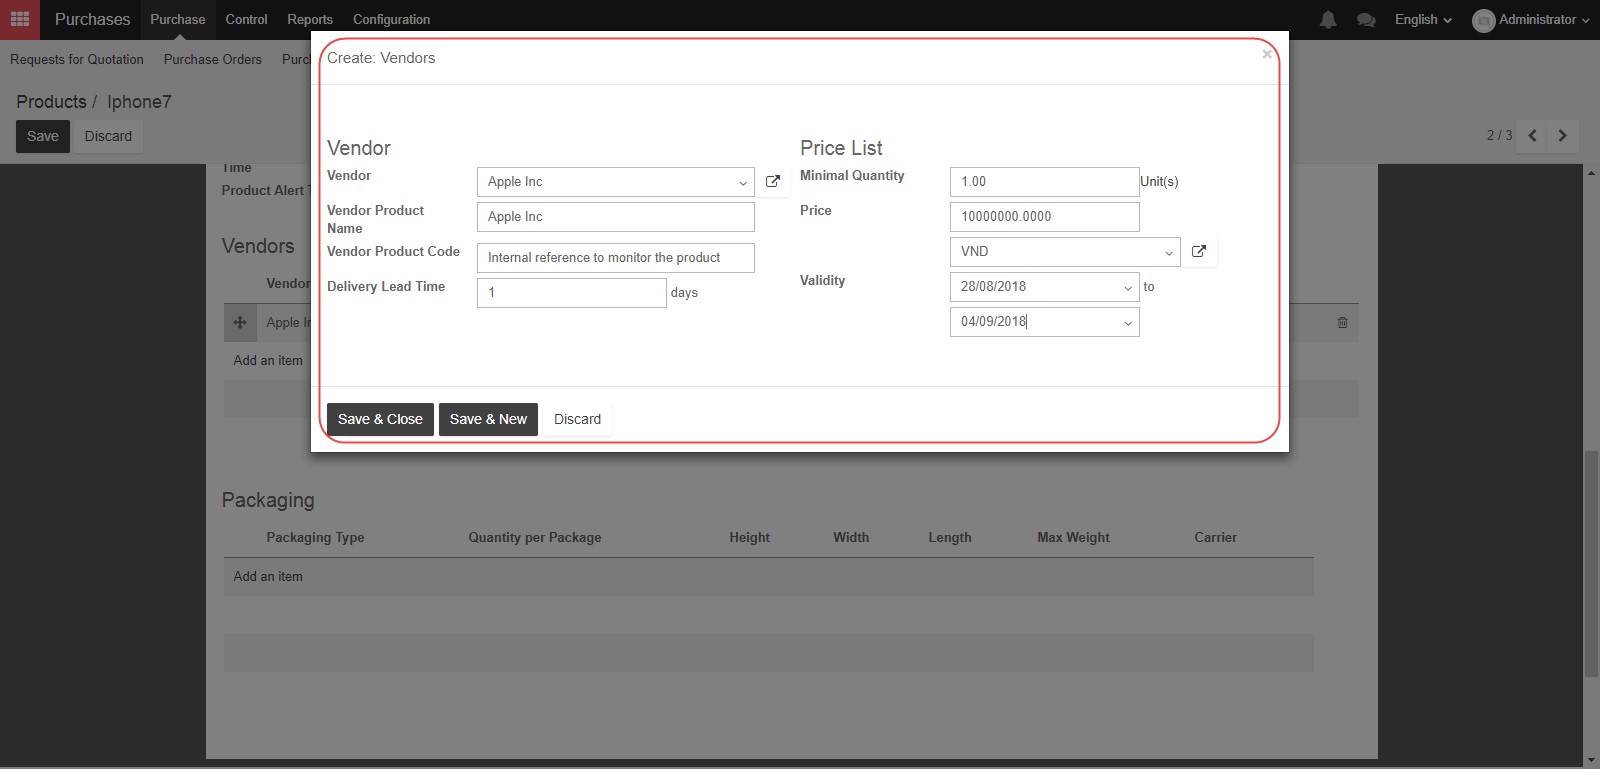
In the Vendor field, select an existing vendor who can provide this product, or create a new one. In the Vendor Product Name and Vendor Product Code fields, you can provide the vendor’s internal reference if you have them, or you can leave them blank. The Delivery Lead Time is the time it takes from when you confirm a purchase order from that supplier until you receive the product from them. In the Price list section, you can enter the Minimum Quantity if applicable, as well as the Price and “Currency”, and you can define the period of time for which the price is valid. You can also add more than one vendor by adding more lines
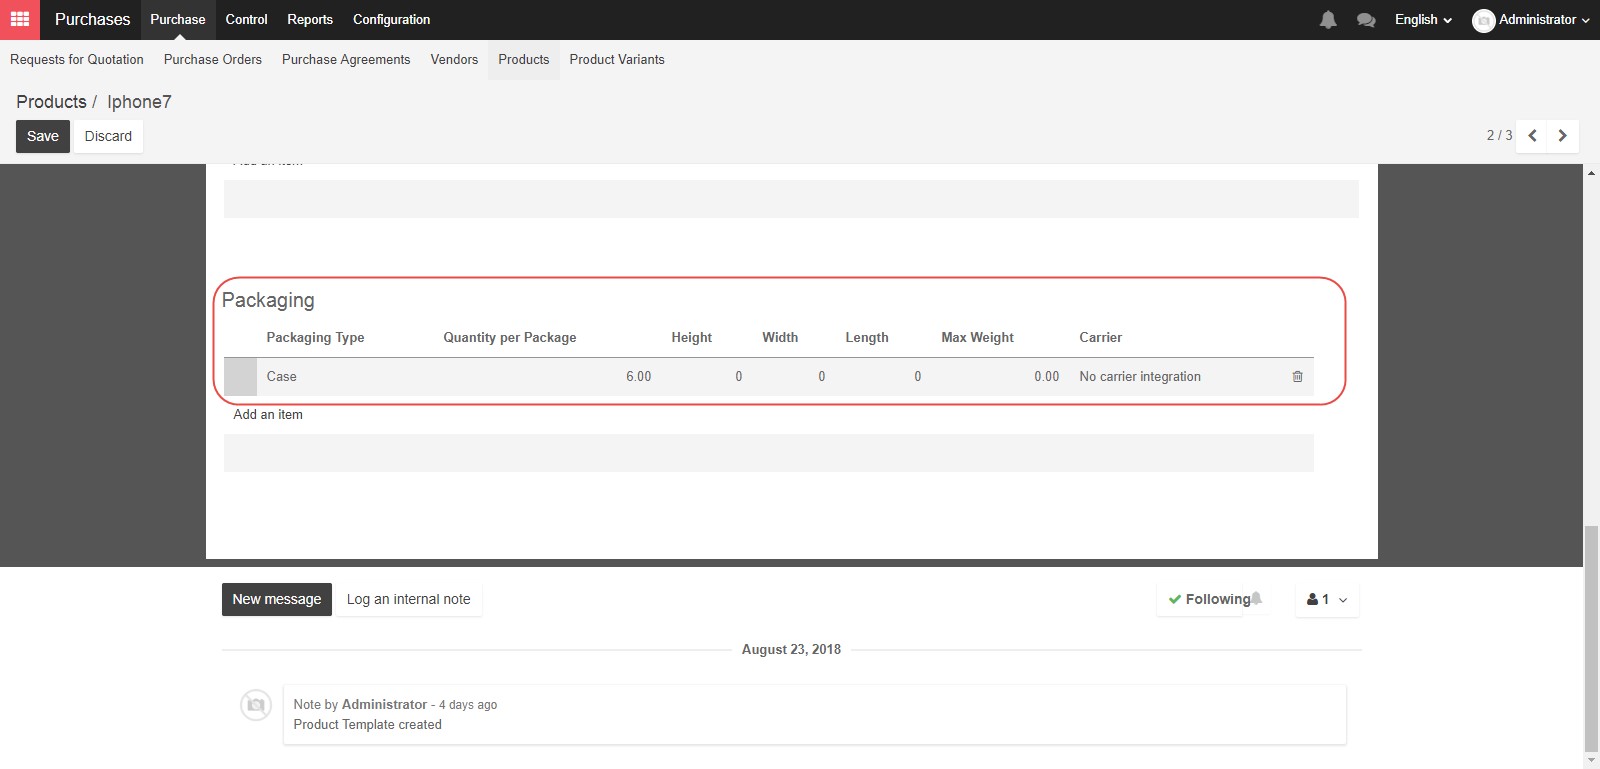
In the “Packaging” section, you can define how you combine multiple product units into larger packages. For example, six “Units” may be defined as a “Case”.
Now that we’ve completed all the items on the Inventory tab, let’s move to the Sales tab. The Point of Sale section can be utilized to control how a product interacts with the “Point of Sale” module. If you want the product to be visible for purchase, check the first box. You can also create categories for your items within the Point of Sale system, or require the product be weighed at the time of purchase.

In the Sales condition section, the two options control lead times. Customer Lead Time is the number of days between sales order confirmation and the delivery of a product, or said differently, the delivery time you promise to your customers. Manufacturing Lead Time is the number of days required to produce this product.
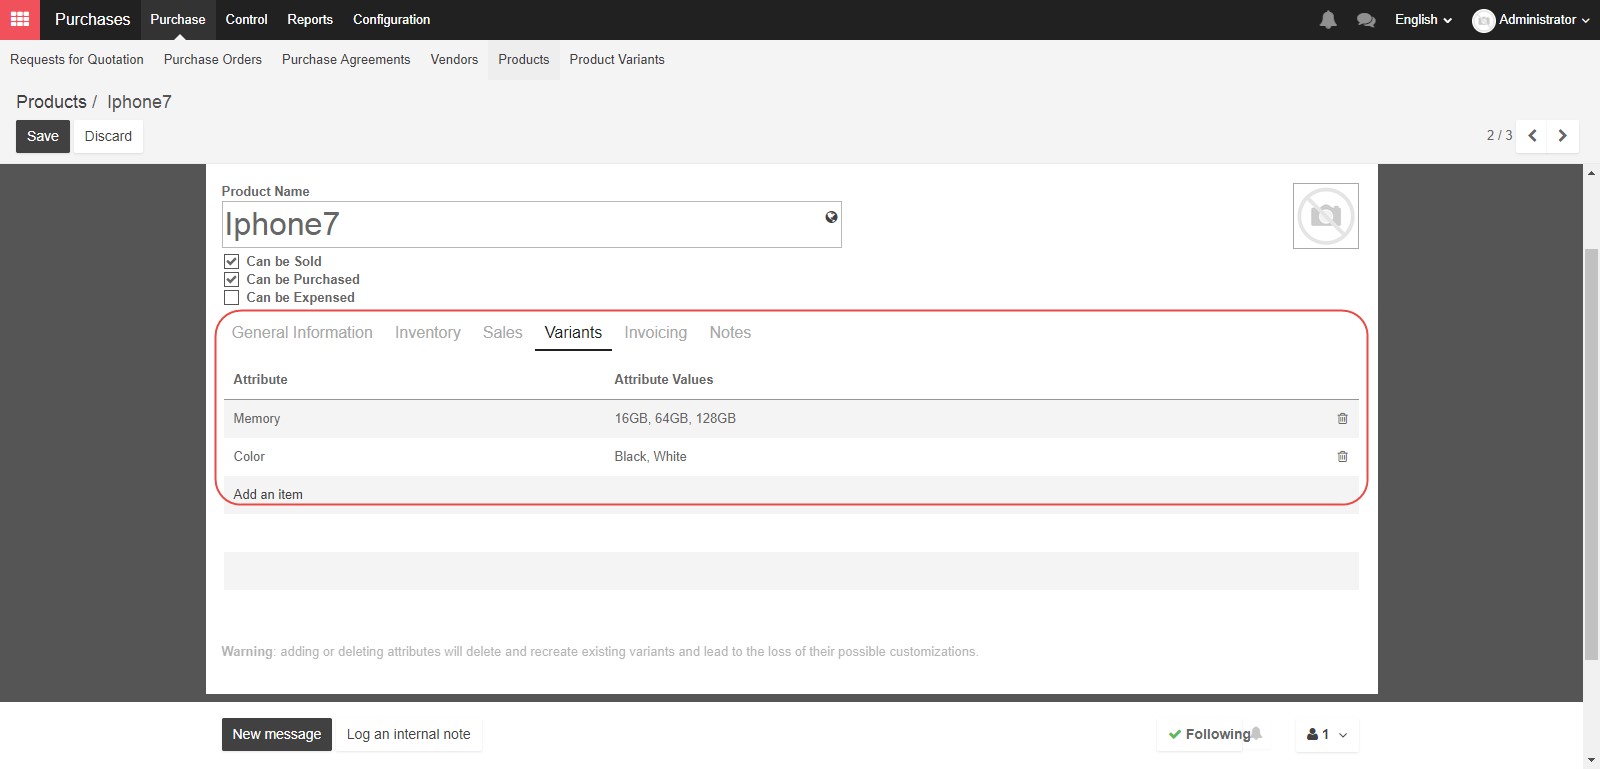
Now that we’ve completed the Sales tab, let’s change over to the Variants tab. Product variants can be used to manage products having different variations, like size, color, etc. It allows you to manage all variations of a product at what we will call the product level, and to set other controls for specific attributes at the variant level. For example, for selling Iphone as a product, you would expect variants for sizes and colors.
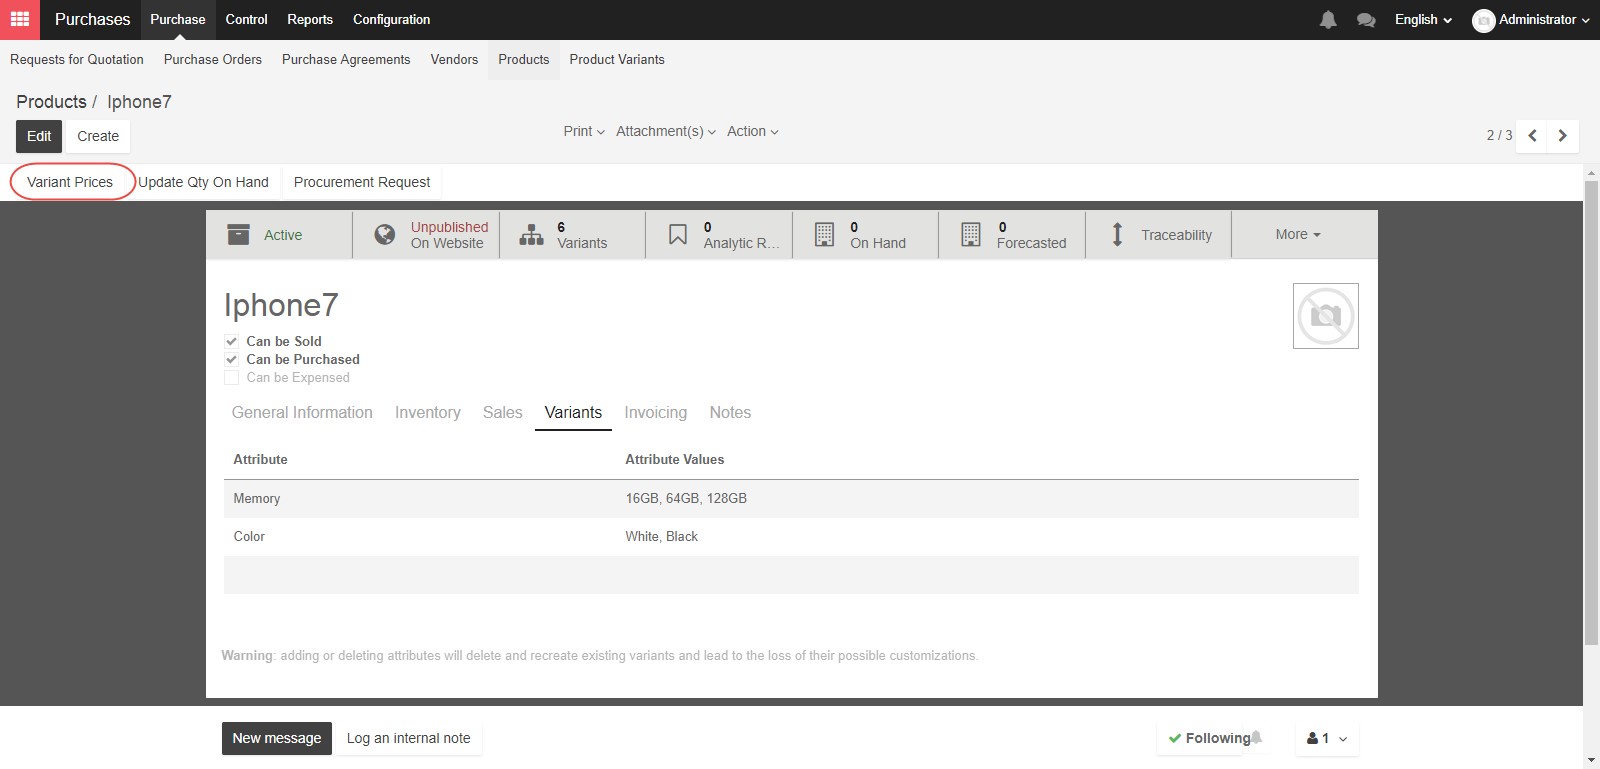
After saving the attribute value, you can set the price for attribute value by clicking Variant prices. The variant prices will be included in the sale price of the products.
Let’s switch to the “Invoicing” tab. The fields here are very similar to the “Internal Category” on the “Inventory” tab. Using the “Income Account” and “Expense Account” fields you can select the line from your “Chart of Accounts” which will be credited or debited for purchasing or selling this product.
If you fill in the fields here, then the rules for this product will override the rules for the internal category. Otherwise, if you leave these blank, account settings in the Internal Category will apply.
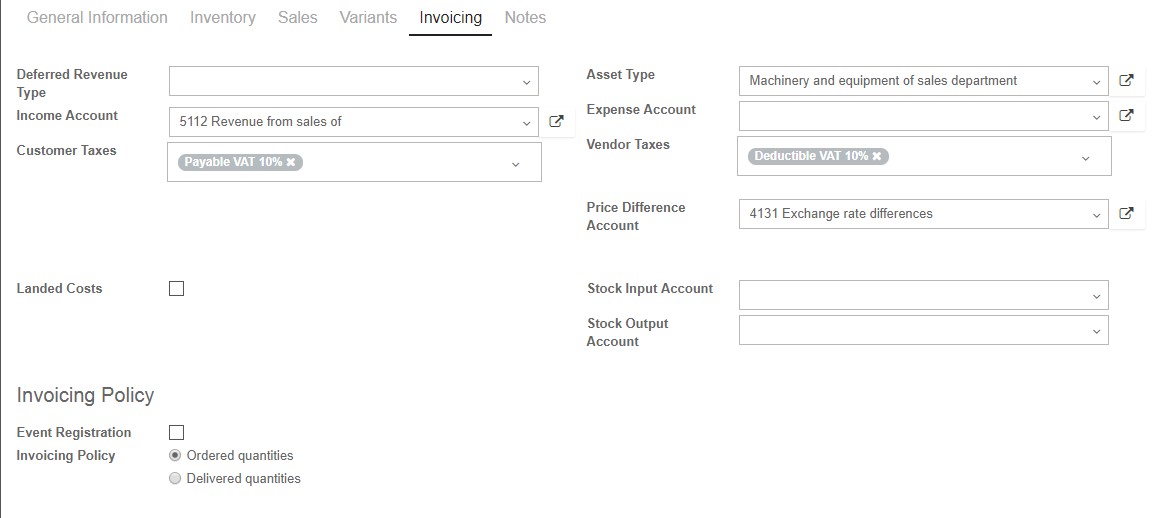
Asset Type field means that this item will be treated as an Asset from that particular category when purchased, including depreciation rules from the category.
Customer Taxes field will the tax to use for your customers when you are selling to them.
Vendor Taxes field will be the tax to use for your suppliers, when you are buying from them. Both of these fields, Customer taxes and Vendor taxes can be set for all product, but we can change these fields when we create separate Sales Orders or Purchase Orders”
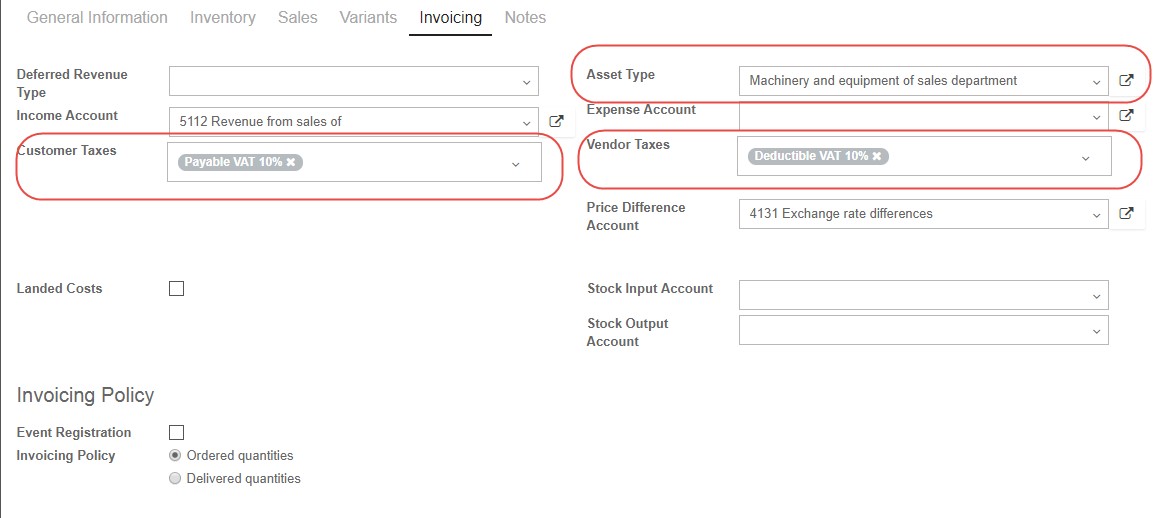
Price Difference Account is used to track cost price changes when working with multiple currencies. If you track costs in one currency, and issue an invoice in another, the receivable journal entry will be created using the currency conversion rate on the day it was entered. If the exchange rate between the two currencies changes by the time the payment is made, then the payment in the bank journal would not match. The Price Difference Account tracks those changes.
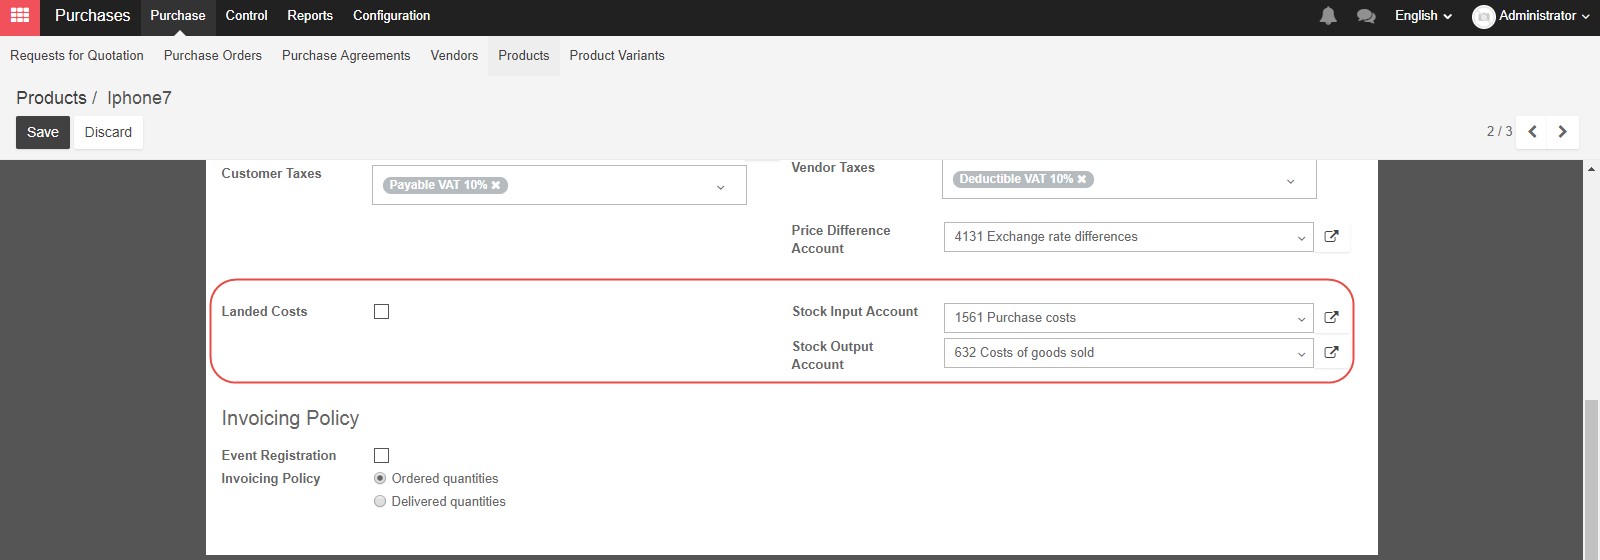
Stock Input Account and Stock Output Account are used to track the real time inventory valuation. Incoming stock is tracked in the first account, and outgoing stock in the second. If you leave these fields blank, the category values will apply.
Landed Costs are all costs above the purchase price of the product, to get the product delivered to your warehouse. If you check this box, you can define one of several methods by which the landed costs on products in a shipment should be divided. How to set up and allocate landed costs will be elaborated in the Inventory session.
In the Invoicing Policy section, if you see the check box for Event Registration you can check it if this product will be related to the ticketing of an event. This is a feature enabled when you use the Events module in Kiu BMP. You can choose to bill your customer before the delivery step, “On Ordered Quantity” or after delivery “On Delivered Quantity” using the “Invoicing Policy” radio buttons.

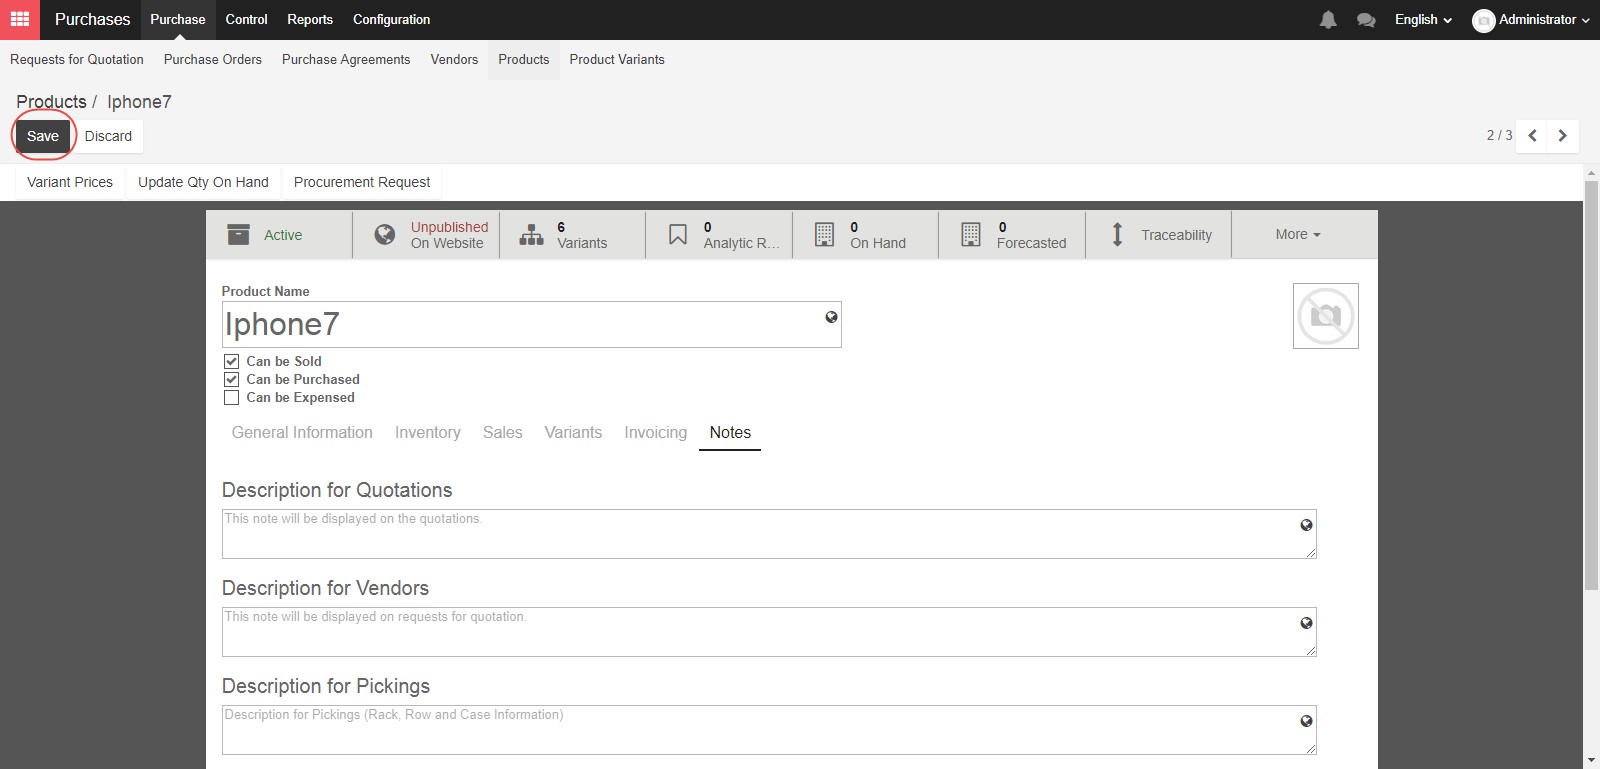
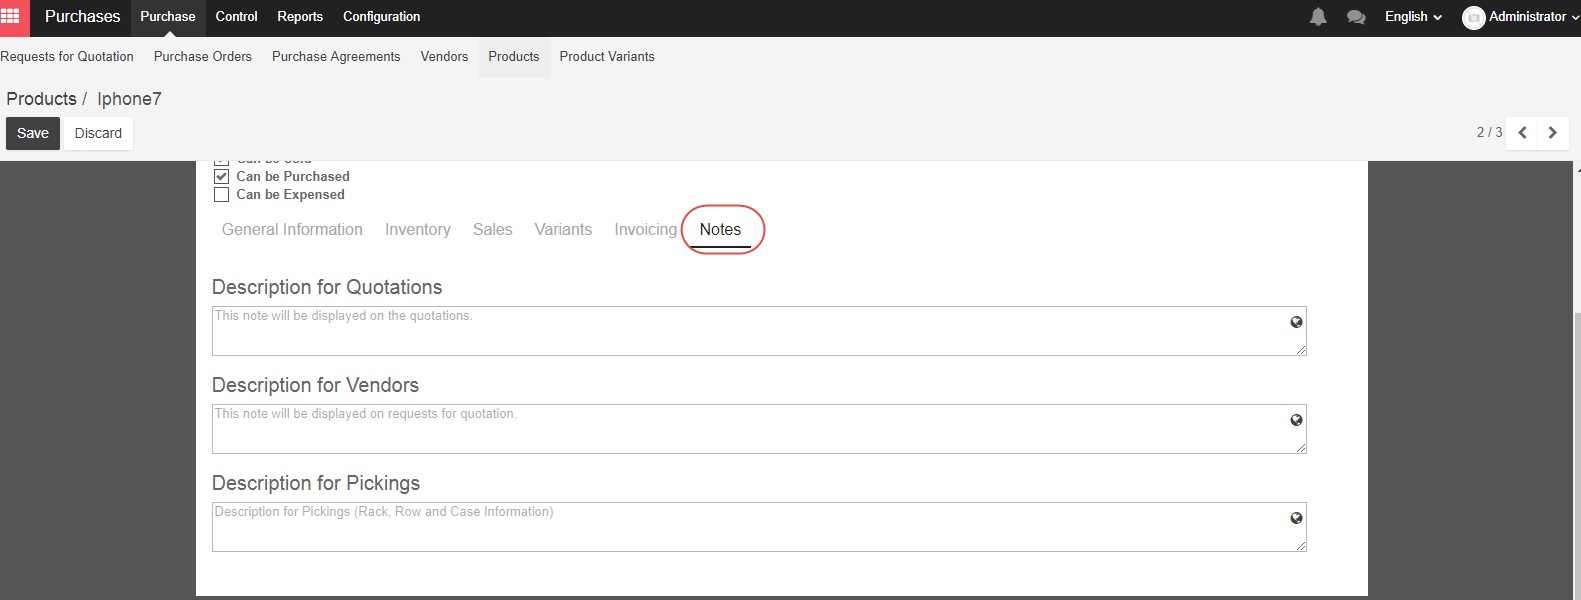
On the Notes tab, you can add descriptions to be displayed on your quotations or request for quotation for this product.
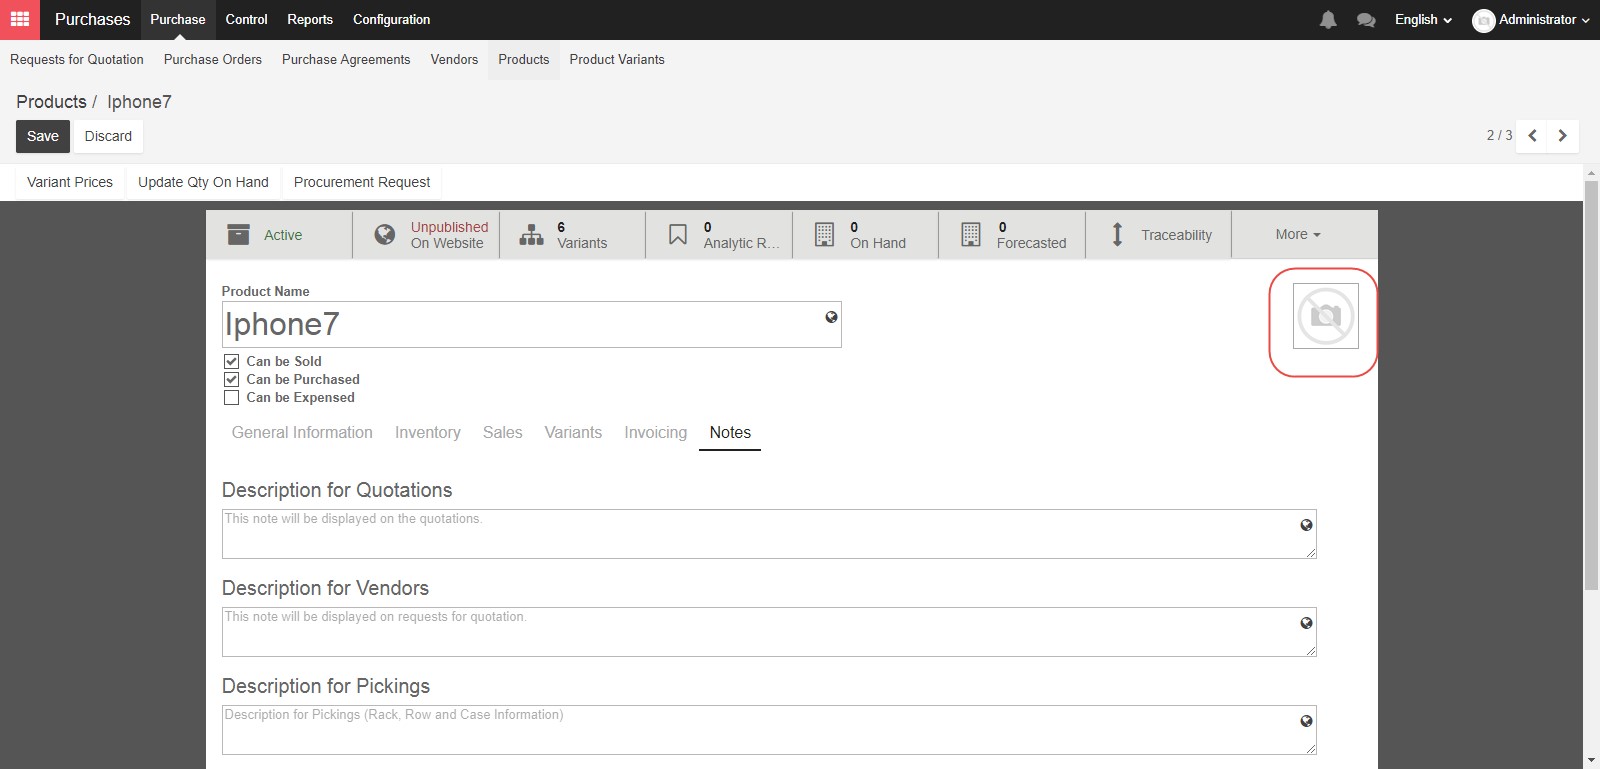
And finally, you can add photos or graphics associated with your products in the image icon in the top right hand side
When you have completed filling in all of the information across all of the tabs, you can click the Save button at the top of the screen to create your product.