
Let’s go back to the Sales Order and Create invoice. When you create an invoice, in the product form you can select one of two options for invoicing policies, either on ordered quantity or on delivered quantity.
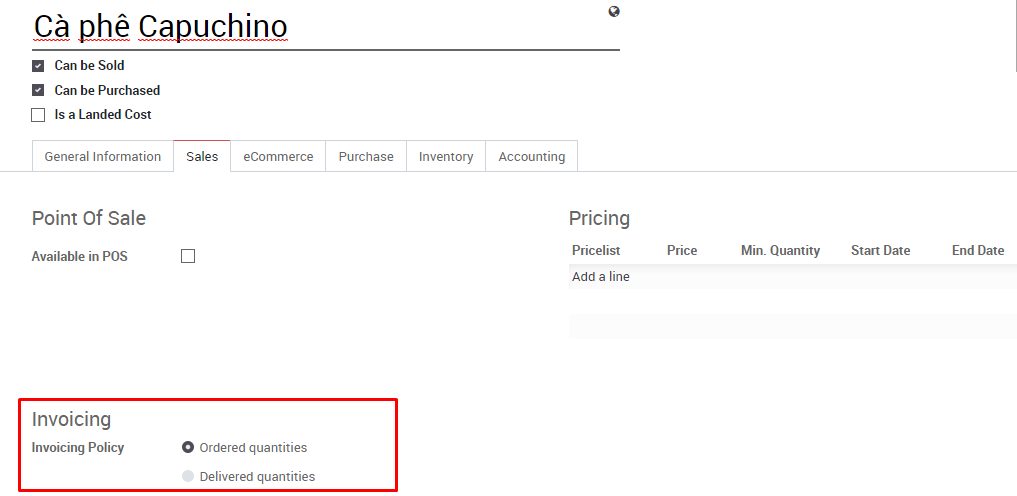
If you choose invoicing on an ordered quantity, you can create an invoice before the delivery step and the pre-filled quantity will be the entire shipment that the customer ordered. Otherwise, if you choose invoicing on delivered quantity, you can only create draft invoices, to be validated by your accountant after completing delivery. You can create invoices for partial deliveries.
Now click on the Create invoice button, which should be visible in the top left corner. A new dialogue will open, allowing you to select one of four options.
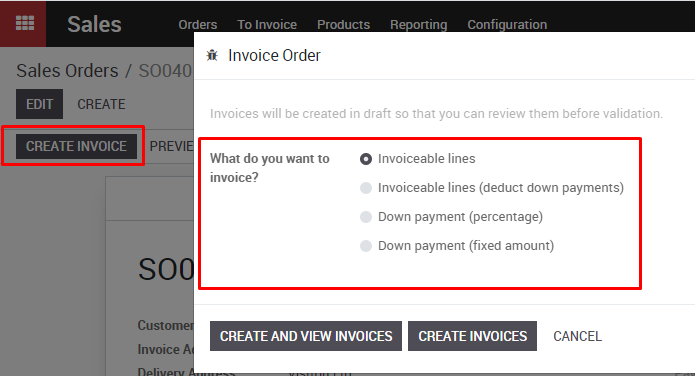
First, you can create a full invoice for everything in the order.
Second, you can create a full invoice for everything in the order, minus any down payment which has already been paid.
Third, you can create an invoice for a down payment, as a fixed percentage of the invoice value.
And fourth, you can create a down payment with a fixed value.
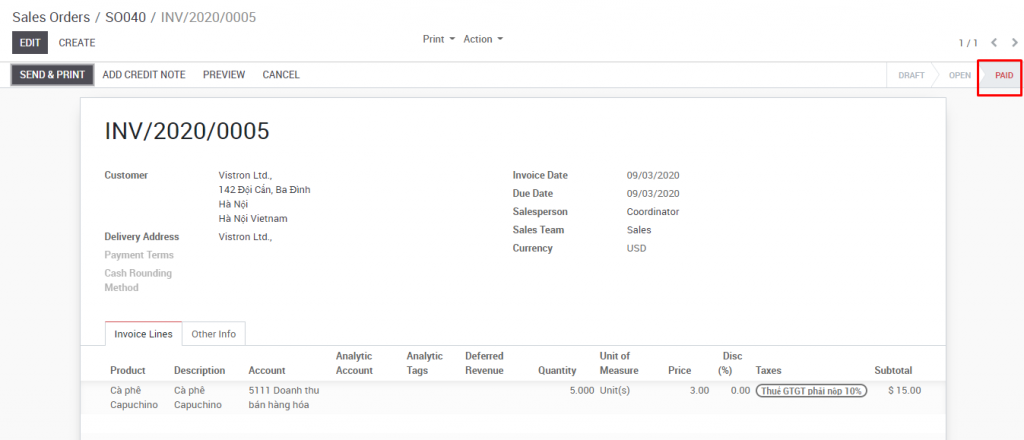
Let’s select the first option, to create a full invoice for everything in our order, and then click Create and View Invoices. You’re able to view the invoice now, however the functions after this will be completed by your accounting department.
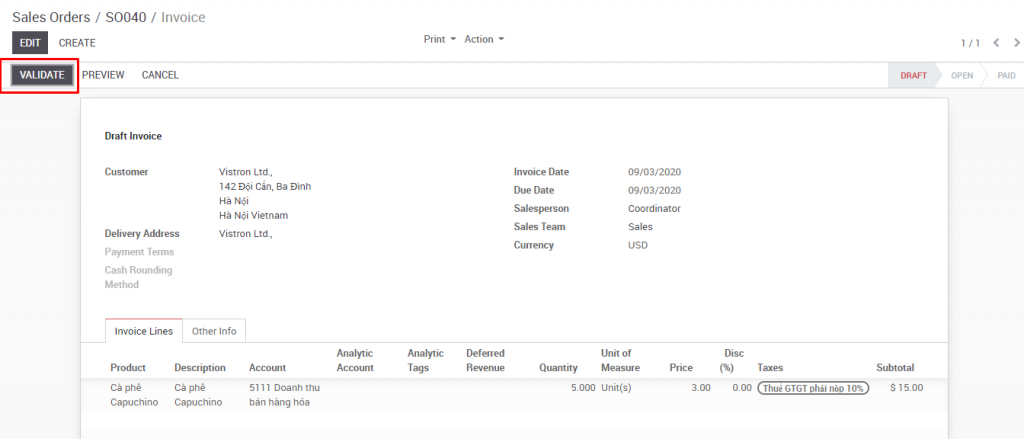
The accounting department will be able to complete the invoice, and register the payment

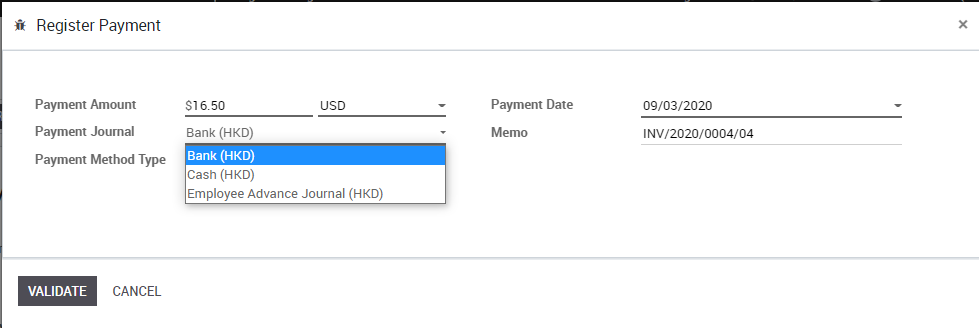
Check the payment amount, select appropriate journal to record the payment (bank or cash) then click Validate
Then status of the invoice will change to Paid in the top right
This is the last step of the regular sales process.