
This manual is for HR Kenya users. You’ll learn how to use HR Kenya module to match it to your needs or those of each individual user of the system.
In HR Kenya of Kiu ERP, user must pay attention to (i) Employee Module, (ii) Leave Module and (iii) Payroll Module.
1. Employee module
1.1. Employee creation
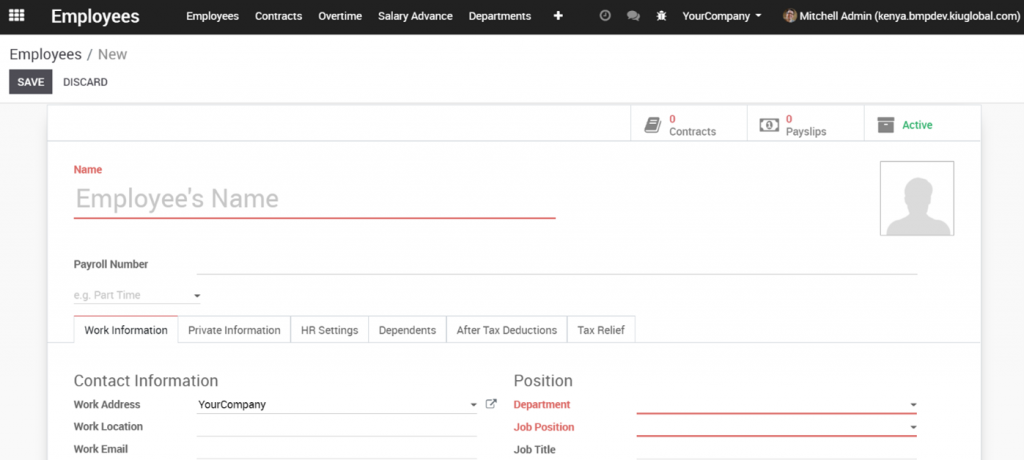
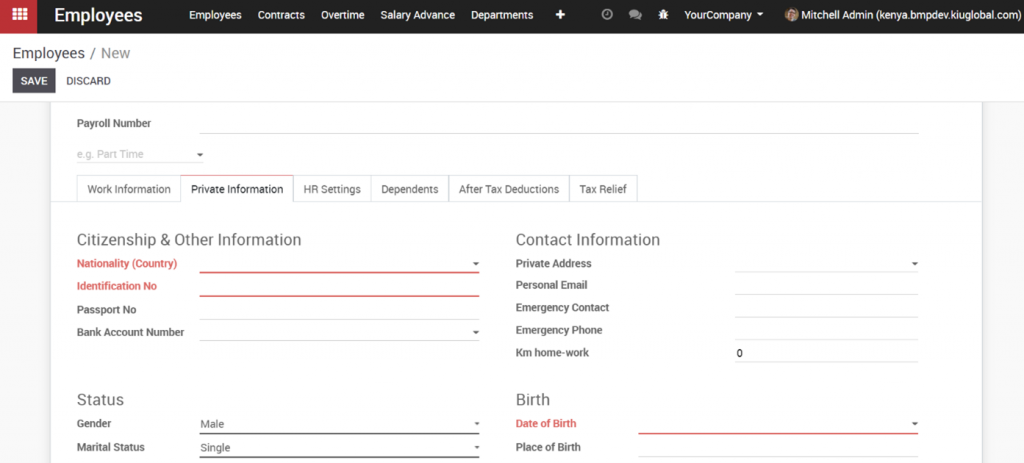
In Employee Module of HR Kenya, user must pay attention to some must-required fields (i.e. Employee’s name, Department, job position, Nationality, etc.) when create a new employee, which is red as below:
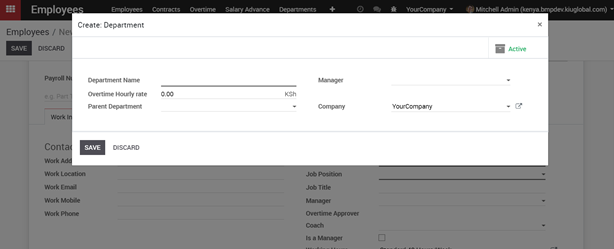
In case the employee’s Department is not available to be selected, HR can create Department right at Employee tab as below. Otherwise, HR can create Department at the Department tab.
Setting up related contact (i.e. Manager, Overtime Approver) enables HR to automatically generate payroll entries for employee when running payslip (also for overtime, leaves).
*NOTE:
- The module is created with default Kenya currency as “KES”.
- Related User & Related Contact are important fields. They are required once you create Leaves, Overtime, Timesheet, Employee Payslip,… When choosing Related User, Related Contact will be automatically changed accordingly > Employee Name will be changed correspondingly.
- Please change the right Accounting Account for employee by clicking on related contact. You can examine these records here book of ra online to get more detailed final results In accounting tab, change to the right account.
1.2. Employee Contract Creation
After creating an employee, HR moves next to contract tab.
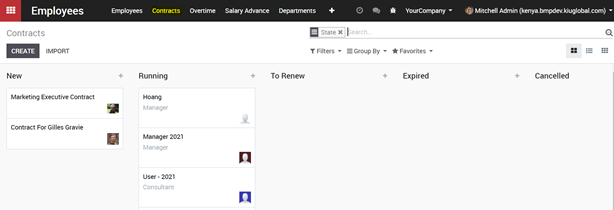
Contracts are created and managed through a sequence process (New –‣ Running –‣ Renew –‣ Expired –‣ Cancelled), which is enable for HR to manage the contracts overtime.
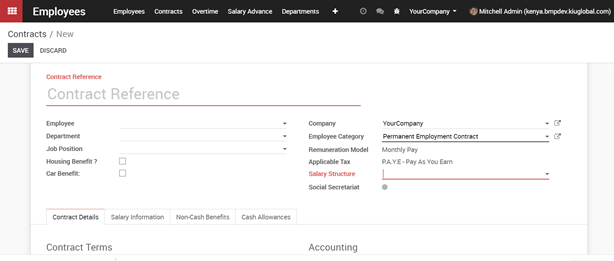
To create a contract, HR will fill in all information related to that employee (i.e. contract details, salary information, benefit-in-cash or benefit in kind). Please be noted that the Contract reference and Salary structure are mandatory fields, thus, the contract cannot save without such information.

Other information including Applicable tax, Employee Category andContract term are also essential, which would help payroll run well. If all is done, click on “Running” to make that contract in running state.
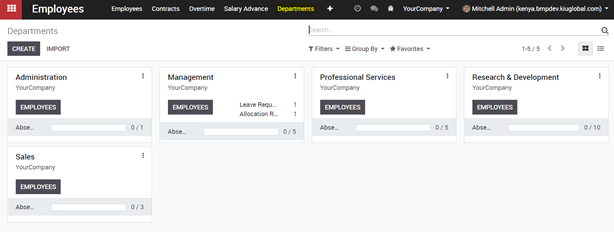
1.3. Department creation
At the Department tab, HR can create new Department and manage employees of each Department as below:
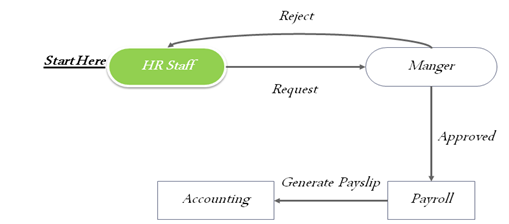
1. 4. Overtime
1.4.1. Overtime Workflow
1.4.2. Overtime Request
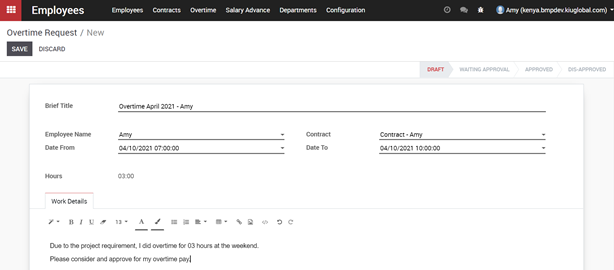
At the Overtime tab, employee can choose “Create” to create a request for overtime.
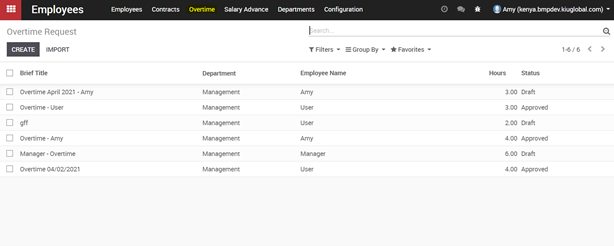
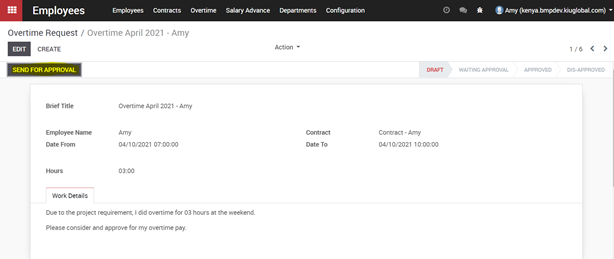
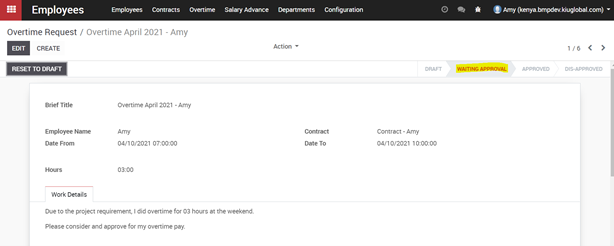
In the request from, employee can input the time they intend to work overtime and reason. Then click on “Save” button for system to recognize the Overtime. Finally click on “Send for approval” button that the system will automatically send to the Overtime approver. The status of this request will move from Draft –‣ Waiting Approval.
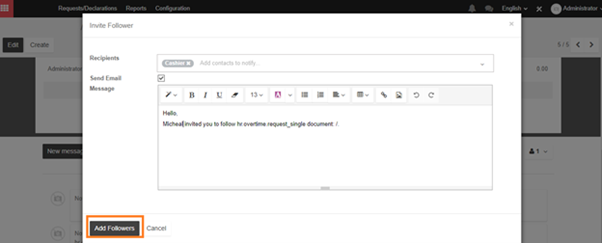
In addition, employee can add the related person to this approval by adding followers function in the request form.
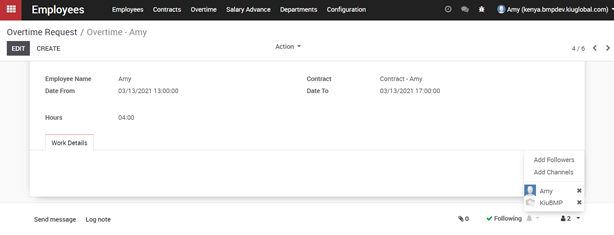
A pop-up will appear when clicking on Add Followers button, this pop-up help to send email to related person to this request. Just fill in the Recipients box and content of message and Click on Add Followers button.

When completing adding followers for requests of overtime, employee will have to wait for manager to approve it.
1.4.3. Overtime approval
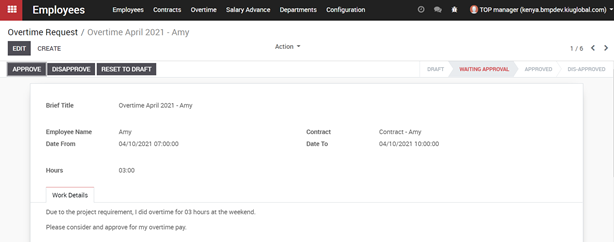
Overtime approver (i.e. Manager) can access the Overtime tab and access to Overtime Request to see the requests in pending state and click on each request to see the detail.

In the form view of request for Overtime, Overtime approver can Refuse or Approve employee’s request.
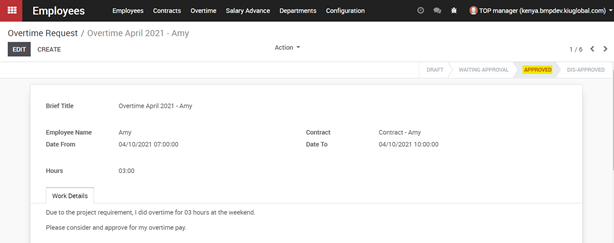
When manager approve the request and the status of request turn into “Approved”. Overtime request for the employee successfully registered.
1.5. Salary Advance Process
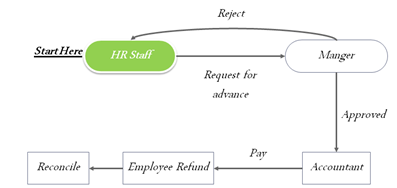
1.5.1. Salary Advance Flow
1.5.2. Salary Advance Request
In order to request an advance, employee can access to Salary Advance tab.
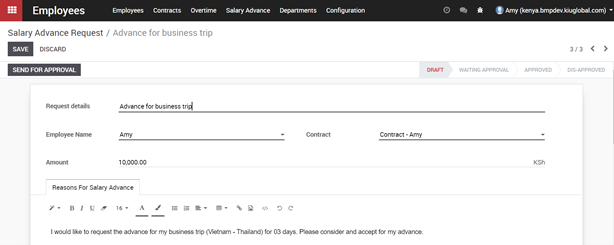
From the main menu, employee can choose “Create” to create a request for advance.

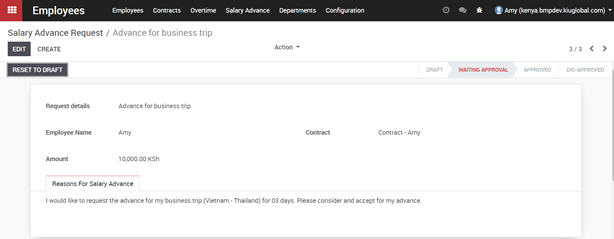
In the request from, employee can input the description and amount of advance. Then, click on “save” button to record the request into the system and “Send for approval” button to verify that advance.
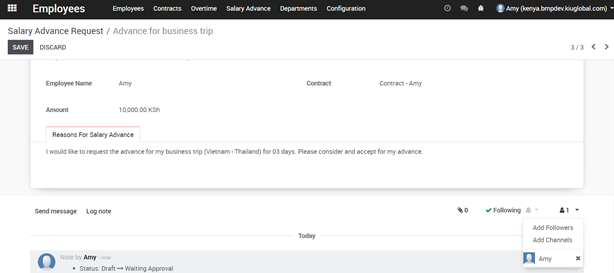
After confirming the request, employee can add the related person to this approval by adding followers in the request form as below:
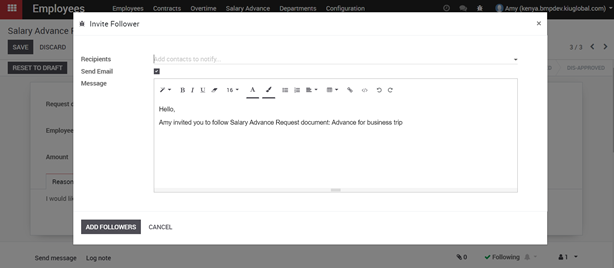
A pop-up will appear when clicking on Add Followers button, this pop-up help to send email to related person to this request. Just fill in the Recipients box and content of message and Click on Add Followers button to send the mail.
After finishing requests for advance, employee will have to wait for manager to approve it.
1.5.3. Salary Advance Approval
Manager can access the Salary Advance tab to see the requests in pending state and click on each request to see the detail.

In the form view of request for advance, manager can Refuse or Approve employee’s request.
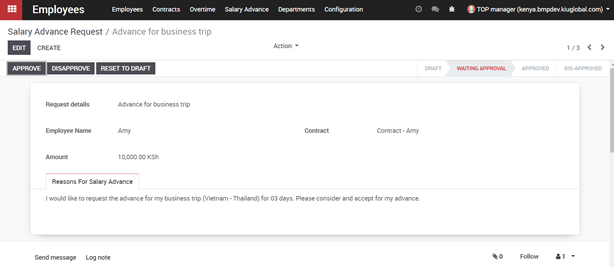
Once manager click “Approve” button, the status of such request will turn to “Approved”. Then, accountant can Pay that money to employee as advance.
Note for settings:
In order to allow who will pay the Advance, set-up for user is mandatory.
First, access the System setting:
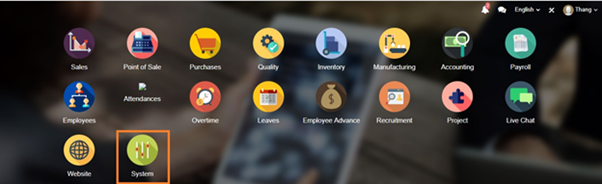
Then, click on Users -‣ users to setup specify user
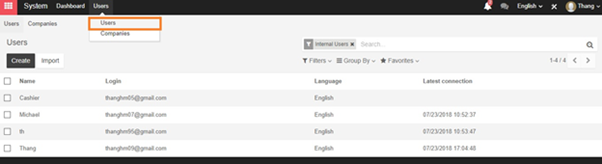
Go next to config Employee advance and Accounting
For below settings for user, user can only approve for employee request but cannot pay.
| Employee Advance | Accounting & Finance |
| Approver | Billing |
Only user with below setting can be allowed to pay the advance
| Employee Advance | Accounting & Finance | |
| Option 1 | Approver | Accountant |
| Option 2 | Manager | Billing |
| Option 3 | Manager | Accountant |
2. Leave module
2.1. Leave flow
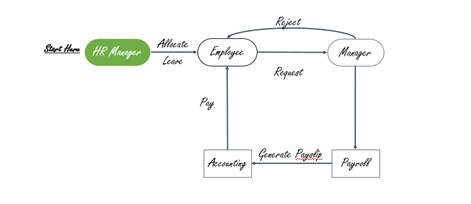
There are two main types of leaves in HR Kenya,
- Allow to override leave limit; and
- Unallow to override leave limit.
Unallow to override leave limit dates is given by manager and therefore, manager has to allocate leave days for employee to use on KIU system. Without allocation, employee can not register leaves day.
On the contrary, with Allow to override leave limit dates, employee is freely allowed to register for leaves date without any restrictions.
2.2. Leave registration
2.2.1. Leave request
In order to register Leave, employee can use Leave module.
From the main menu, employee can select My leave –‣ Leave request –‣ Create to create a request for Leave.


Save” button for system to recognize the Leave.
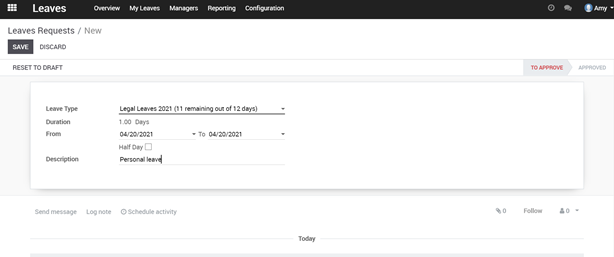
After confirming the request, employee can add the related person to this approval by adding followers function in the request form.
When completing adding followers for requests of leave, employee will have to wait for manager to approve it.
2.2.2. Leave approval
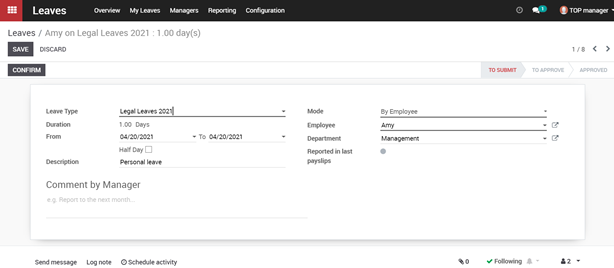
Leave approver (i.e. Manager) could access to Leave module, then click Manage –‣ To Approve –‣ Leave to see the requests in pending state and click on each request to see the detail.

In the form view of Leave request, manager can Refuse or Approve employee’s request.
When manager approve the request and the state of request turn into “Approved”. Leave request for the employee successfully registered.
2.3. Leave Allocation
In order to allocate Leave for Kenya employee, HR can use the Leave module

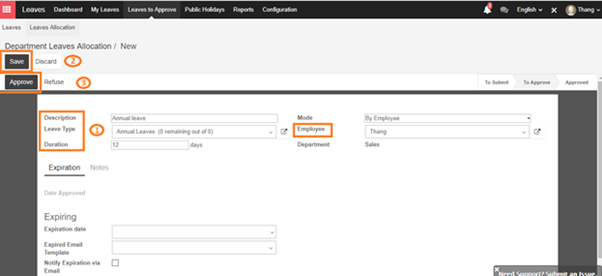
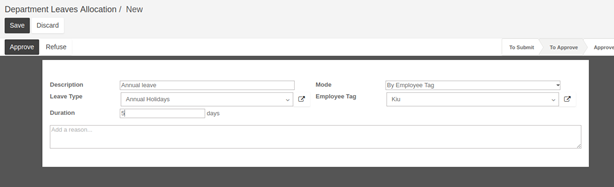
From the main menu, HR can choose “Leave to Approve” → “Leaves Allocation” and “Create” to create a request for Leave
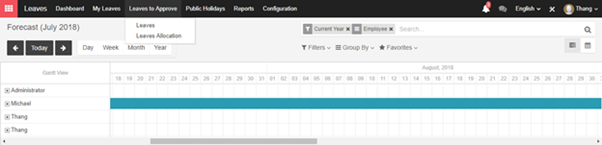
In the request from, HR can choose the Employee he intends to give allocation date then input the Description for the leave, Leave Type, number of day to allocate and number of allocation day in Duration tab Then click on “Save” button “Approve” button for system to recognize the Leave Allocation.
When HR approved the request and the state of request turn into “Approved”. Leave allocation for the employee successfully registered.
Please note that: Employee and Manager of Employee will receive an email for notification of the allocated leave. If you want to remove that, on the screen, check the followers and remove it.
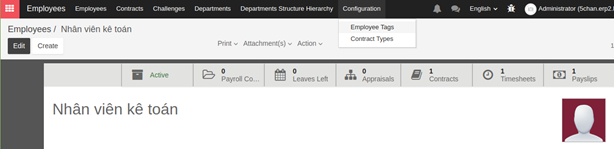
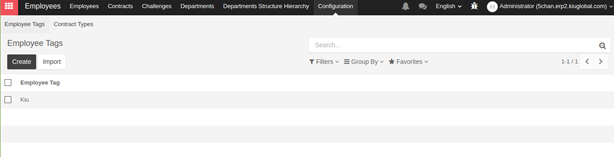
If you want mass leave allocation, you have to set up the Employee Tag first (in the Module Employee/ Employee form).
From here Create your own Employee tag
And when create employee form, just get the tag to employee
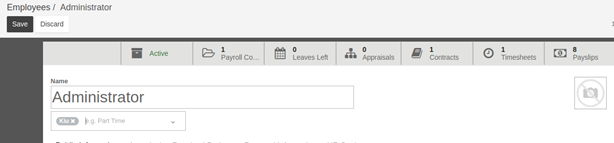
And from Leave Allocation Screen, you can allocate leave to all employee in your company with the same tag instead of allocating leave one by one.
3. Payroll module
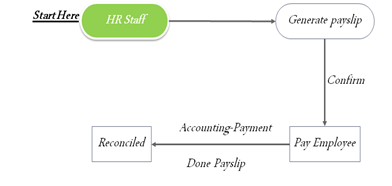
3.1 Payroll workflow
3.2. Payslip process
If fully set-up employee, contract as the manual above, in this step, HR only need to access Payroll module, create Payslip.
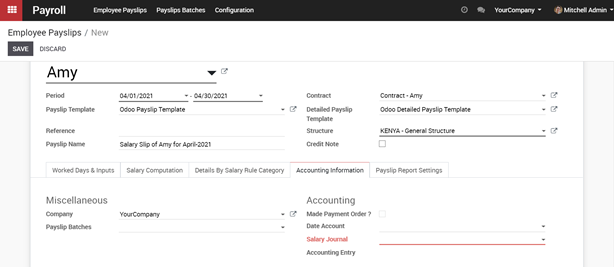
Choose the appropriate Employee, fill in the Payslip period and Salary Journal then click on “Save” to record into the system. Please be noted that the Salary journal is mandatory field, thus, HR can not save without such information.
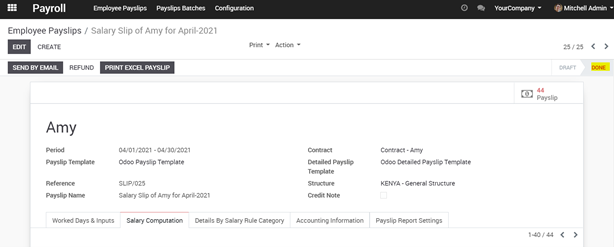
HR should check the information, then click “Confirm” button, employee detail salary will be appeared on salary computation tab as below.
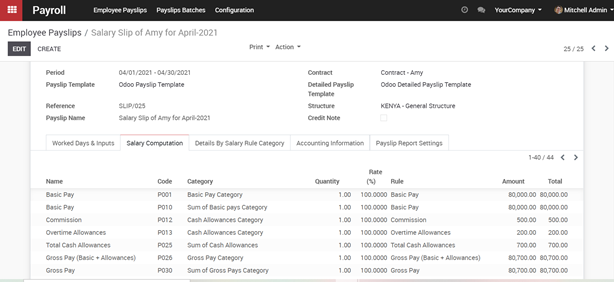
The status of creating Salary slip will turn from “Draft” to “Done”. At this stage, the payslip for specific period is created successfully.
3.3. Salary payment
After payslip is created, accountant can access Accounting –‣ Bank Statement to pay to Employee.
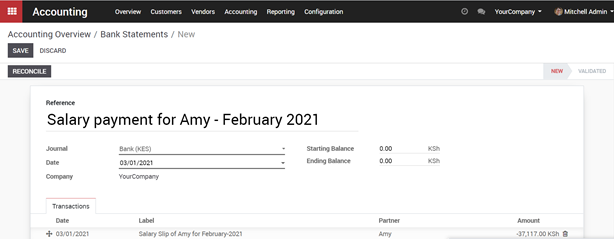
Accountant should fill in the necessary information regarding the salary payment for the employee, then choose the amount of net payment and click “Save” button. Please be noted that the amount should be negative.
Then, accountant need to reconcile the payment amount with the created payslip amount by click “Reconcile” button. A pop up of Reconciliation will be created as follows:
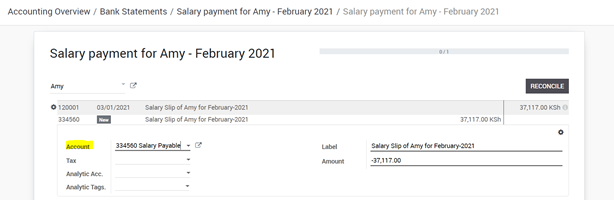
Then, accountant select the related account as “Salary payable”, then click “Reconcile”
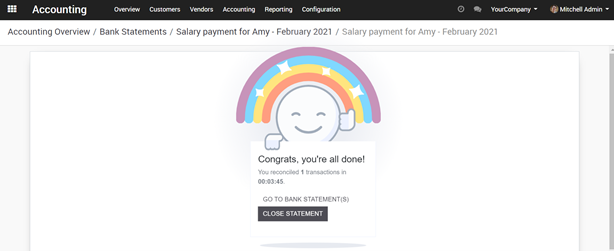
Then, the salary payment process is successfully created.
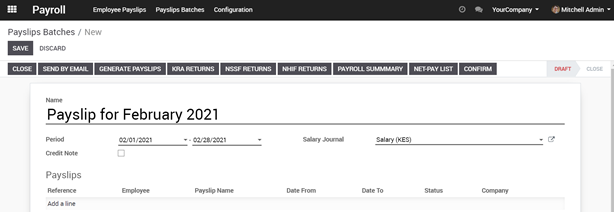
3.4. Payslip batch process
In Payroll module, Payslip batches, choose slip period and click “Generate payslips”
Choose list of employee and click “Save”
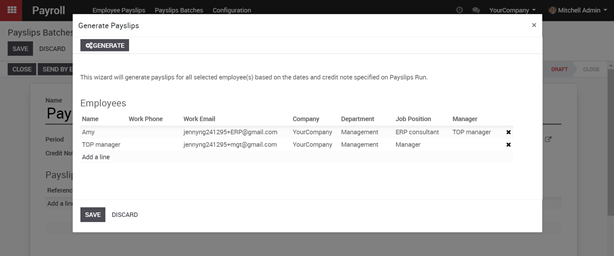
If each slip info of employee is correct then click on verify to mass confirm payslip.