
This is the most important part, helping you manage the quantity and amount of goods sold during the day. The system automatically calculates grand total amount in case customer buy multiple products at the same time or help you calculate excess amounts to be returned to the customer.
- To check out products, you should follow steps below:
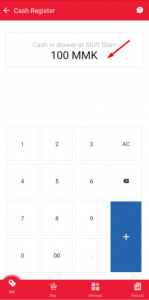
In Step 2: Users set opening balance in this box.
|
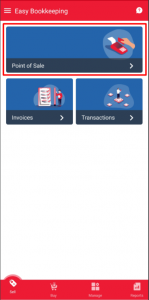
Step 1 – Go to POS menu |
Step 2 – Open session |
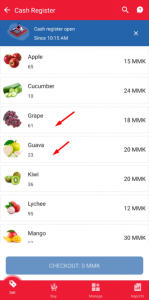
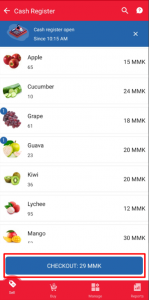
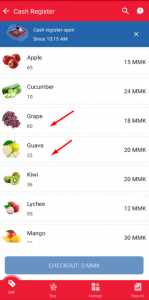
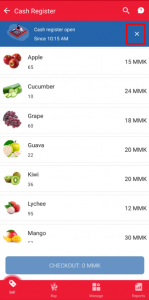
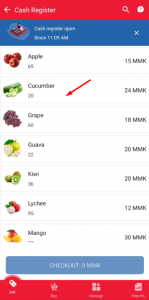
Step 3 – Choose product |
 |
 |
 |
|
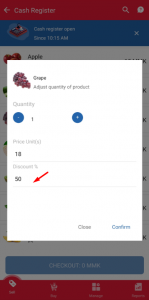
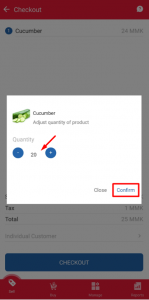
Step 4 – Choose product quantity |
Step 5 – Click on Check out button |
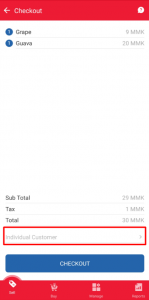
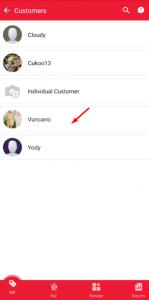
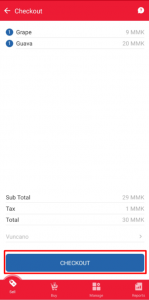
Step 6 – Choose customer |
 |
 |
 |
|
Step 7 – You can search customer |
Step 8 – Click on Check out button |
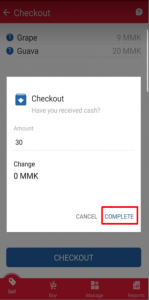
Step 9 – Enter paid amount |
 |
 |
 |
|
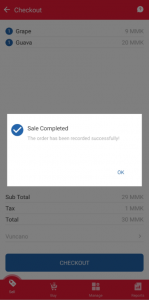
Step 10 – Order completed |
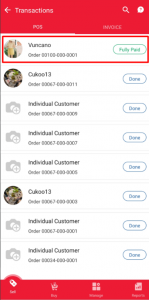
Step 11 – Sales Transactions |
Step 12 – Inventory updated |
 |
 |
 |
|
||
|
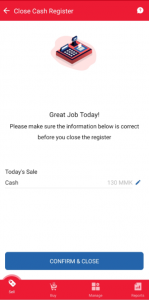
Step 1 – Close session |
Step 2 – Check cash in drawer |
|
 |
 |
|
|
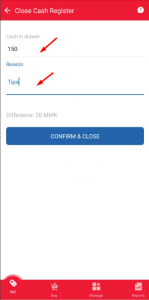
● If Cash in your drawer is not the same as calculated in App, you should click on “Adjust Cash” |
||
|
Step 3 – Adjust Cash |
Step 4 – Type amount and reason |
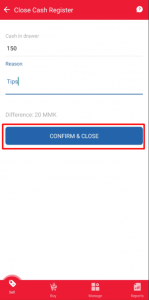
Step 5 – Confirm and close |
 |
 |
 |
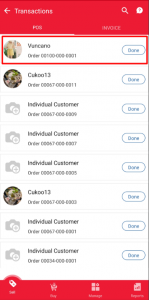
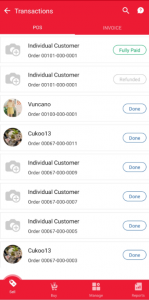
- To view POS orders, go to Dashboard, click on Sale Transactions menu > tab POS
|
Step 1 – Go to Sale Transactions |
Step 2 – Choose POS order |
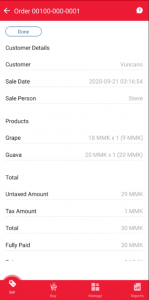
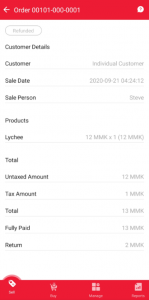
Step 3 – Detail POS order |
 |
 |
 |
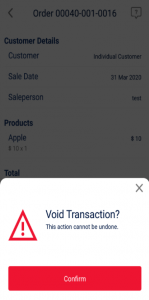
- Voiding POS orders means canceling the order you recorded before, products will be returned and money is refunded. Each POS order only can void one time. A new refund order will be created if you complete voiding a transaction.
|
Step 1 – Go to Sale Transactions |
Step 2 – Choose POS order |
Step 3 – Click on Void Transaction |
 |
 |
 |
|
Step 4 – Confirm to void |
Step 5 – POS order after voiding |
Step 6 – A refund order created |
 |
 |
 |
- If your product quantity is not enough to sell or less than the minimum quantity set up before, the system will alert and do not let you sell. To continue selling at POS, you have to adjust quantity more than the minimum
|
Step 1 – Click on Edit product quantity |
Step 2 – Enter quantity |
Step 3 – Quantity updated |
 |
 |
 |