
Invoices is one of the most important menus in Kiutify application. This menu help you sell products like in POS menu: sell multi products, enter discounts (if any) by creating new invoices for your customers. But the best thing in this menu is you can let your customer pay partially instead of immediate payment in POS. You also can choose payment methods, payment terms when record invoices.
After recording a new invoice, you can save then register payment or save and sending an pdf invoice version for your customer by email
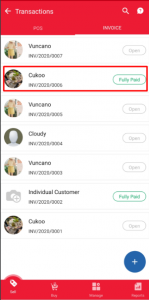
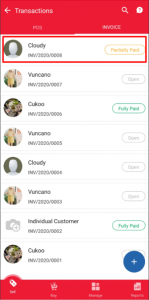
This app provides Invoices tab in Sale Transactions menu let you follow how much your customers paid, due amount in each invoice
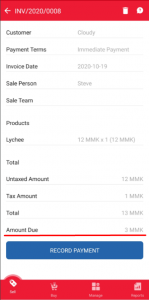
You also can adjust your invoices if record wrong. Invoice status must be submitted. The invoice number will be kept the same after you adjust but the total amount and inventory will be updated.
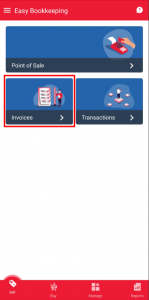
- To make a new invoice follow these step:
|
Step 1 – Go to Create Invoices |
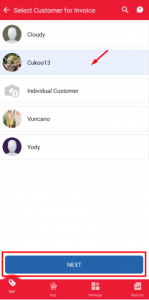
Step 2 – Choose customer |
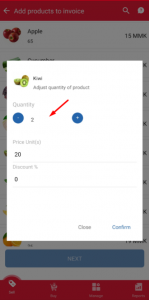
Step 3 – Enter quantity, discount |
 |
 |
 |
|
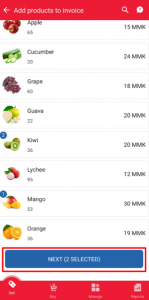
Step 4 – Confirm to proceed |
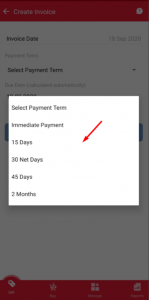
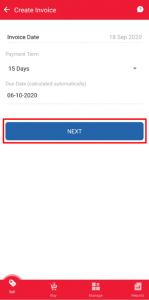
Step 5 – Choose payment term |
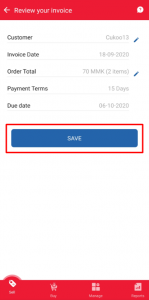
Step 6 – Review invoice |
 |
 |
 |
|
Step 7 – Save invoice |
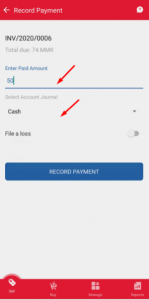
Step 8 – Pay now or pay later |
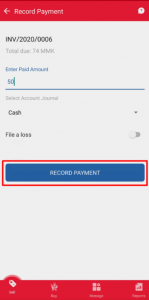
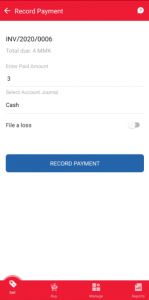
Step 9 – Enter paid amount, journal |
 |
 |
 |
|
● Users can pay partially or pay full amount by enter amount in box |
||
|
Step 10 – Confirm to proceed |
Step 11 – Payment Recorded |
|
 |
|
|
|
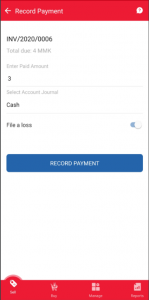
● If users want to write off for a partially paid invoice, they can turn on “File as loss” as steps below: |
||
|
Step 1 – Record payment |
Step 2 – Choose “File as loss” |
Step 3 – Invoice status updated |
 |
 |
 |
- To view how much you customer paid in each invoice or adjust invoices, go to Sale Transaction:
|
Step 1 – Choose POS order |
Step 2 – Detail order |
|
 |
 |
|
|
Note that “Paid partially” Invoice and “Paid” Invoice can not adjust. |
||
|
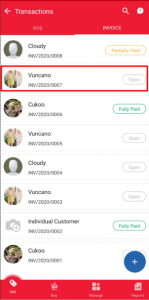
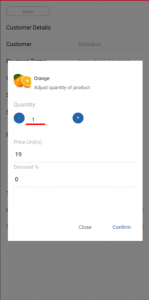
Step 1 – Choose Invoice |
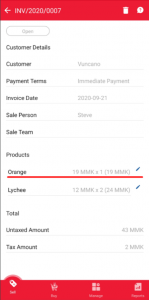
Step 2 – Click on adjust invoice |
Step 3 – Tap to edit quantity |
 |
 |
 |
|
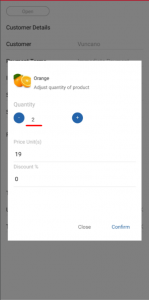
Step 4 – Edit quantity |
Step 5 – Click Confirm to save |
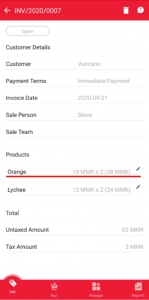
Step 6 – Invoice updated |
 |
 |
 |