After creating new products, the regular purchase process can begin with the Purchase Agreement. You can negotiate specific condition and choosing the best price from Purchase Agreement before proceeding to the official Request for Quotation. In Purchase module of Kiu BMP, If choosing to create new purchase agreement, then in next window of purchase agreement, you can specify the type of agreement is purchase tender or blanket order.
A Purchase Tender is sent to multiple suppliers, where a Blanket Order is only sent to a single supplier. In a Purchase Tender, the Quantities are set automatically on the Purchase Order, while with a Blanket Order you will set those quantities manually on the Purchase Order. Additionally after using Purchase Tender you will have only a single Purchase Order, while with Blanket Order you will have used multiple POs.
Firstly we will create Purchase tender by choosing dropdown menu from Agreement type:

In the form of purchase agreement, you can choose the analytic account which is the internal account used for monitoring and examining the costs, sales and margins by specific department/resources or products. In daily use, it is useful to mark the analytic account on each purchase invoice. When the invoice is approved, it will automatically generate the entries for both the general and the corresponding analytic accounts. For each entry on the general accounts, there is at least one analytic entry that allocates costs to the department which incurred them
For Agreement deadline, this is the last day in which the purchase agreement is still active and this can be modified based on specific quotation/ purchase agreement
For Ordering Date, this is the starting date of the agreement. And for delivery date, this field should be blank as we can have multiple delivery date for multiple orders or quotations from different vendors.
In the Products section, click on Add an item. Select products in the Product list, then insert Quantity. You can add as many products as you wish then click Save.
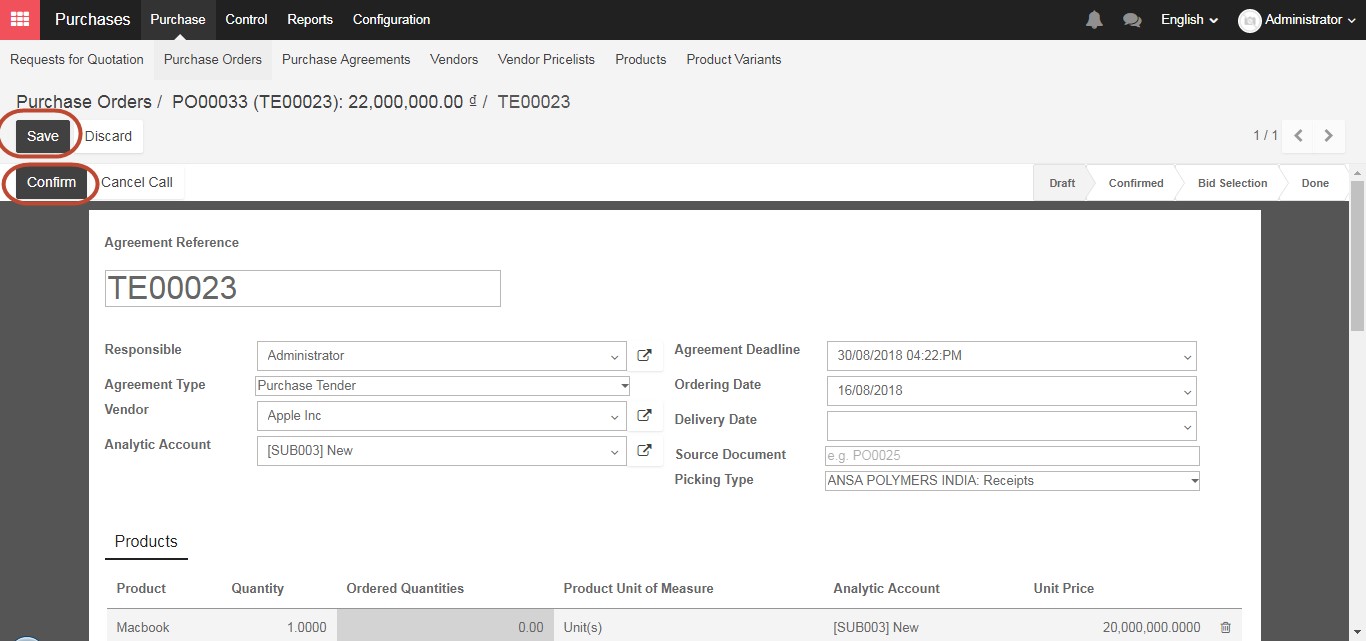
One Purchase tender can be sent to multiple suppliers in order to choose the best offer with the most reasonable price from different vendors, therefore you can create multiple Request for Quotation within one Purchase tender by clicking New Quotation after Confirm the Purchase agreement.
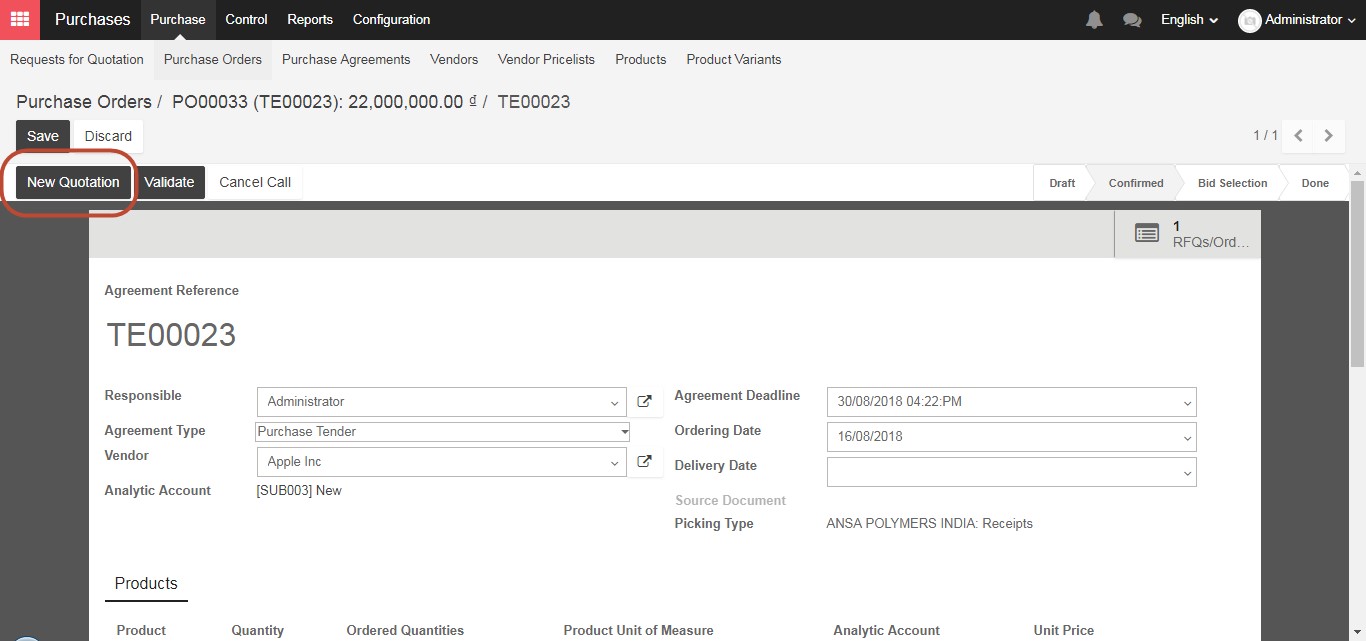
New quotation from different vendor has been created within one Purchase tender
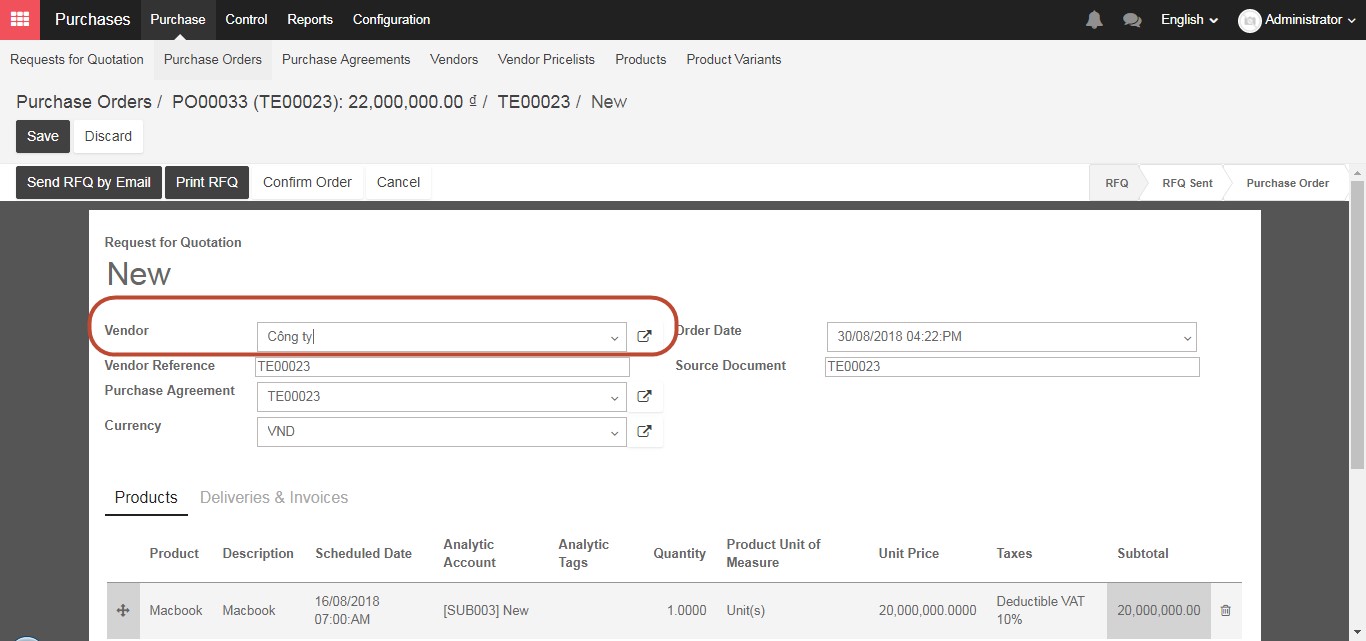
The quotation is ready to send to the vendor by clicking on Send RFQ by email button
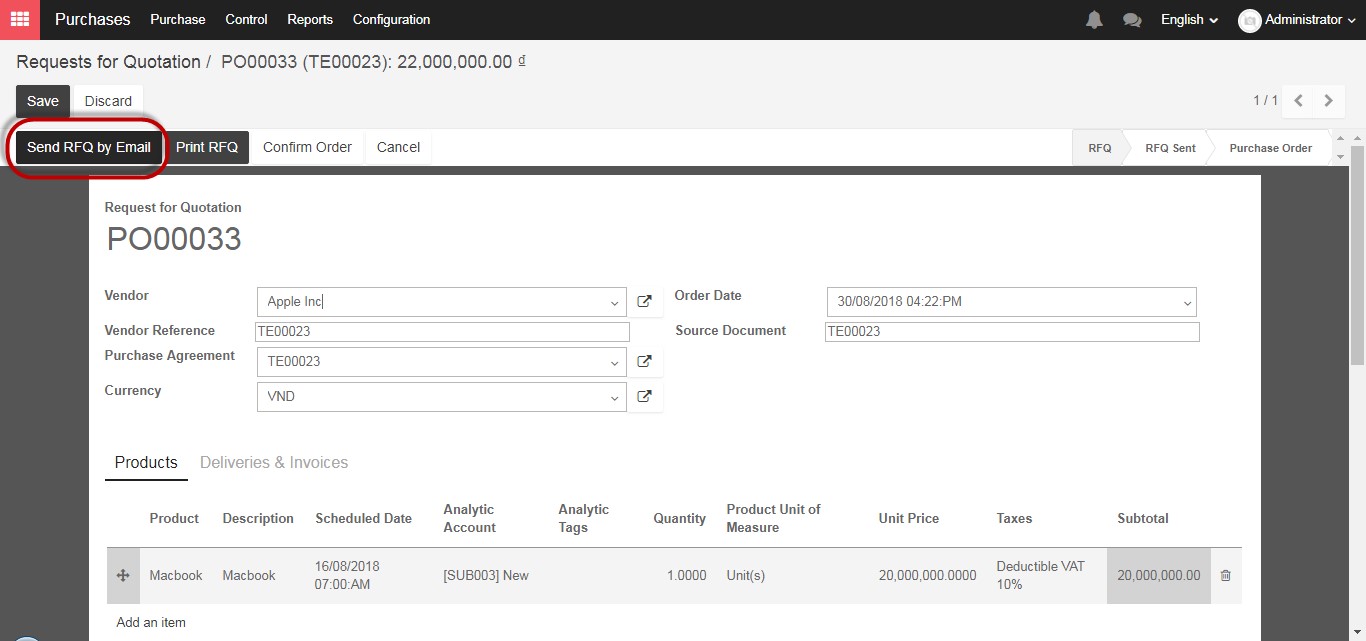
Verify the details of the email as well as the information of the vendor then click Send

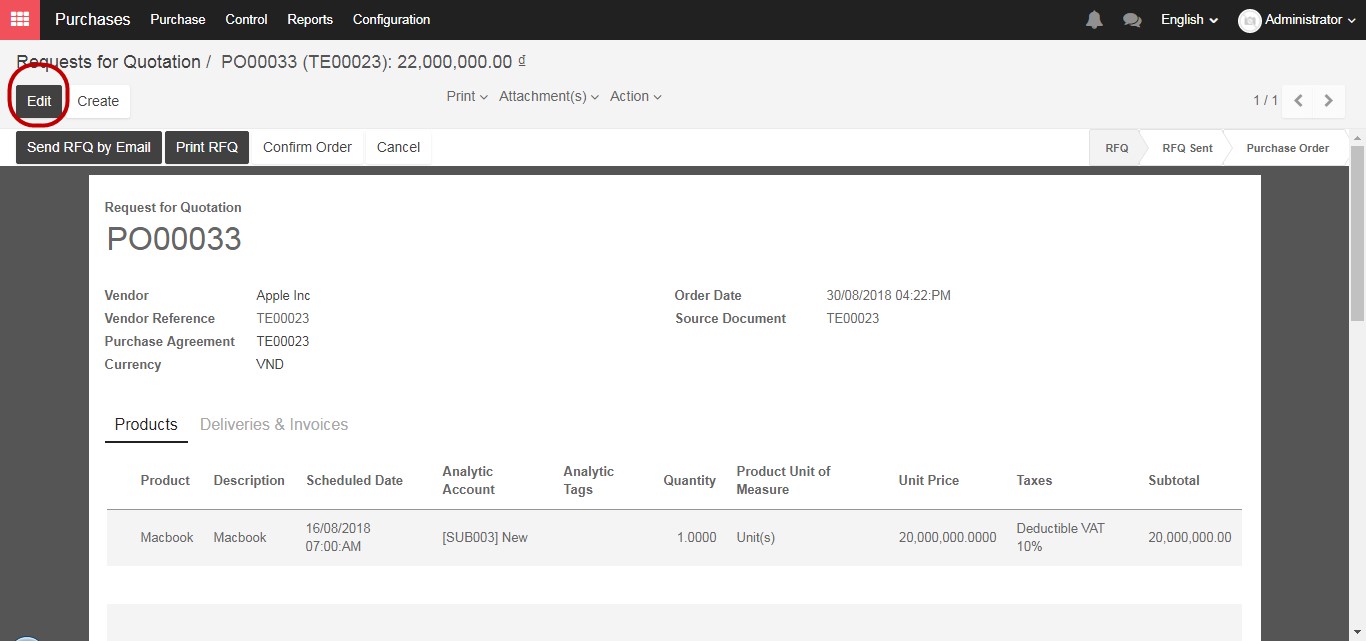
After sending the Request for Quotation successfully and receive the feedback from the vendors,Click “Edit” in the top left, to update the quotation with the new information provided, such as the price, any taxes, expected delivery lead time, payment terms, or any other information the supplier has given you, then click “Save” at the top of the screen.
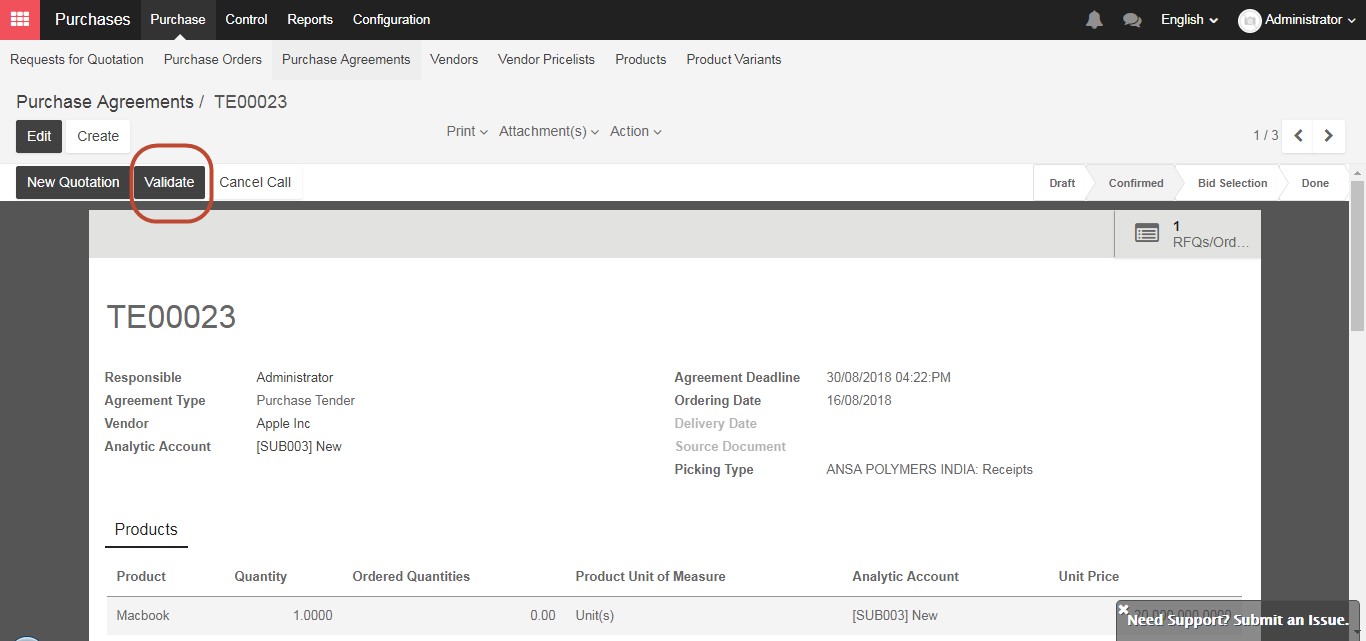
Once all the Requests for Quote are sent, you can click on “Validate” on the Purchase Tender.
The vendors will send their offers, and you can update their Request for Quotation accordingly. Then, choose the ones you want to accept by clicking on ”Confirm Order” for the Request for Quotation and “Cancel” on the others. Finally, after the purchase order had been confirmed, you can click Done on the Purchase tender to close the agreement.
Secondly, for creating Blanket order from the drop down menu of Agreement type:
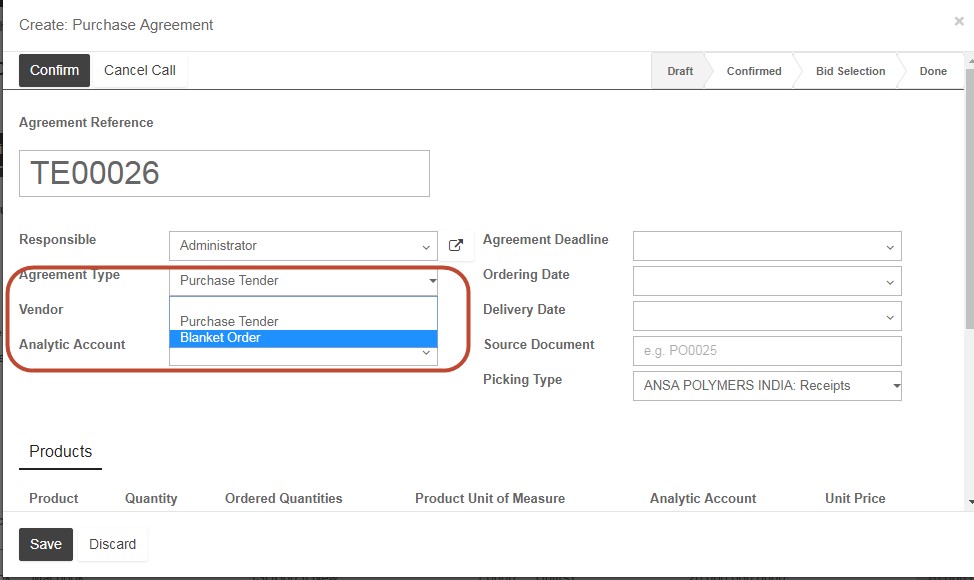
A “Blanket Order” is similar to a framework contract, where you lock in a good price with a vendor for a specific period of time and plan multiple deliveries during that interval. In the supplier field select the vendor you intend to purchase from. In the “Product Tab” below, click “Add an Item” to add one or more products. Select the quantity, which will be the sum of all deliveries to be covered by this Blanket Agreement, and add the negotiated price in the “Unit Price” column.

When you have completed filling in these details, click “Confirm”.

Now you can start creating different Purchase Orders with multiple scheduled delivery dates within the agreed period, all linked to this Blanket Order.

The system will auto-fill the document with the product(s) from your blanket order, you only have to choose the quantity and confirm the order. When you go back on the blanket order, you will see how many quantities you have already ordered from your blanket order.

This way, you can easily track how many products you have ordered within a particular agreement, and the quantity remaining with that vendor.

After Purchase agreement has been created and the most suitable quotation has been selected from these purchase agreement, the process would continue by select Purchase/ Request for Quotation and select create button to create a new Request for Quotation

In new screen of Request for Quotation, Select existed supplier in the “Vendor” menu, or create new supplier by clicking on “Create and Edit”.

If choosing to create new supplier, then new window of Vendor will appear. General information of new supplier must be filled in such as selecting this as a company or individual, name, address, email, phone, etc…

In Sale & Purchase tab of new vendor form, tick a box “Is a vendor” and specify the supplier currency if needed.

In accounting tab, default receivable and payable accounts have been set up automatically for new vendors. These default accounts can be changed only in special circumstances.

After selecting Vendors successfully, reference to identify specific vendors can be filled in:

If not choosing purchase agreement and leaving this field as blank, this would be treated as a normal request for quotation. Otherwise, this would be purchase tender or blanket order. We can choose existed purchase agreement or choose to create a new purchase agreement:

So far we’ve shown how to create a “Request for Quotation”, and a “Purchase Tender”with several RFQs included, sent those requests to suppliers, and then used the returned Quotations to update our Request, before finally placing a “Purchase Order” with a supplier.
If your company accept the quotation, click “Confirm order” button to transfer the Quotation to official Purchase order. Otherwise, If you already know the price of the item you want to purchase, and you only intend to purchase one time, you can skip the “Request for Quotation”, “Purchase Tender”, and “Blanket Order” and proceed directly to creating a “Purchase Order”.

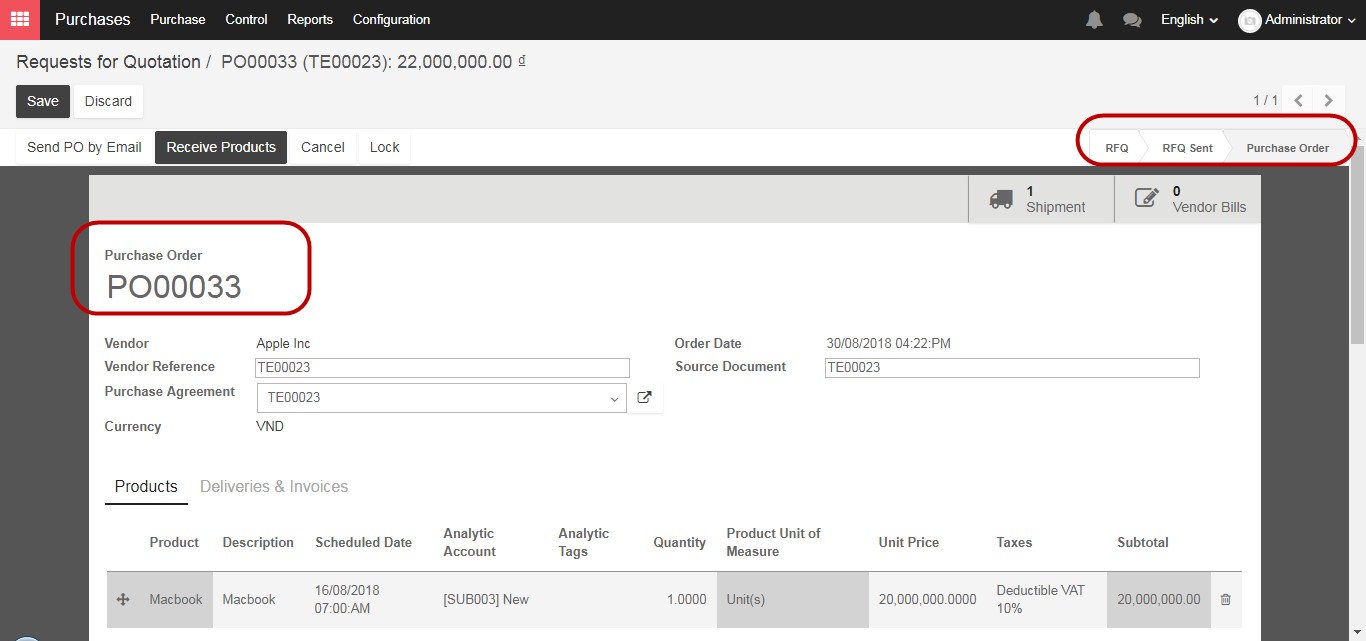
After clicking on “Confirm order”, new purchase order based on this quotation has been created successfully and the status of the request for quotation will change to “Purchase Order” and the icons in the upper right corner of the order will show “1 Shipment” and “0 Vendor Bills”.
However, if you already know the price of the item you want to purchase, and you only intend to purchase one time, you can skip the “Request for Quotation”, “Purchase Tender”, and “Blanket Order” and proceed directly to creating a “Purchase Order”. Within the “Purchases” module, click the “Purchase” drop down menu at the top of the screen, and select “Purchase Orders”. The system will now open to a list of Purchase Orders. The list shows all Purchase Orders created. When you click “Create” you will see a screen very similar to the “Request for Quotation” form. The status field can be “Waiting Bill”, “Bills Received”, or “Nothing to Bill” for a cancelled order. “Waiting Bill” means that the Purchase Order has already been confirmed and “Bills Received” means that the Vendor Bill has been created.
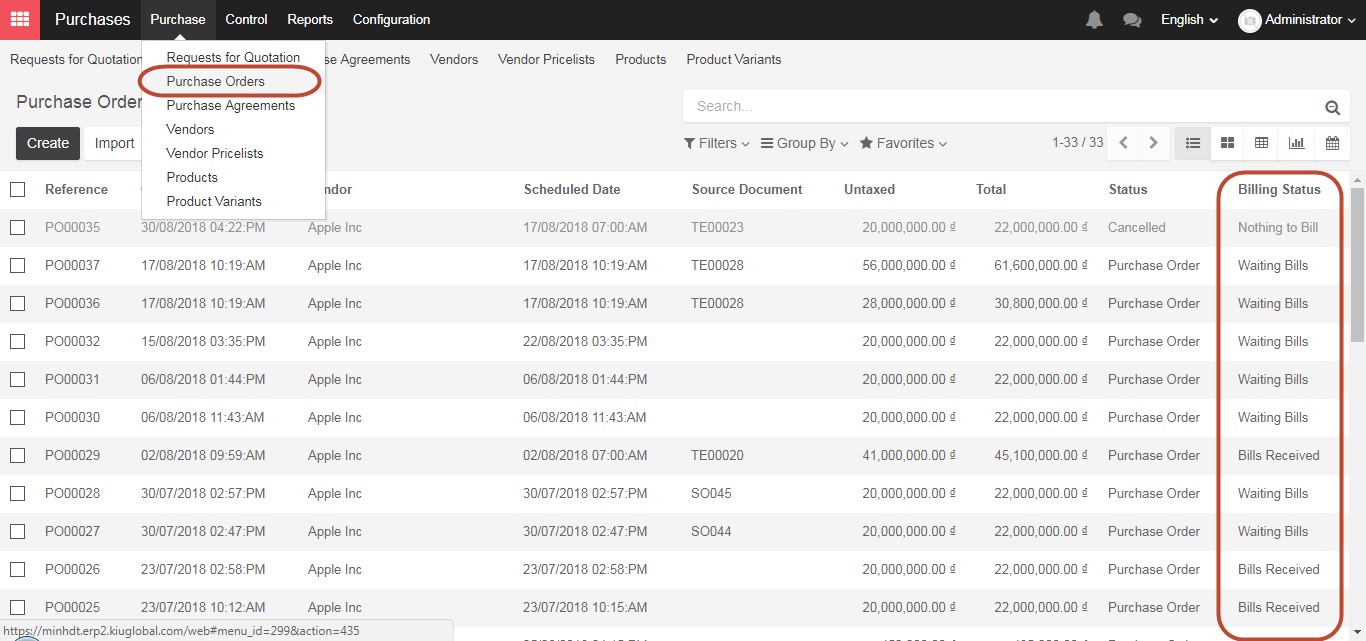
If you want to view an existing Purchase Order, you can choose the Purchase Order from the list. To create a new Purchase Order click on the “Create” button. The only difference between the “Request for Quotation” and the “Purchase Order” views, is the addition of the columns “Received Quantity” and “Billed Quantity”.
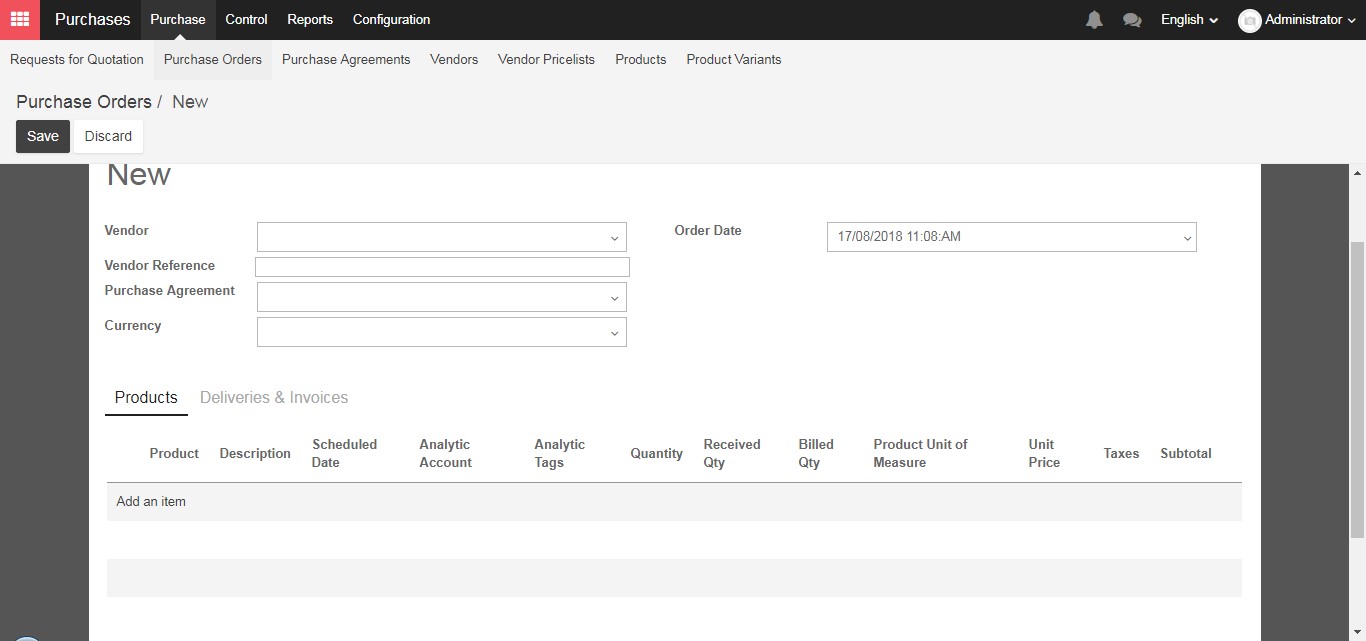
The “Received Quantity” column will show the number you have received and the “Billed Quantity” will contain the number of items your company has received an invoice for.
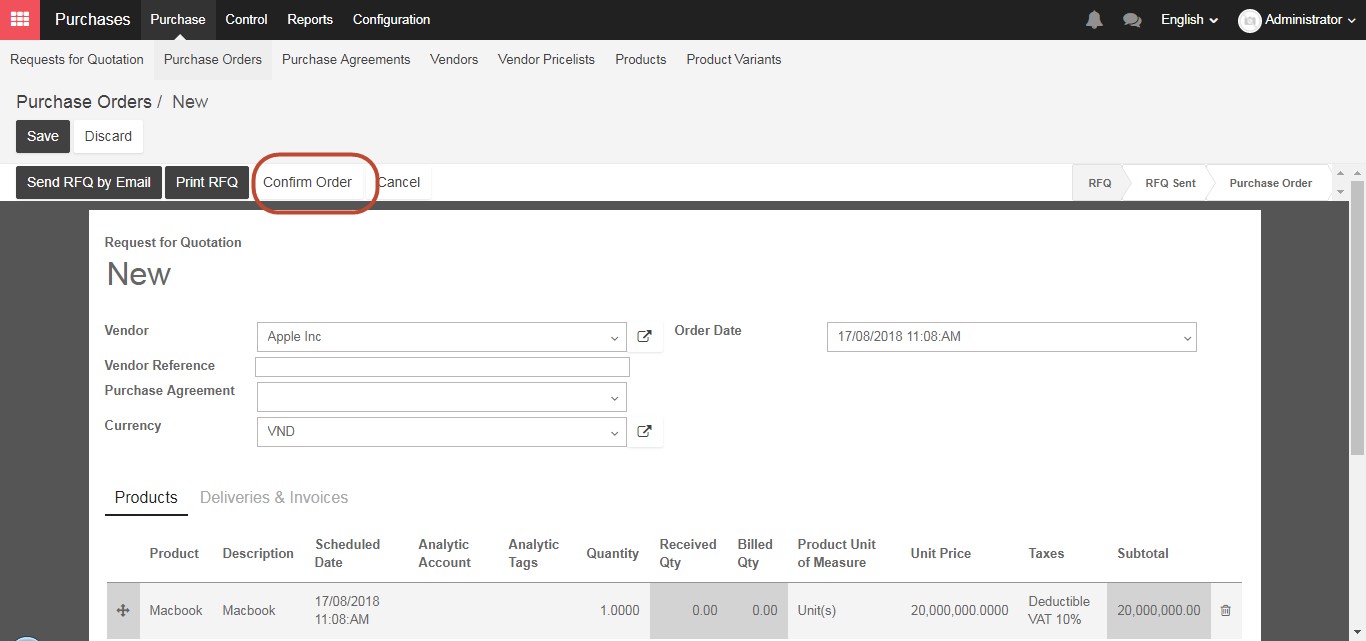
To finalize the Purchase Order, you can click on the “Confirm Order” button, which will initiate purchase from your supplier, and is the last step to creating a Purchase Order.
When the supplier sends you the shipment, you will have to receive the products and register their invoice with a Vendor Bill. When the purchase order opens you will notice the “Shipment” and “Vendor Bill” icons in the top right of the screen.

If we click on the “Shipment” button, the details of our shipment will appear. If the items displayed does not match the items you received, Click on the “Edit” button, or the small “Pencil Icon” next to each line of your shipment, and then select the number of products you have received.

Verify the actual units the company has received from the suppliers

If you have received all of the products in the shipment, the number of products you have received in the “Done” column matches the number in the “To Do” column, you can now click “Validate” at the top of the screen, and the status will change to “Done” in the top right, and you will have received the products to your warehouse.

After receiving the product in our warehouse, we’ll have to pay for them. In the Kiu BMP system, we can create a Vendor Bill, which will be the last step in our purchasing process.
Coming back to Purchase order, select “Vendor Bills” icons in the top right of the screen.

Click on the “Vendor Bills” icon, and when the screen refreshes click the “Create” button.

The Vendor Bill will be prepopulated with all of the information from your purchase already. If you have received all of the products in your Purchase Order, it will reflect that. If you have only received a partial shipment, the Vendor Bill will automatically update for the quantity received. When you are satisfied that the information matches what you have received, click “Validate”. At this point, the Vendor Bill is only a “Draft Vendor Bill”.

To create a final Vendor Bill, click on “Validate” to confirm all the information such as the number of product, price, bill date, due date, etc. Then the accountant or manager will work in the “Accounting” module to register the payment and finalize the purchase order.

This is the last step of regular purchase process.

