3.6.2. How to review my personal sales activities (new sales dashboard)

Sales professionals are struggling every day to hit their target and follow up on sales activities. They need to access anytime some important metrics in order to know how they are performing and better organize their daily work.

Within the KIU CRM module, every team member has access to a personalized and individual dashboard with a real-time overview of:

  • Top priorities: they instantly see their scheduled meetings and next actions
  • Sales performances: they know exactly how they perform compared to their monthly targets and last month activities.

Create opportunities

If your pipeline is empty, your sales dashboard will look like the screenshot below. You will need to create a few opportunities to activate your dashboard

Daily tasks to process

The left part of the sales dashboard (labelled To Do) displays the number of meetings and next actions (for example if you need to call a prospect or to follow-up by email) scheduled for the next 7 days.

Meetings

In the example here above, I see that I have no meeting scheduled for today and 3 meetings scheduled for the next 7 days. I just have to click on meeting button to access my calendar and have a view on my upcoming appointments.

Next actions

Back on the above example, I have 1 activity requiring an action from me. If I click on the Next action button in the Dashboard

I will be redirected to the contact form of the corresponding opportunity.

Under the next activity field, I see that I had planned to send an email today. As soon as the activity is completed, I can click on done (or cancel) in order to remove this opportunity from my next actions.

Performances

The right part of your sales dashboard is about my sales performances. I will be able to evaluate how I am performing compared to my targets (which have been set up by my sales manager) and my activities of the last month.

Activities done

The activities done correspond to the next actions that have been completed (meaning that you have clicked on done under the next activity field). When I click on it, I will access a detailed reporting regarding the activities that I have completed.

Won in opportunities

This section will sum up the expected revenue of all the opportunities within my pipeline with a stage Won.

3.6.1. How to analyze the sales performance of your team and get customized reports

As a manager, you need to constantly monitor your team’s performance in order to help you take accurate and relevant decisions for the company. Therefore, the Reporting section of KIU Sales represents a very important tool that helps you get a better understanding of where your company’s strengths, weaknesses and opportunities are, showing you trends and forecasts for key metrics such as the number of opportunities and their expected revenue over time, the close rate by team or the length of sale cycle for a given product or service.

Beyond these obvious tracking sales funnel metrics, there are some other KPIs that can be very valuable to your company when it comes to judging sales funnel success.

Review pipelines

You will have access to your sales funnel performance from the Sales module, by clicking on Sales ‣ Reports ‣ Pipeline analysis. By default, the report groups all your opportunities by stage and expected revenues for the current month. This report is perfect for the Sales Manager to periodically review the sales pipeline with the relevant sales teams. Simply by accessing this basic report, you can get a quick overview of your actual sales performance.

You can add a lot of extra data to your report by clicking on the measures icon, such as :

  • Expected revenue.
  • overpassed deadline.
  • Delay to assign (the average time between lead creation and lead assignment).
  • Delay to close (average time between lead assignment and close).
  • the number of interactions per opportunity.
  • etc.

Depending on the data you want to highlight, you may need to display your reports in a more visual view. KIU CRM allows you to transform your report in just a click thanks to 3 graph views: Pie Chart, Bar Chart and Line Chart. These views are accessible through the icons highlighted on the screenshot below.

Customize reports

You can easily customize your analysis reports depending on the KPIs you want to access. To do so, use the Advanced search view located by clicking on the magnifying glass icon at the end of the search bar button. This function allows you to highlight only selected data on your report. The filters option is very useful in order to display some categories of opportunities, while the Group by option improves the readability of your reports according to your needs. Note that you can filter and group by any existing field from your CRM, making your customization very flexible and powerful.

Evaluate the current pipeline of each of your salespeople

From your pipeline analysis report, make sure first that the Expected revenue option is selected under the Measures drop-down list. Then, use the + and icons and add Salesperson and Stage to your vertical axis, and filter your desired salesperson. Then click on the graph view icon to display a visual representation of your salespeople by stage. This custom report allows you to easily overview the sales activities of your salespeople.

Forecast monthly revenue by sales team

In order to predict monthly revenue and to estimate the short-term performances of your teams, you need to play with two important metrics: the probable revenue and the probable closing.

From your pipeline analysis report, make sure first that the probable revenue option is selected under the Measures drop-down list. Then click on the + icon from the vertical axis and select Sales team. Then, on the horizontal axis, click on the + icon and select Expected closing.

3.5.3. How to adapt your prices to your customers and apply discounts

Temporary prices

Apply deals for bank holidays, etc. Enter start and end dates dates.

Discounts, margins, roundings

For setting changes in price change rules. changes can be relative to the product list/catalog price, the product cost price, or to another pricelist. Changes are calculated via discounts or surcharges and can be forced to fit within floor (minimum margin) and ceilings (maximum margins). Prices can be rounded to the nearest cent/dollar or multiple of either (nearest 5 cents, nearest 10 dollars).

Go to Sales ‣ Configuration ‣ Price lists  ‣ Advanced pricing based on formulas (discounts, margins, rounding) then click Apply

Go to Sales ‣ Configuration ‣ Price lists then select applied pricelist

Each pricelist item can be associated to either all products, to a product category (set of products) or to a specific product. You can also set start date, end date and minimum quantities. There are 3 modes of computation: fix price, discount & formula.

Prices per country

Price lists can be set by countries group. Any new customer recorded in KIU gets a default pricelist, i.e. the first one in the list matching the country. In case no country is set for the customer, Kiu takes the first pricelist without any country group.

The default pricelist can be replaced when creating a sales order.

Compute and show discount % to customers

In case of discount, you can show the public price and the computed discount % on printed sales orders and in your eCommerce catalog. To do so:

  • Check Allow discounts on sales order lines in Sales ‣ Configuration ‣ Settings ‣ Quotations & Sales ‣ Discounts.

  • Apply the option in the pricelist setup form.

3.5.1. How to create a Price list

KIU has a powerful pricelist feature to support a pricing strategy tailored to your business. A pricelist is a list of prices or price rules that KIU searches to determine the suggested price. You can set several criteria to use a specific price: periods, min. sold quantity (meet a minimum order quantity and get a price break), etc. As pricelists only suggest prices, they can be overridden by users completing sales orders. Choose your pricing strategy from Sales ‣ Configuration ‣ Settings ‣ Pricing ‣ Sale price, then To apply several prices per product, select Specific prices per customer segment, currency, etc

Then open the Sales tab in the product detail form. You can settle following strategies.

3.4.2. Dropshipping Process

→ Configuration

Drop-shipping on KIU BMP is a method allowing user to transport ordered parcel directly from supplier to customer. The model is illustrated as below:

Reflecting the drop-shipping model, the workflow in KIU BMP is demonstrated as below:

To successfully record all your document in accordance with system workflow, please go over the following configuration first:

a. Inventory module

  • General settings

Going to Inventory -> Configuration -> Settings. Check “Advanced routing of products using rules” in the Routes section and “Allow suppliers to deliver directly to your customers” in the Drop Shipping section.

  • Drop Shipping Route

Going to Inventory ->Configuration ->Routes -> Drop shipping

Open to view the establishment of Drop Shipping’s module on : Product Categories, Products,  Sales Order Lines

b. Purchase module

The purchase process is divided into 2 cases:

 Case 1: Draft Purchase Agreement

The purchase requisition is set up as Purchase Agreement that have two types: (1) Purchase Tender and (2) Blanket Order.

The former allows user to create as many Requests for Quotation as possible and send to different suppliers to select the best price (A vendor provides the best price will win the deal). While the latter is used to negotiate a discounted price over a period of time with one vendor (It is able to take multiple smaller deliveries during the settled period).

PURCHASE TENDER BLANKET ORDER
  • Sent to different suppliers
  • Not especially high volume
  • Quantities set automatically on PO
  • One PO in the end
  • One supplier involved
  • High volume
  • Quantities set manually on PO
  • Multiples PO in the end
  • Multiple deliveries

Technically, Purchase Tenders is for the purpose of having better prices through competing suppliers, whereas Blanket Order is for the purpose of managing delivery dates with a supplier.

To enable the Purchase Agreement feature in KIU BMP, user must active the option by going to Purchase -> Configuration -> Settings -> Calls for Tenders

  • Allow using call for tenders to get quotes from multiple suppliers (advanced)

And going to Purchase -> Configuration -> Settings ->Location & Warehouse

  • Allow suppliers to deliver directly to your customers

In accordance with purchase configuration, all items bought or sold in drop-shipping flow must be set up as below.

Going to Purchases ->Purchase -> Product Variants and search for the product. Click on the product to open its configuration form.

Case 2: Draft Purchase Order

Enable function “Draft Purchase Order” to partner one indicated supplier. This type allows user to draw up an initial Request for Quotation to the identified vendor offering the most acceptable price, which is based on the list of vendor’s price set up in the product configuration.

Going to Purchase>Configuration>Settings>Calls for Tenders

  • Purchase propositions trigger draft purchase orders to a single supplier

Going to Purchase>Configuration>Settings>Location & Warehouse

  • Allow suppliers to deliver directly to your customers


In accordance with purchase configuration, all items bought or sold in drop-shipping flow must be set up as below.

Going to Purchases ->Purchase ->Product Variants and search for the product. Click on the product to open its configuration form.

On tab Invoicing -> Expense account

c. Sale module

Going to Sales ->Configuration ->Settings ->Quotation & Sales ->Order Routing. Choose specific routes on sales order lines (advanced)

When all the mentioned items are properly checked, start recording all the document for this business practice.

→ Working practices

Stage 1: Receive quotation from Customer

Going to Sales ->Sales ->Quotations, click “Create” to draw up a quotation.

Step 1: Record Quotation/Sales order from Customer

– Fill the general information on the Header of the document, other details of the quotation can be added on the Lines. Once the draft quotation is saved, it is labelled with an auto-generated reference (E.g. SO020)

No Name Description
Header General Information
1. Customer Name of the individual/organization orders your product
2. Invoice Address The address displayed on invoice issued to your customer
3. Delivery Address The address to which goods are delivered
4. Order Date The date on which the order is recorded from customer
5. Expiration Date The date on which your quotation becomes invalid
6. Price list

The pricing strategy applying to customer

This can be created if going to Sales->Configuration ->Price list
7. Payment Terms The terms specify the period allowed to a customer to pay off the amount due when your company completes a sale
8. Delivery Method Fill this field if you plan to invoice the shipping based on picking

Step 2: Confirm Order with Suppliers

–    Click “Confirm” to close the deal with customer. The quotation becomes Sales Order.

Stage 2 – Case 1: Draft Purchase Requisition

Looking for the draft Purchase Requisition by going to Purchases ->Purchase ->Purchase Agreement

Step 1: Review and Confirm a Purchase Agreement

–    The purchase requisition is drawn up as a Purchase Agreement and recognized with a reference (E.g. TE00001) that can be changed. Click on the document to review its details and make any changes if necessary.

No Name Description
1. Agreement Reference The reference to identify a Purchase Agreement. Automatically generate by KIU BMP but changable
2. Responsible Purchaser in charge of requesting the order
3. Agreement Type Purchase Tender Blanket Order
4. Ordering Date The date when a purchase order to a chosen vendor is submitted The starting date of the contract
5. Delivery Date The date when the products have to be delivered Do not have to fill because each release has different dates
6. Vendor Do not have to fill because the vendor is defined after bidding Choose the vendor with whom the contract is signed
7. Agreement Deadline The date informing vendors when to have their offer submitted
8. Source Document Related document to this purchase requisition
9. Picking Type Dropship
  • To verify the Purchase Agreement, click “Confirm”.

Step 2: Create and Confirm a RfQ

  • KIU BMP displays button “New Quotation” after confirmation. Click this button to form a draft Purchase Order (or so-called Request for Quotation).

  • A RfQ is created with the products listed on the Purchase Agreement. The next practice applied to different types of Purchase Agreement varies as shown in table.
Agreement Type Purchase Tender Blanket Order
Quantity on RfQ Quantity on RfQ is set percisely as entered on Purchase Agreement. By default, the RFQ quantity is set to 0. Individual deliveries should be smaller.
Operation Choose a vendor and send the RfQ. Enter the quantity and date for each delivery. Send the RfQ to the vendor.
Repeat this operation for each vendor. Repeat this operation for each release.
Validation Validate the Purchase Agreement once all the RfQ(s) are sent. Validate the Purchase Agreement when all releases (Purchase Order) have been delivered and paid.
Mark as Done When a RfQ related to this requisition is confirm (a vendor offering the best price is selected) When all releases are fully paid.
A finished (Status: Done) Purchase Agreement can not be added to any RfQ.
  • Fill the Dropship Address with the customer’s address. Send the RfQ to vendors and Confirm the RfQ of the chosen supplier.

  • After confirmation, 2 buttons linking to Shipment and Vendor Bill is displayed

Stage 2 – Case 2: Draft Purchase Order (RfQ)

Looking for the auto generated Request for Quotation based on customer’s order by going to Purchases ->Purchase ->Requests for Quotation

Step 1: Review a RfQ

  • As the Request for Quotation is already prepared by KIU BMP, it is labelled with a reference (E.g. PO00036). Click on the document to review its Header and Lines to make any change (if necessary).

Step 2: Confirm a RfQ

  • Finalizing the Request for Quotation by clicking button “Confirm” to change its status into Purchase Order.

  • After confirmation, 2 buttons linking to Shipment and Vendor Bill is displayed.

Stage 3: Delivery to Customer

  • As shipment delivering goods from Vendor to Customer is auto generated, it is vital to review this and enter the date on which goods are expectedly delivered to customer (the information is taken from Packing List and Bill of Lading).

Noted that Force Accounting Date is related to the date recognized in accounting journal entry.

  • Validate the shipment to mark as done once the goods are delivered to customers.

3.4.1. Regular Sale Process

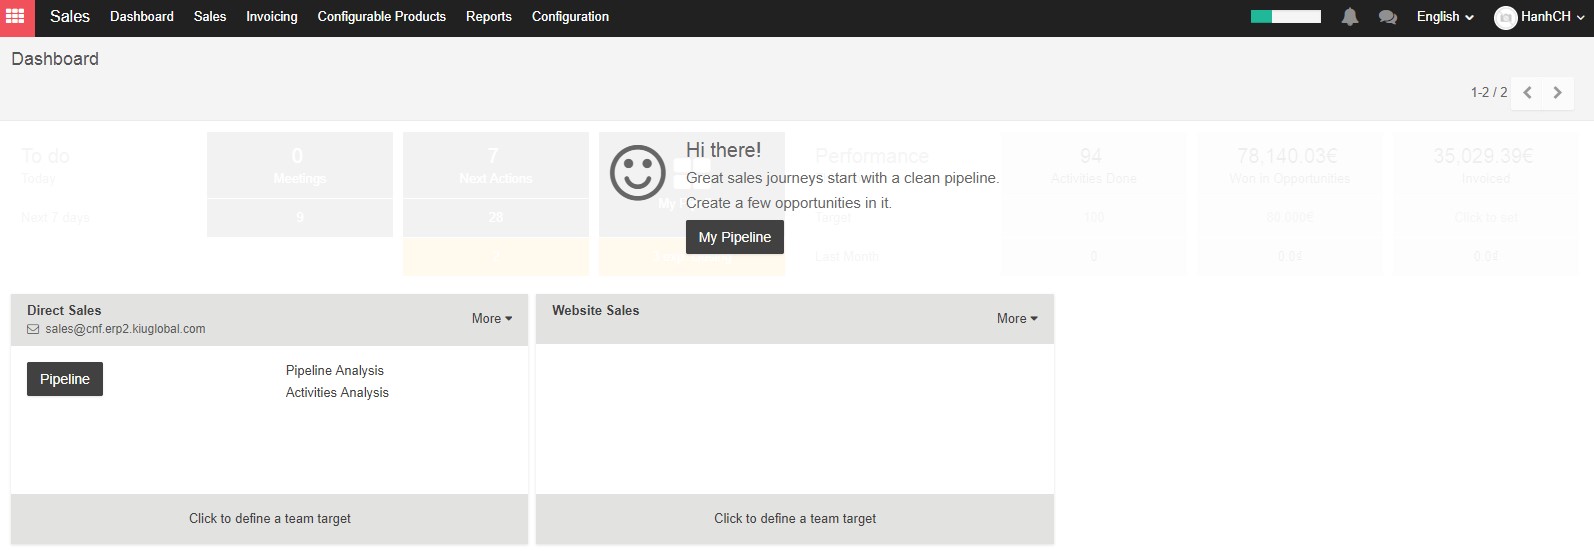
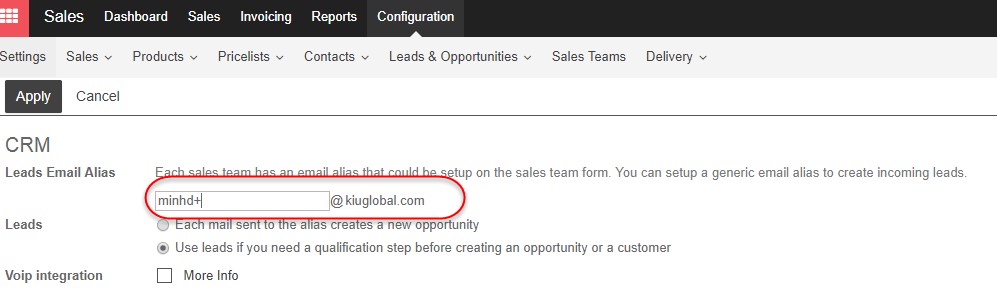
In Kiu BMP, the Sales process starts with create contact as Leads then if these contacts meet several qualifications, they can be upgraded to Opportunities. Those Opportunities can be contacted by a Salesperson to understand their needs, and eventually provide a Quotation for goods or services. When the customer approves your offering, you can confirm the Quotation to proceed to a Sales Order. Alternatively, if the customer has already agreed on the terms of the sale, you may bypass the Quotation step and go directly to Sales Order. After a sales order is complete, we can then track the delivery and invoicing of a product to the customer.

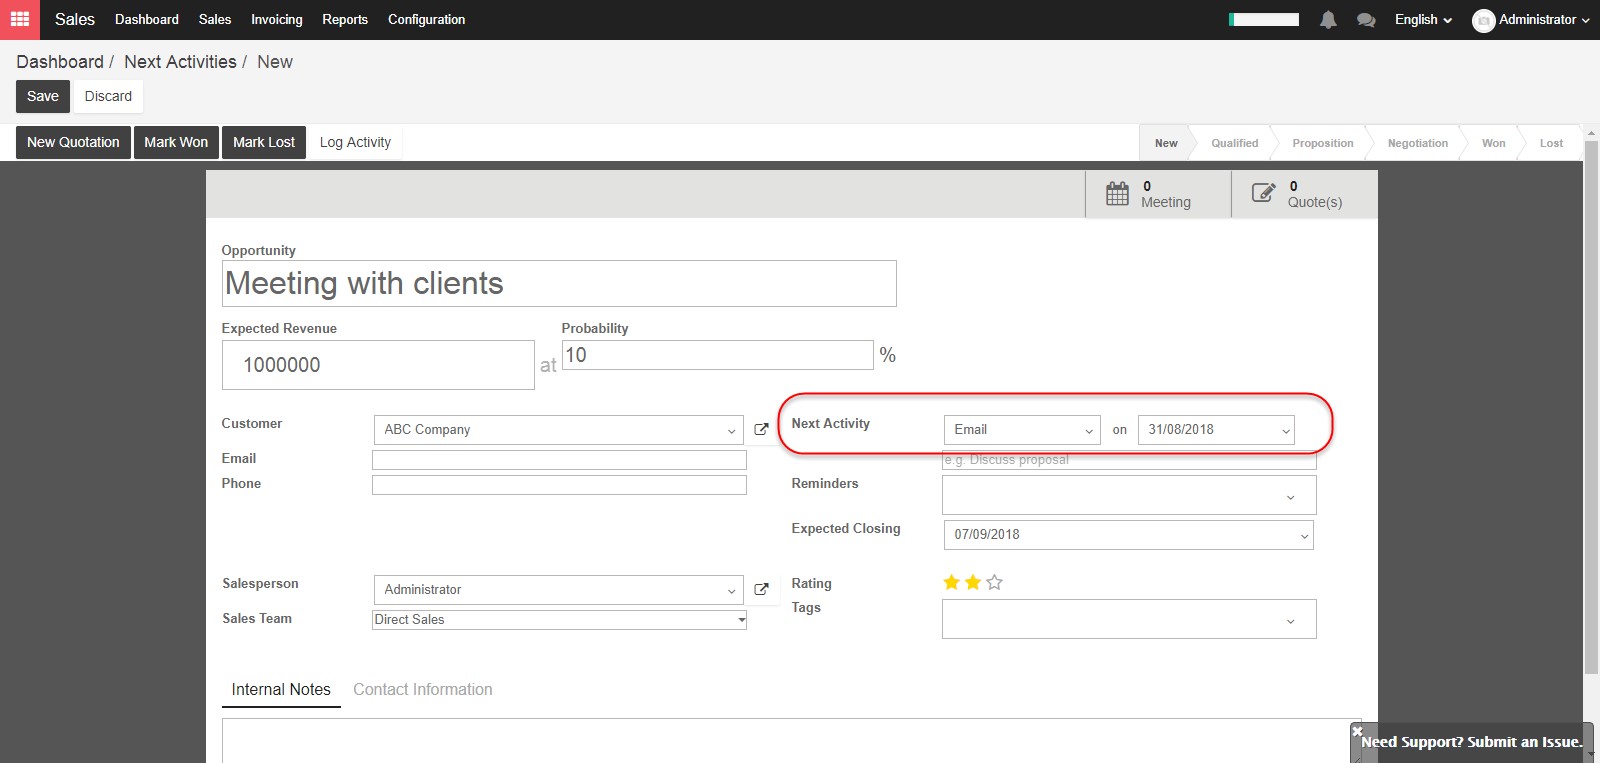
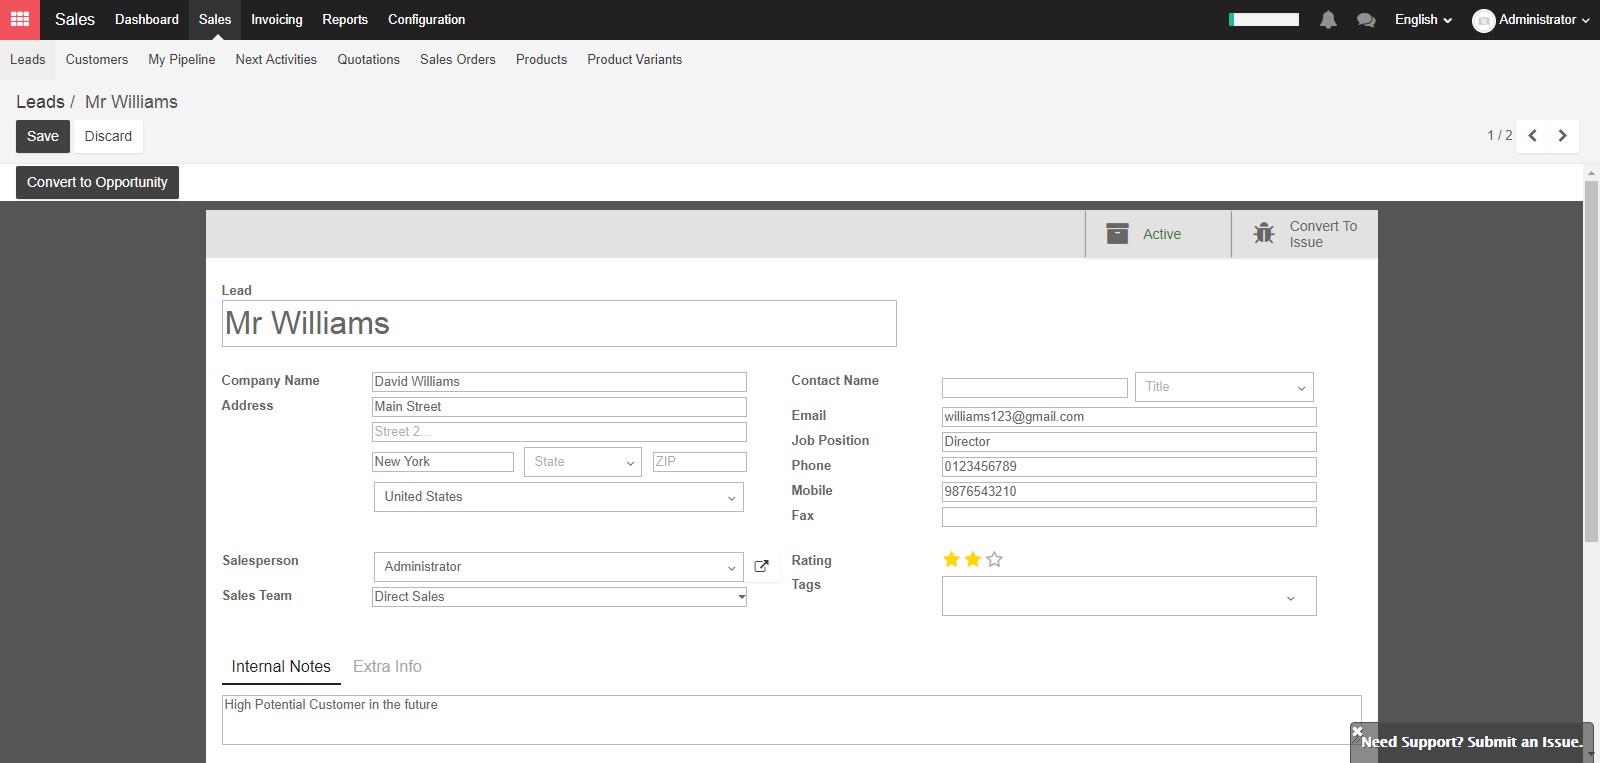
The detailed guidance for how to create Leads and Opportunities can be found in 3.3.3 How to create a contact. Now we will continue the sales process with creating a Quotation.

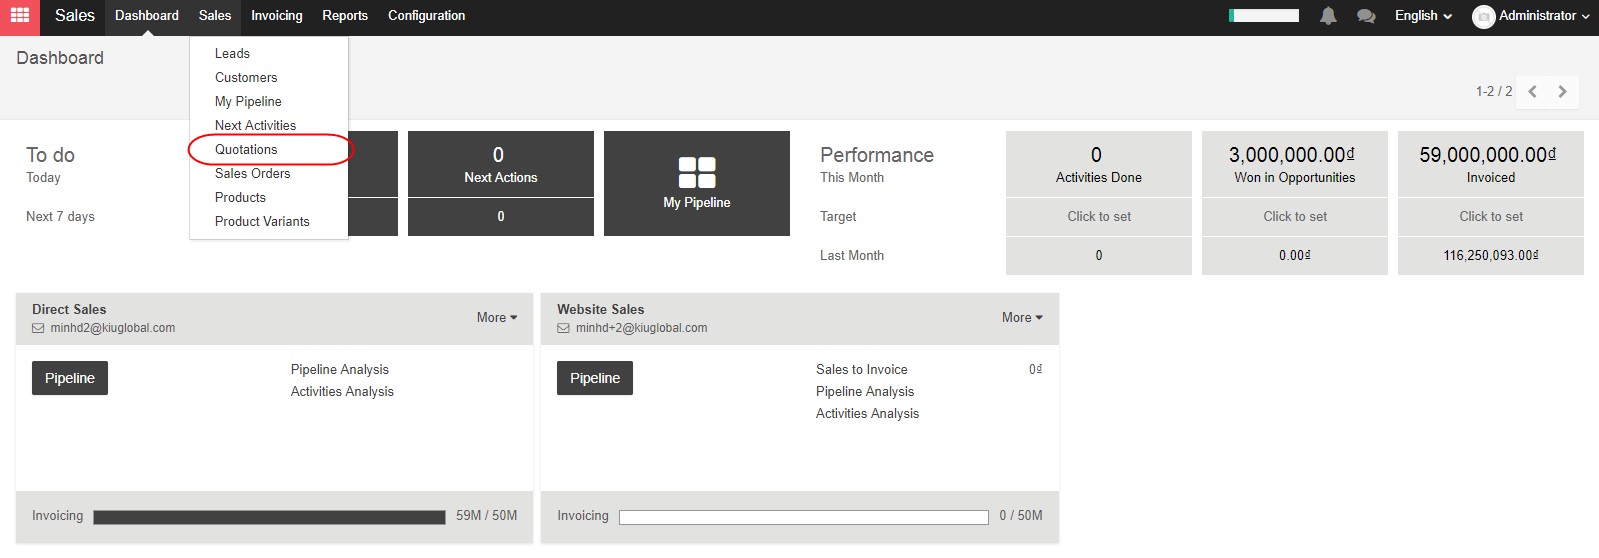
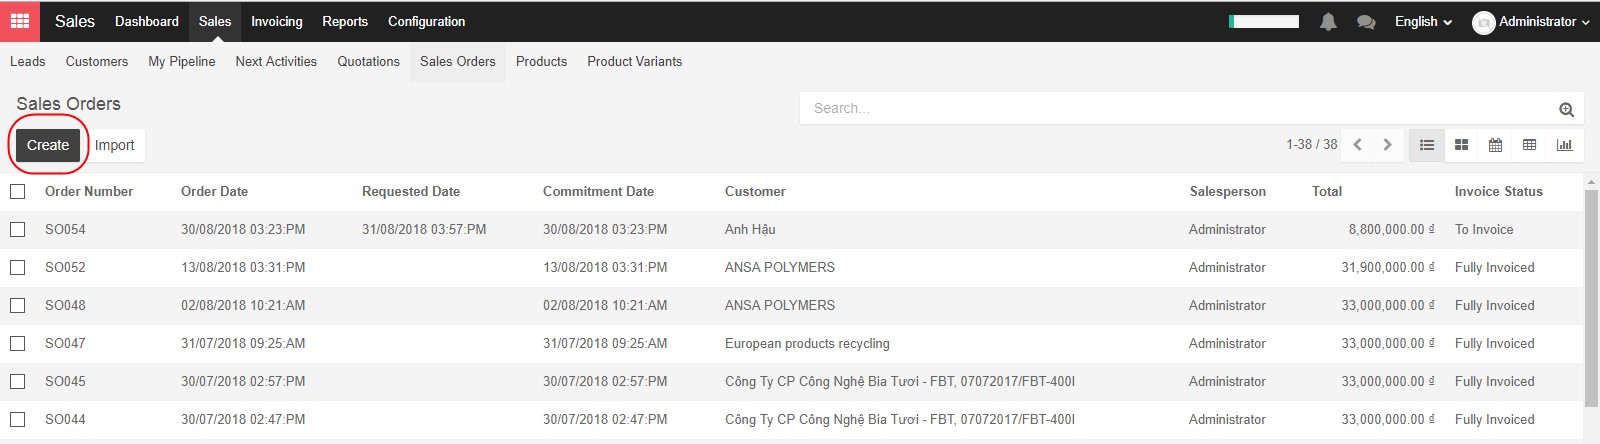
To create a new quotation, you can select the Sales drop down menu at the top, then click on Quotations.

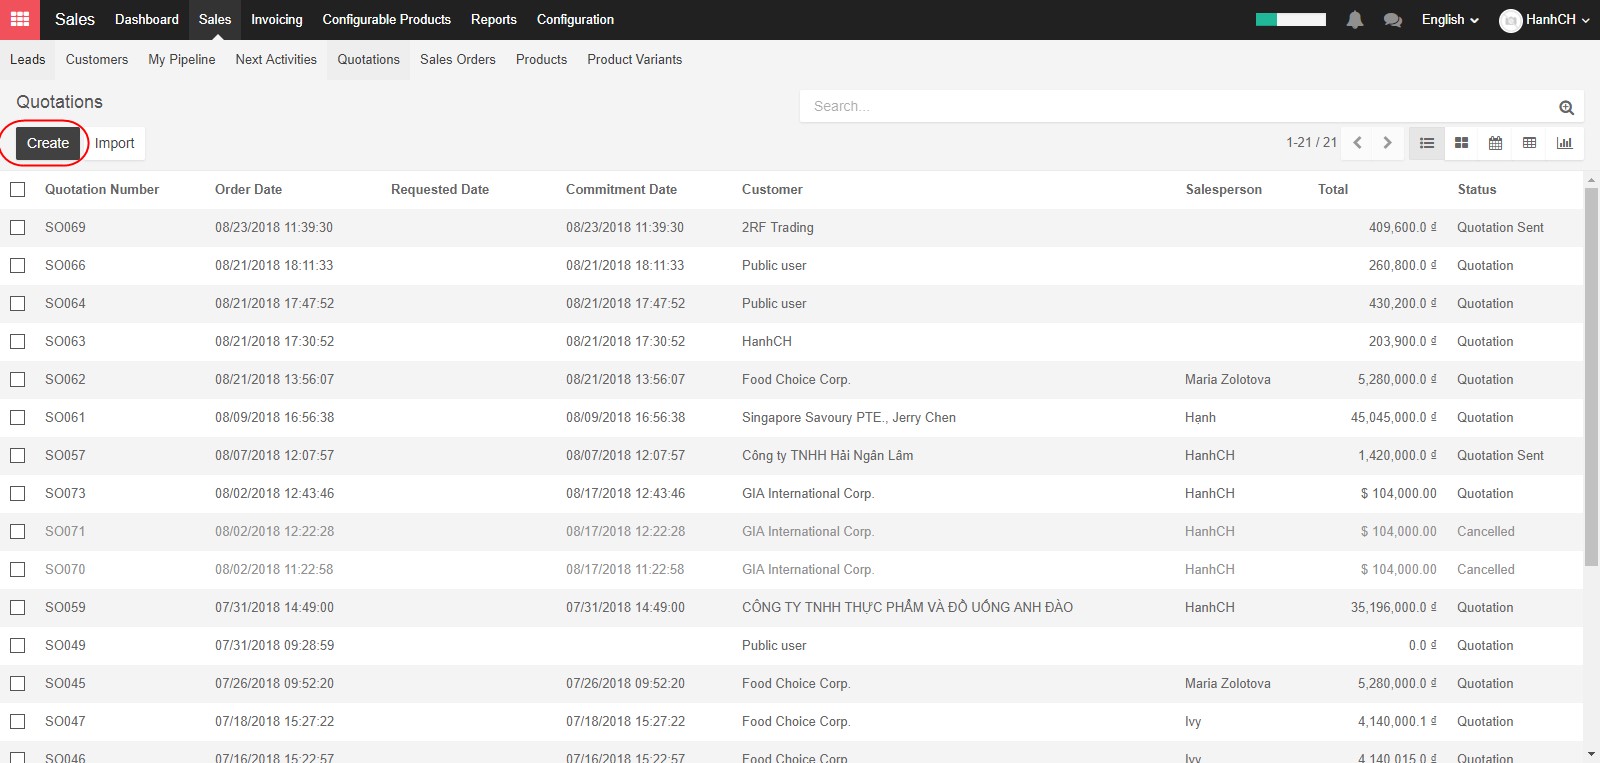
Click on Create on the top left corner to create a new quotation

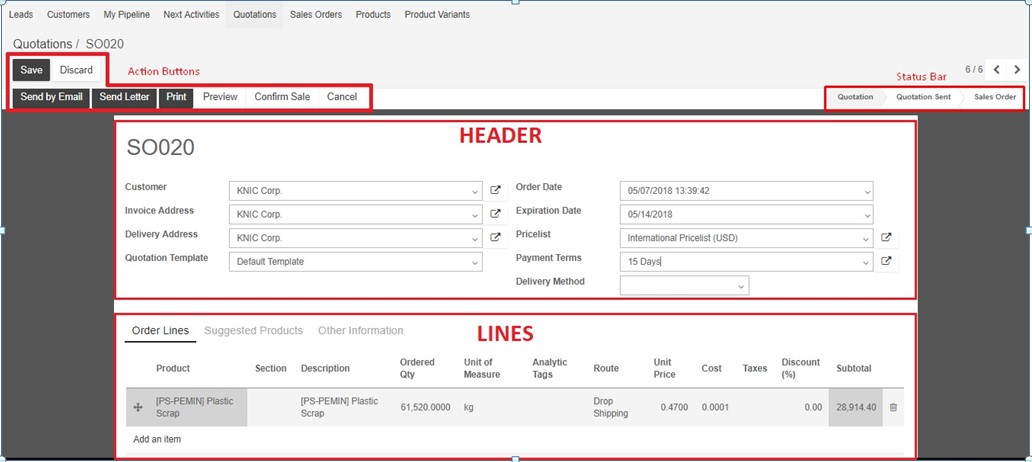
The basic elements to add to any quotation are the Customer and the Products you want to sell. Select a Customer from the first drop down menu. Their “Invoice Address and Shipping Address will automatically populate, if those were included when the Contact was created.

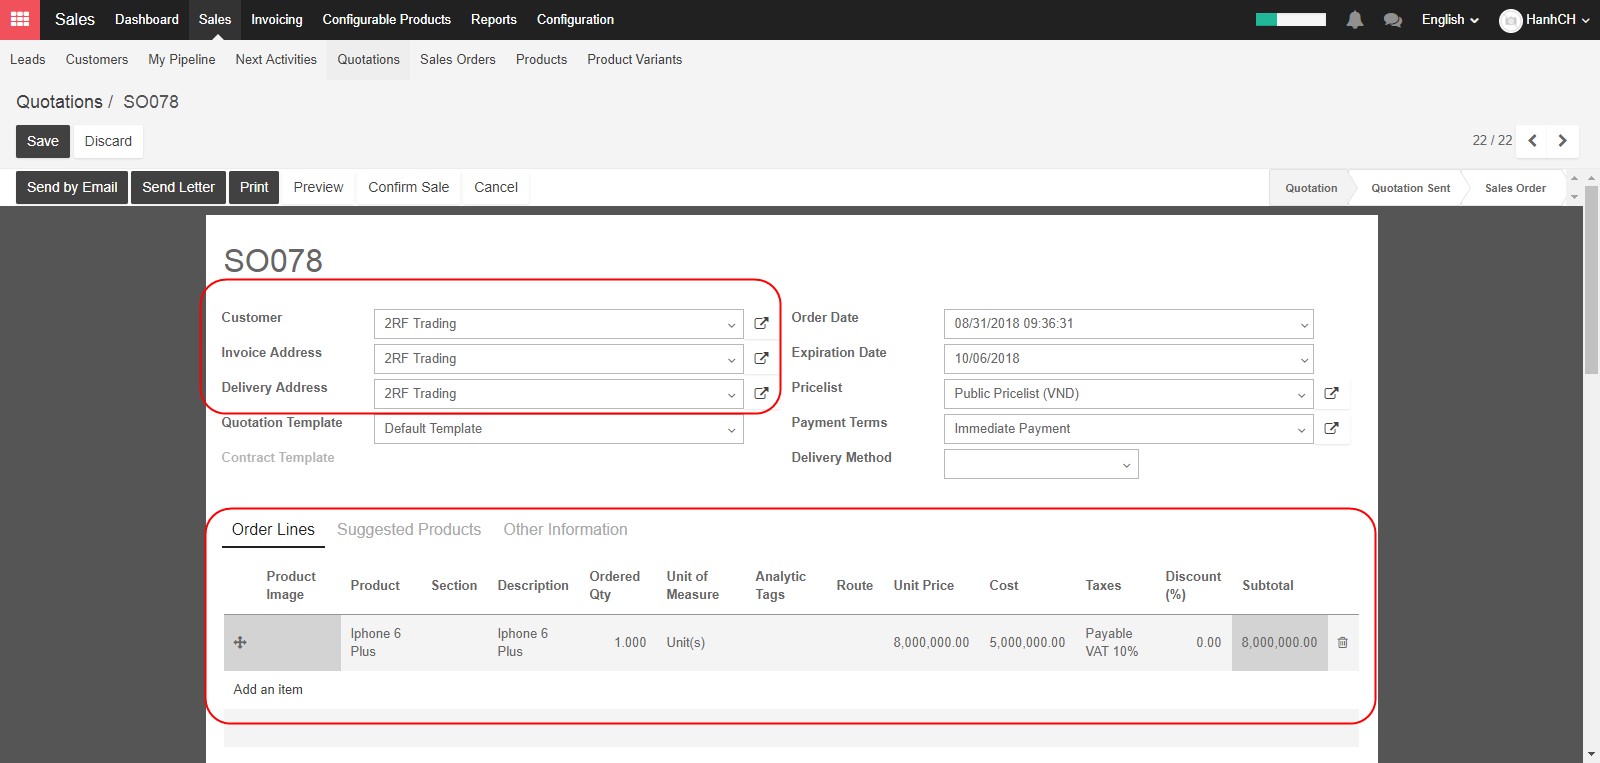
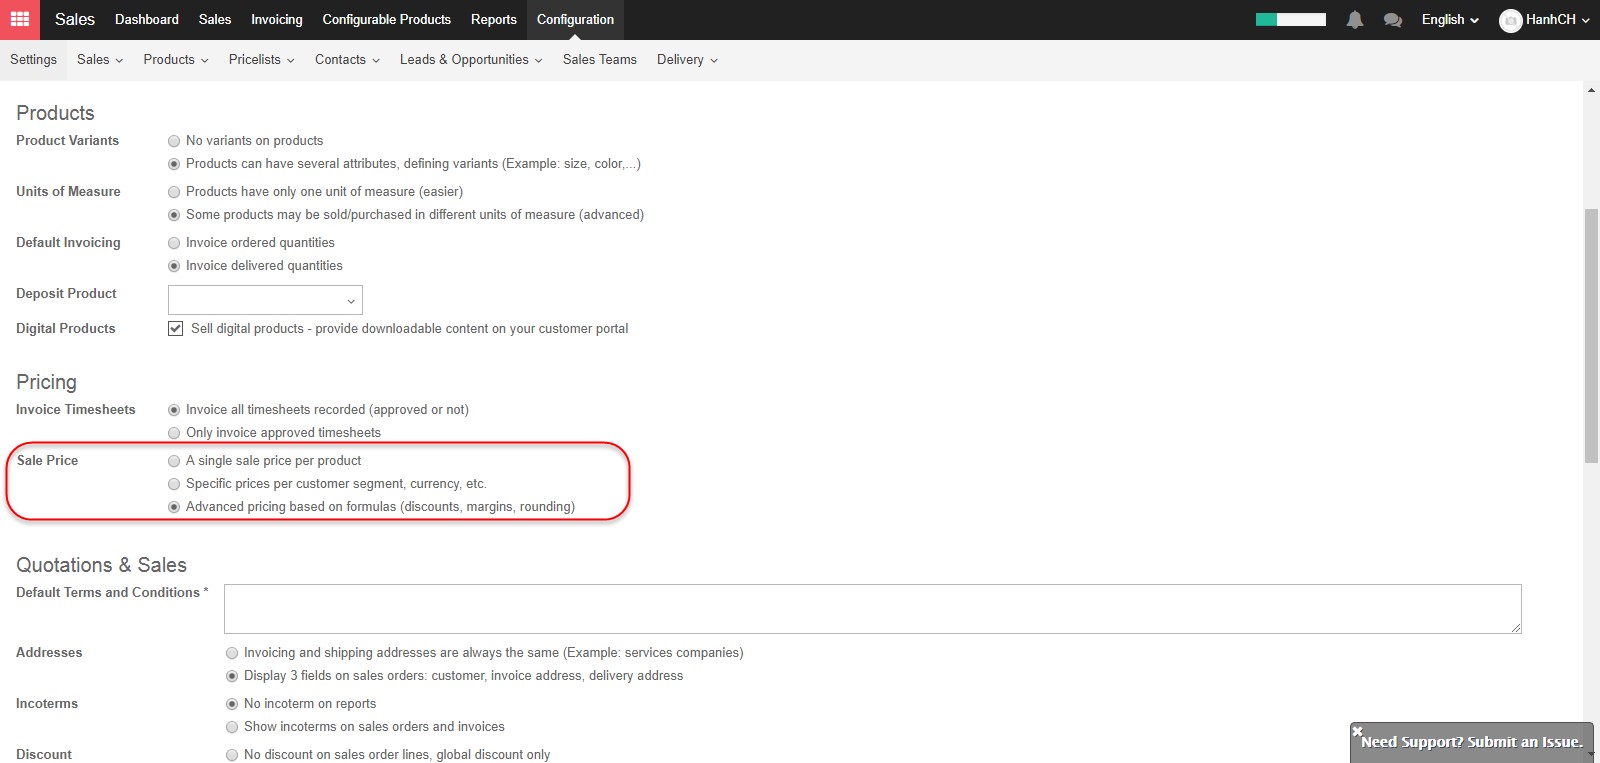
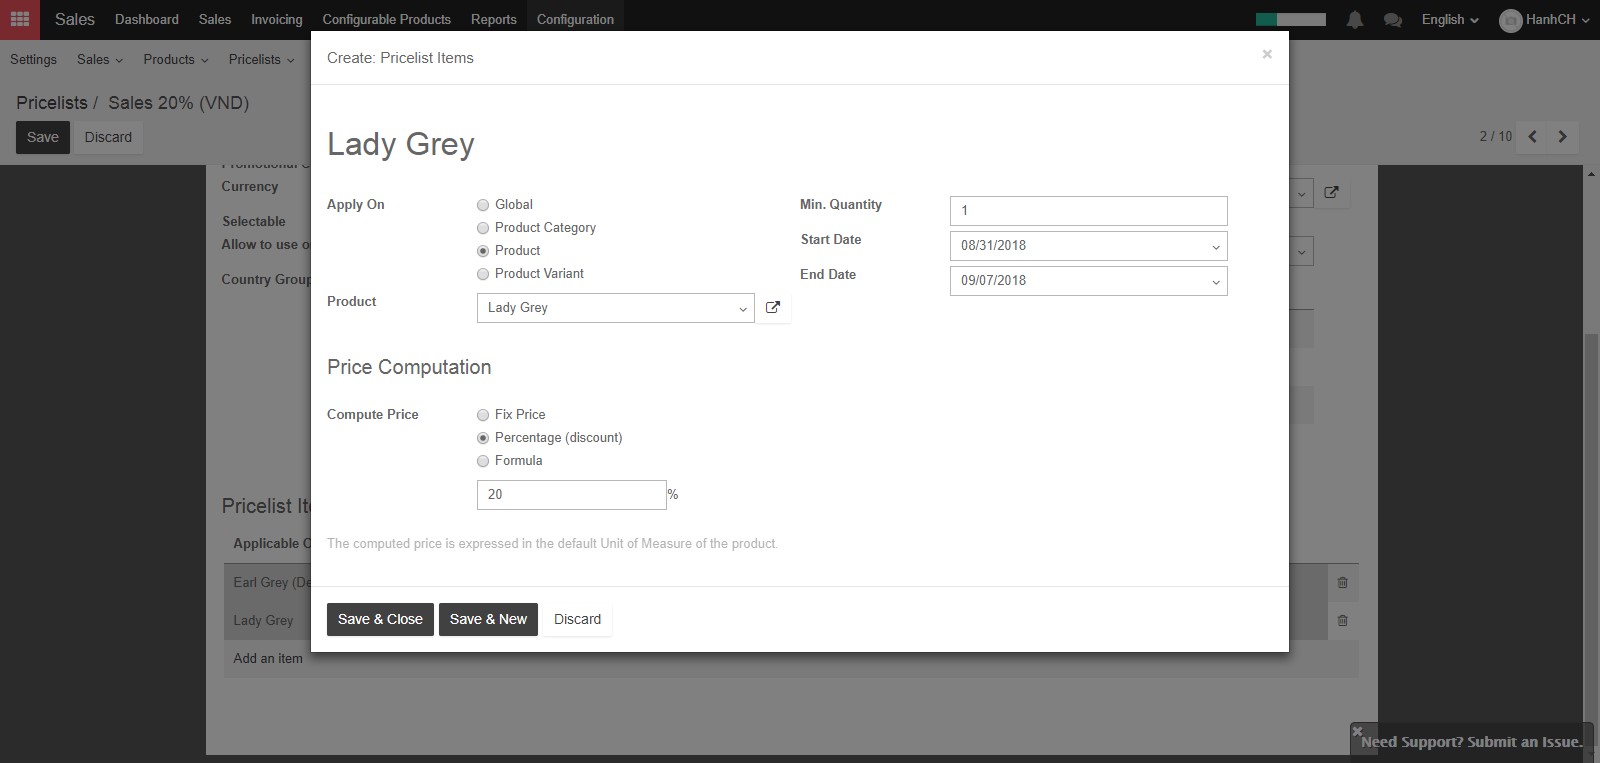
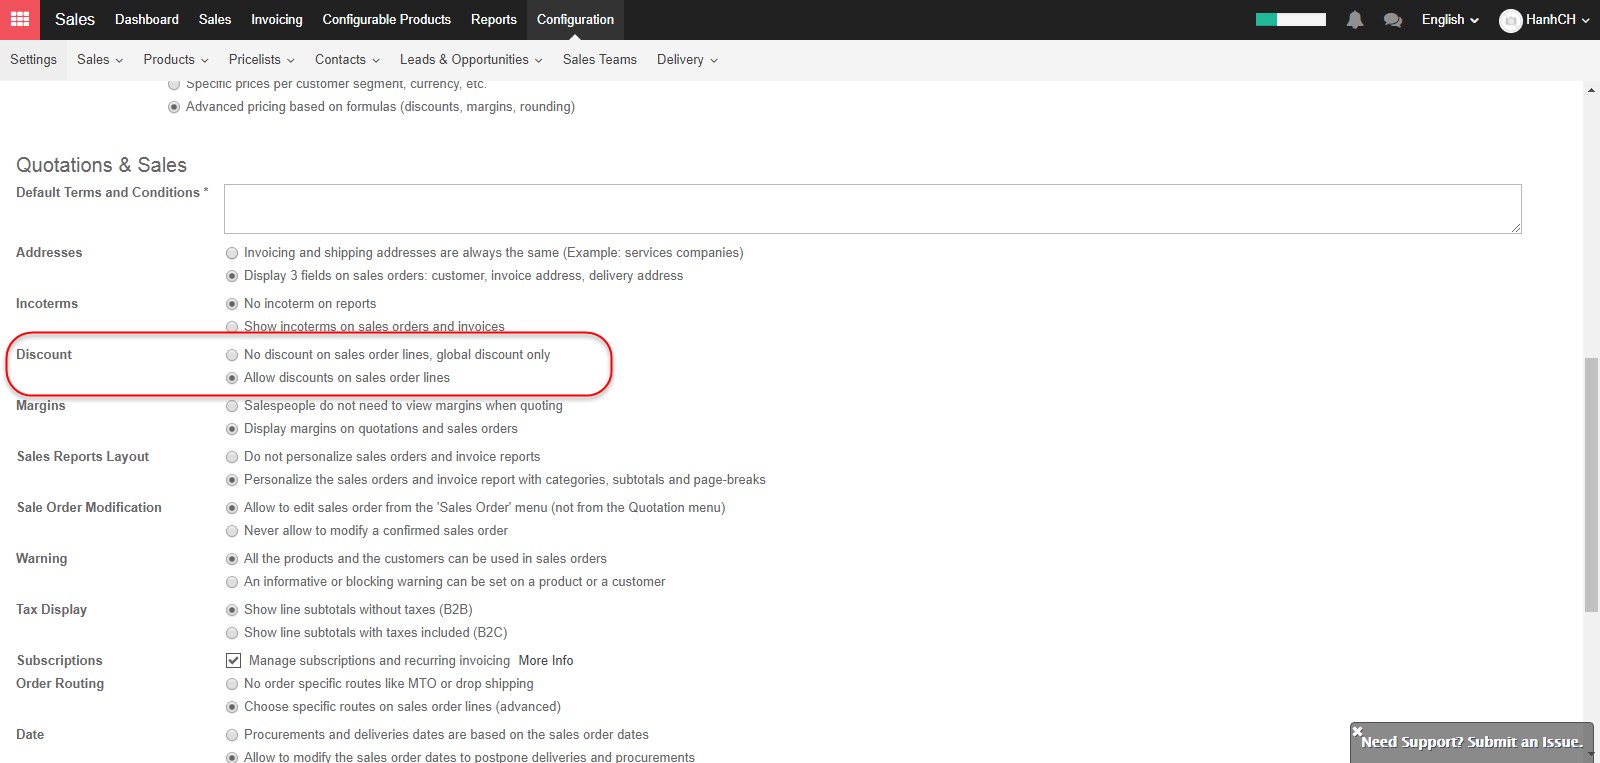
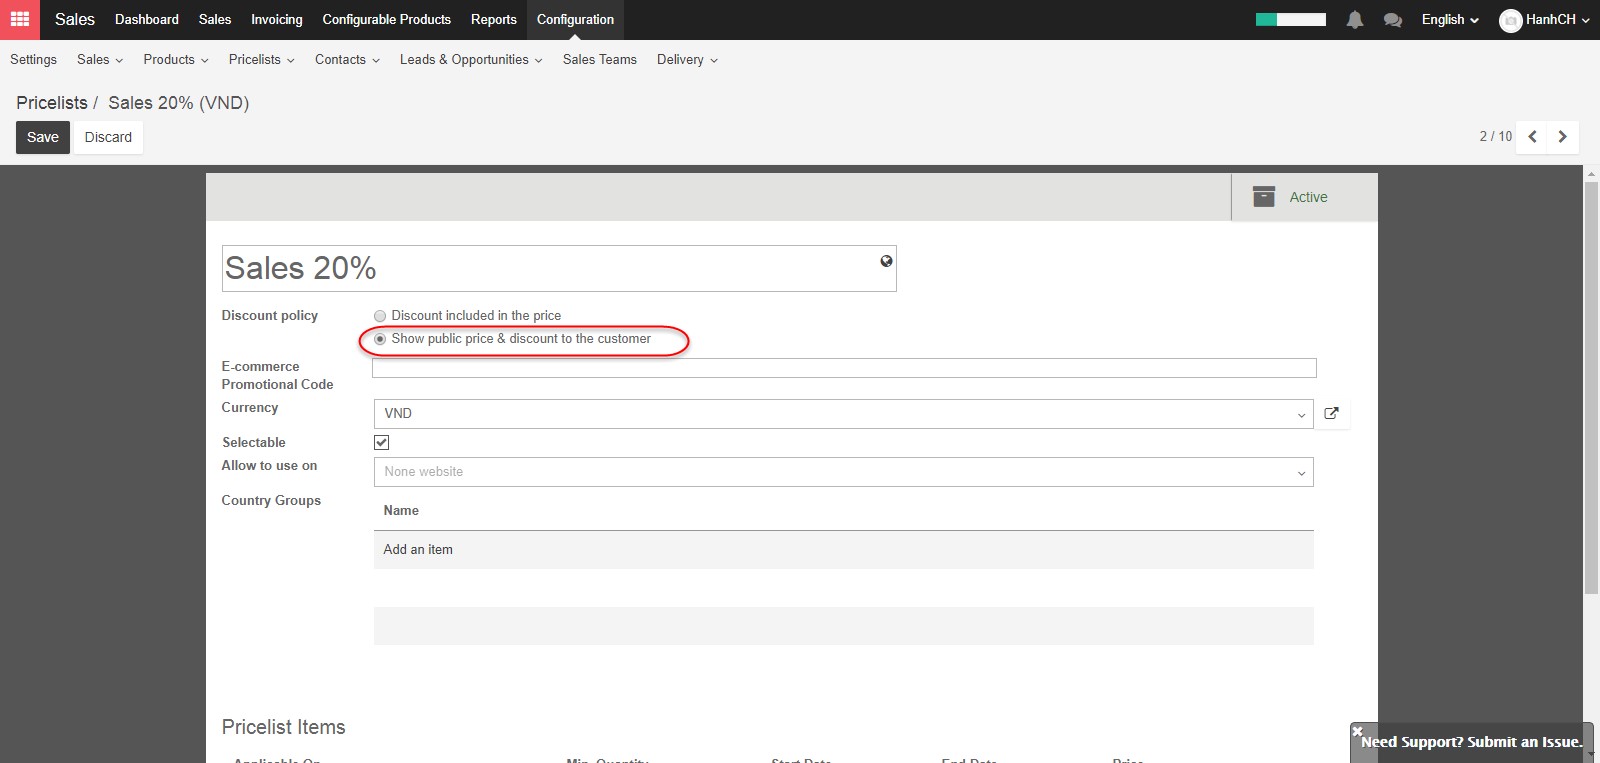
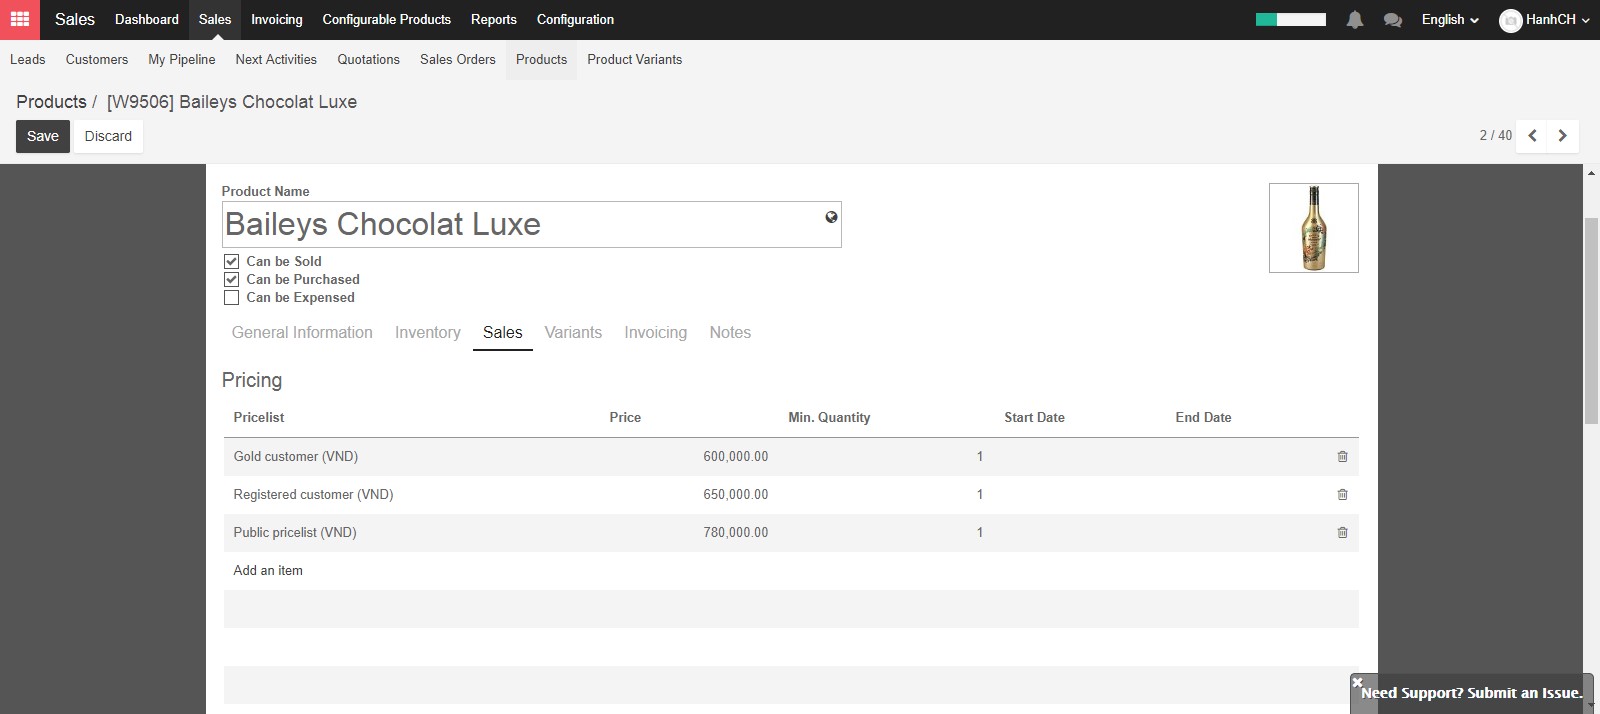
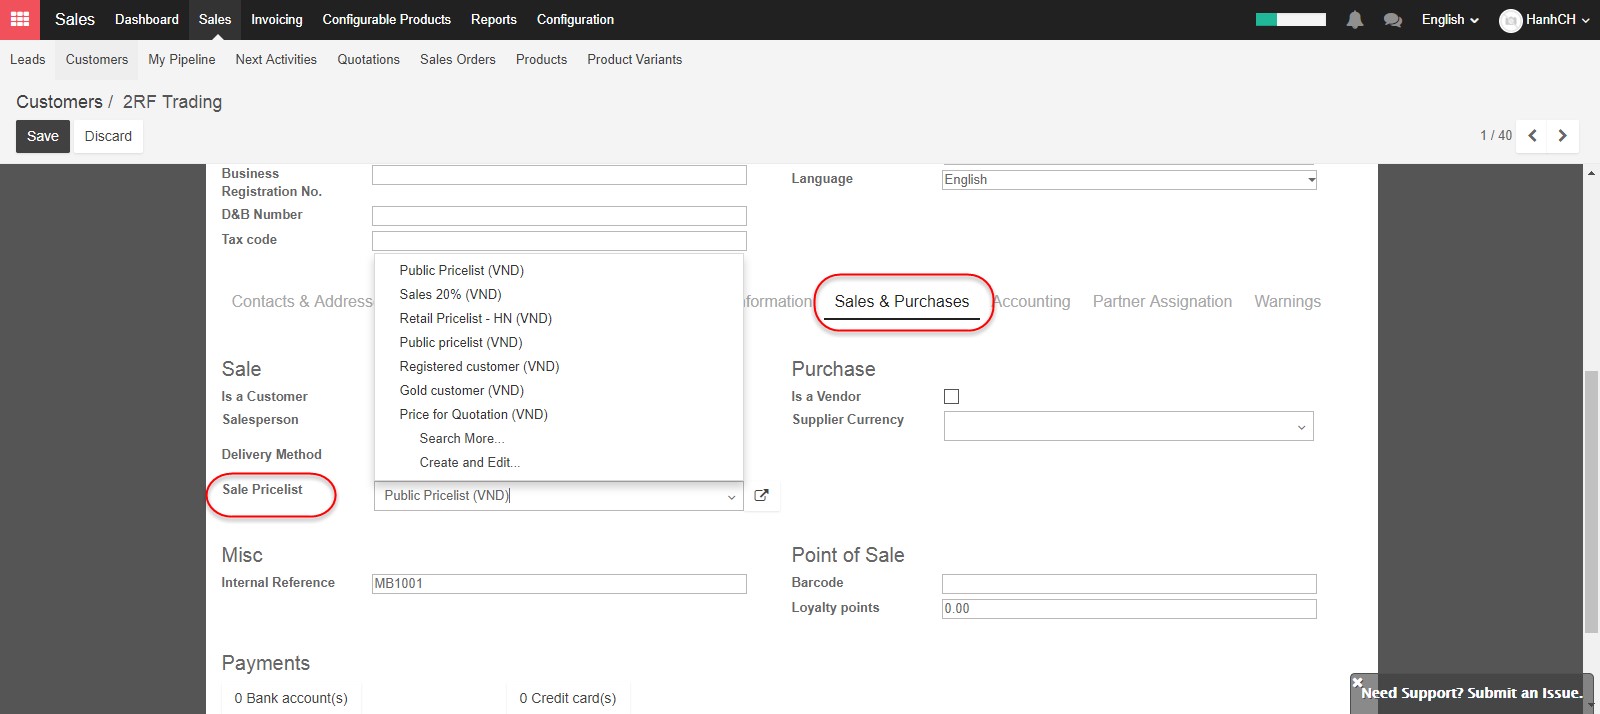
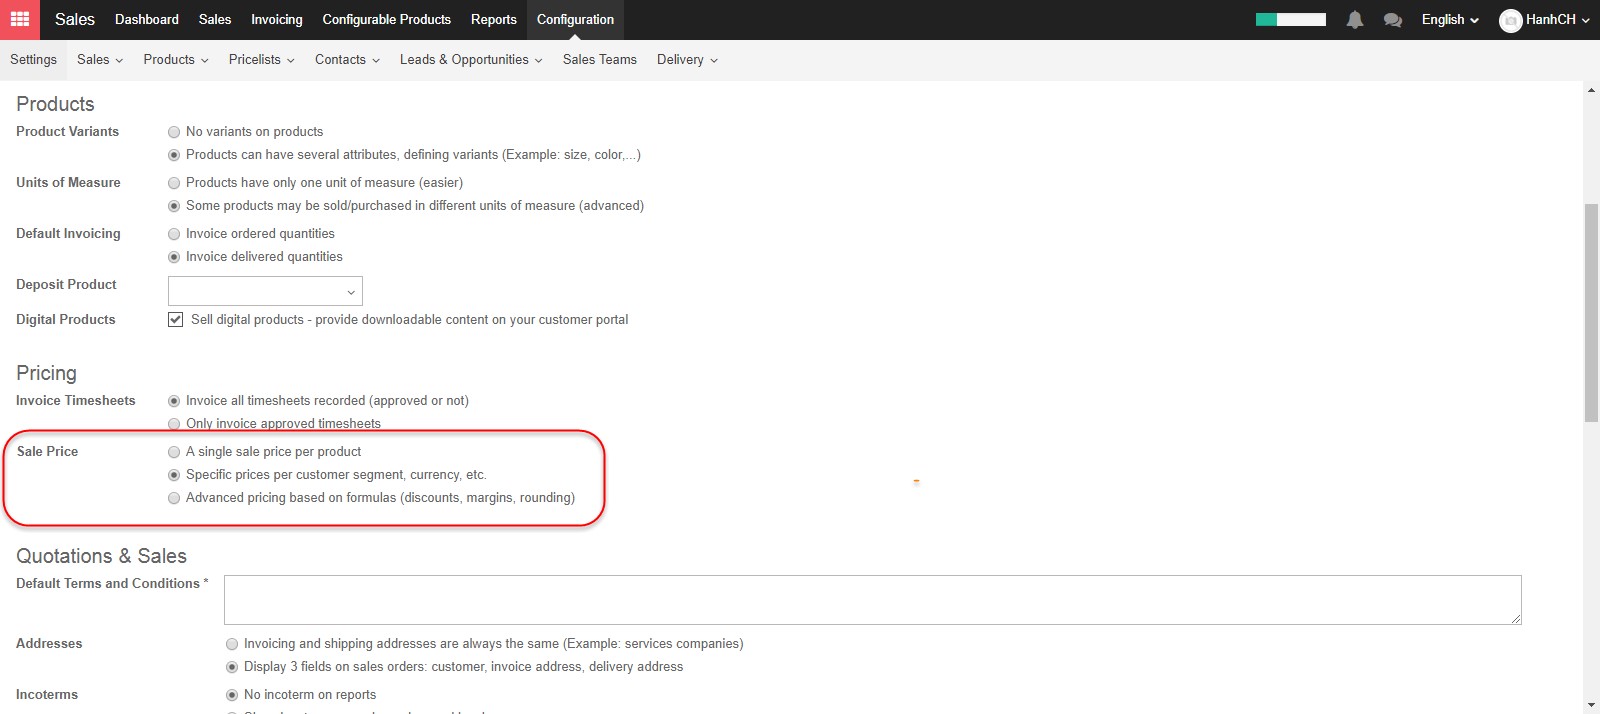
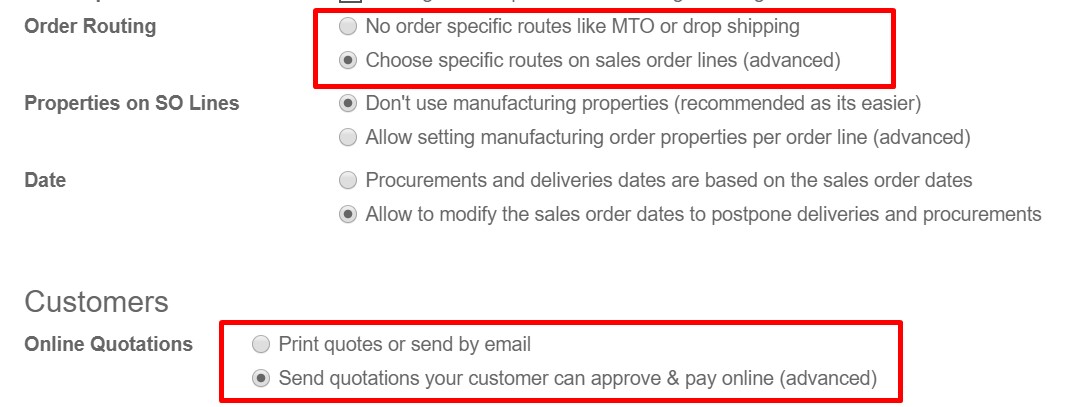
The Expiration Date field is the date your quote will be valid until. You can add Payment Terms such as 15 Days, 30 Days or Immediate Payment. KIU has a powerful Price list feature to support a pricing strategy tailored to your business. A pricelist is a list of prices or price rules that KIU searches to determine the suggested price. You can set several criteria to use a specific price: periods, min. sold quantity (meet a minimum order quantity and get a price break), etc. Detailed guidance for how to create a pricelist can be found in 3.5. Sales Price list.

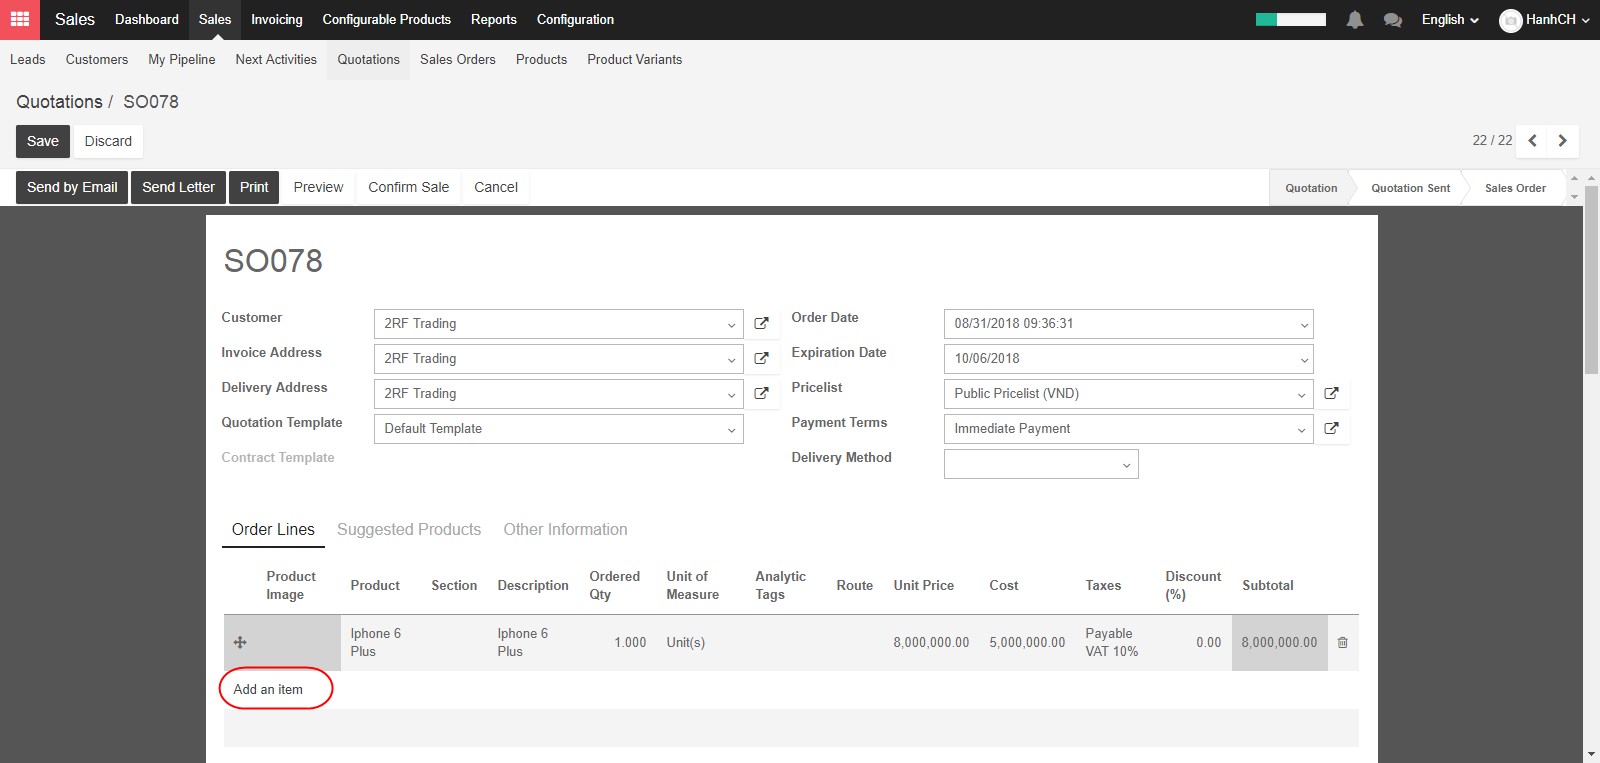
On the Order Lines tab, you can include the products or services you will sell by clicking Add an Item.

This will bring up the Create Order Lines window. Select the product you plan to quote from the Products drop down menu or type a few letters to see suggestions appear.

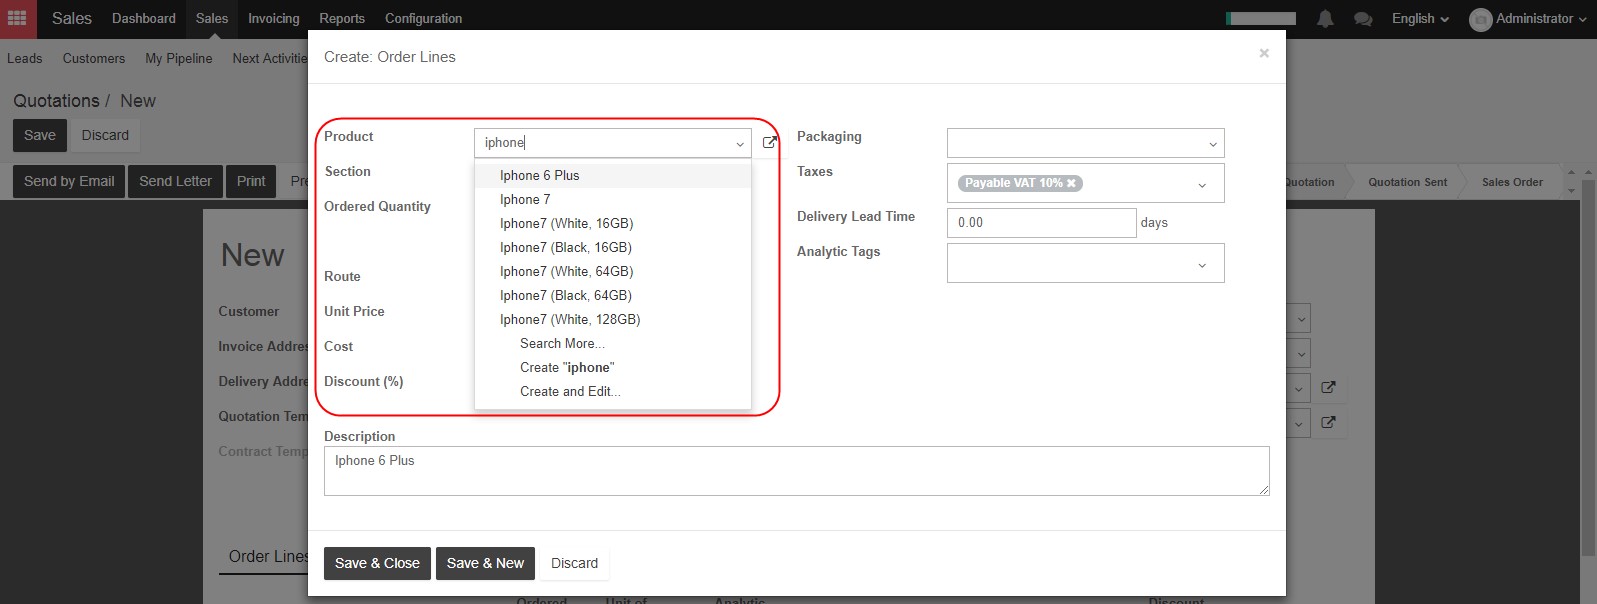
The Section field allows you to select either a Service or Material. When you send this quotation to your customer the lines will be separated into Services and Materials. with subtotals for each section.

Add the number you plan to sell in the Ordered Quantity and select the appropriate unit of sale. You can also add Packaging, Taxes, and Analytic Tags here. The Delivery Lead Time field will tell the customer how many days after they confirm their order that you will ship that order. Make sure to add the price at which you will sell to the Unit Price field, and add any discounts to the Discount Percentage field. You can also type a description of the product for your customer here.

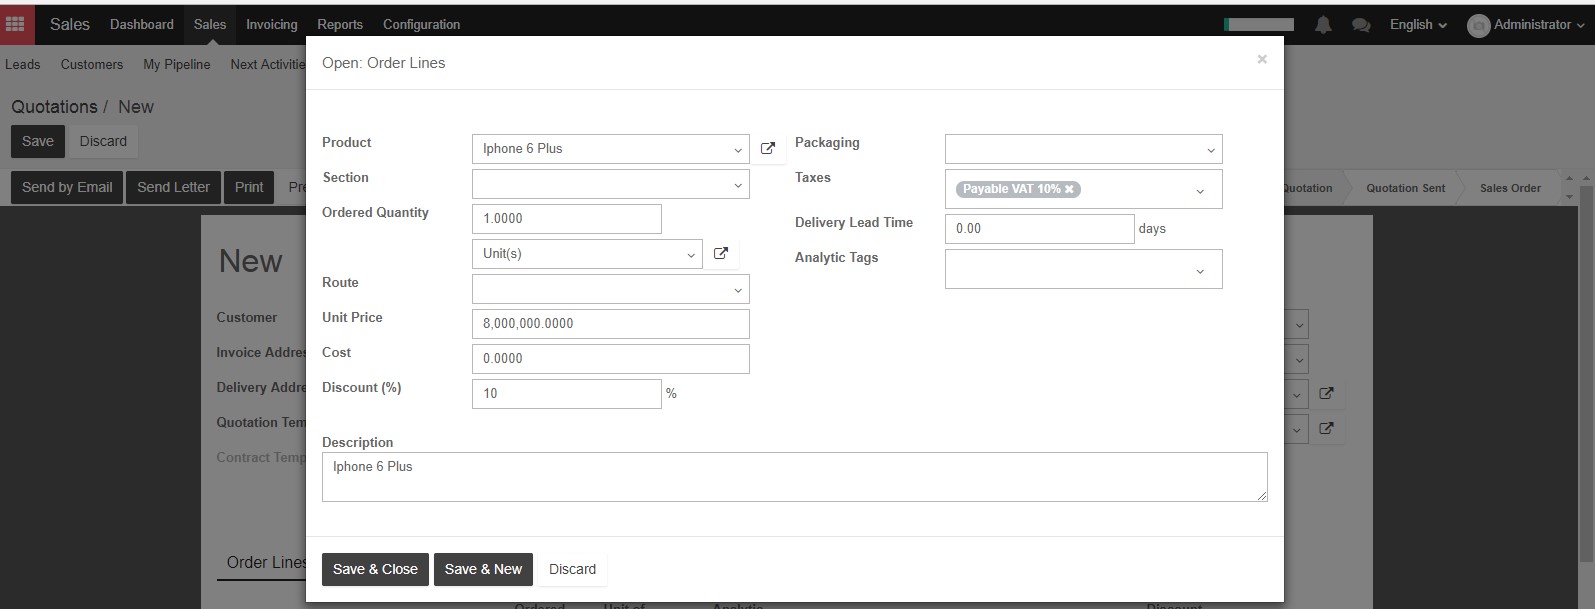
When you’ve finished entering all of the information for this product, you may click Save and Close or if you want to add another product to the quotation you can click “Save and New”.

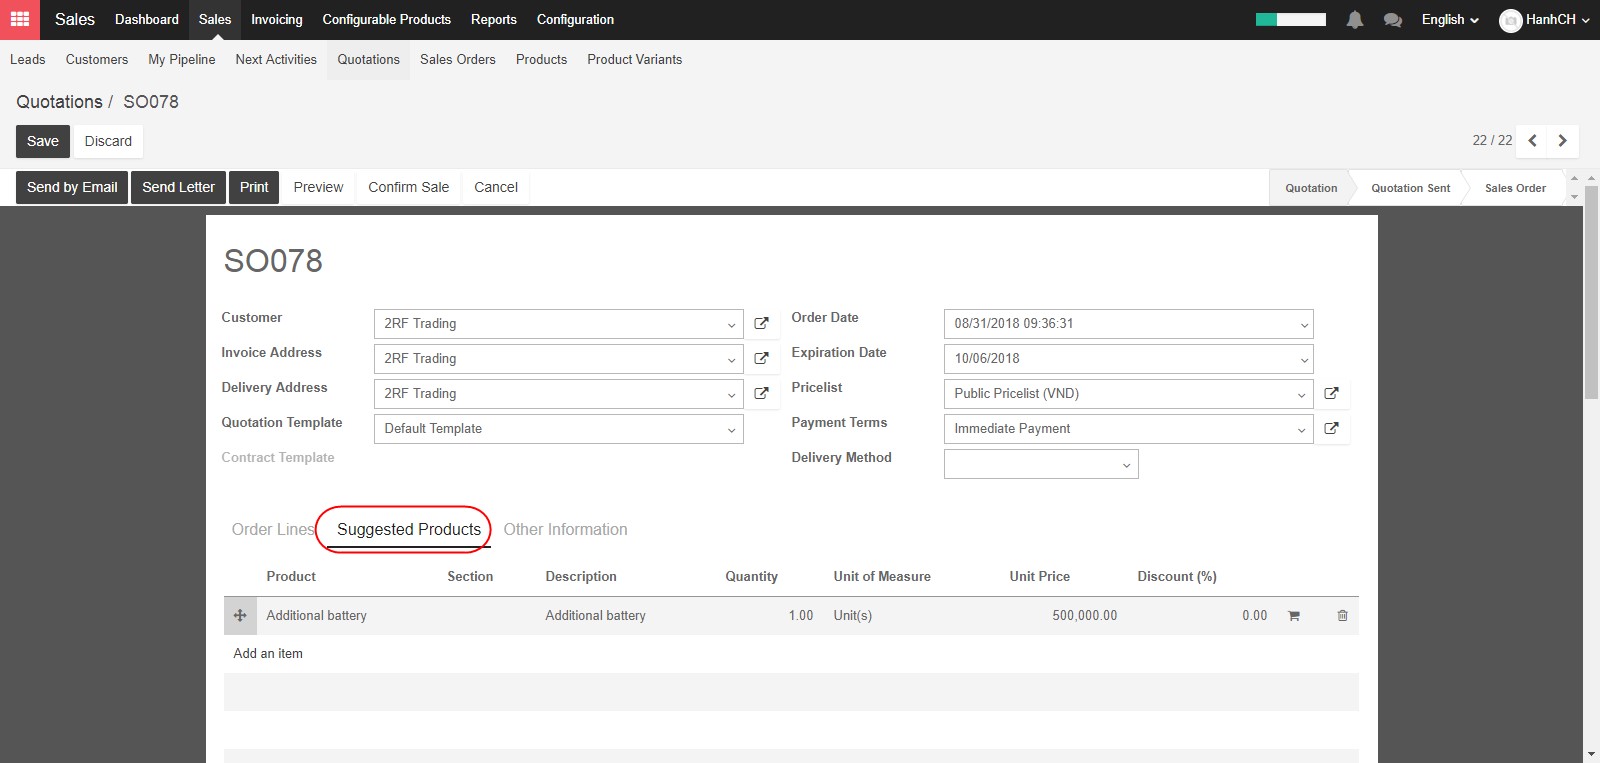
Let’s move to the Suggested Products tab. In the Suggested Products tab, you can choose to add other products that your customer may think would be useful to the quotation. If we are selling Iphone to a customer, an Additional Battery might be a good suggested product, if we were to stock those as well

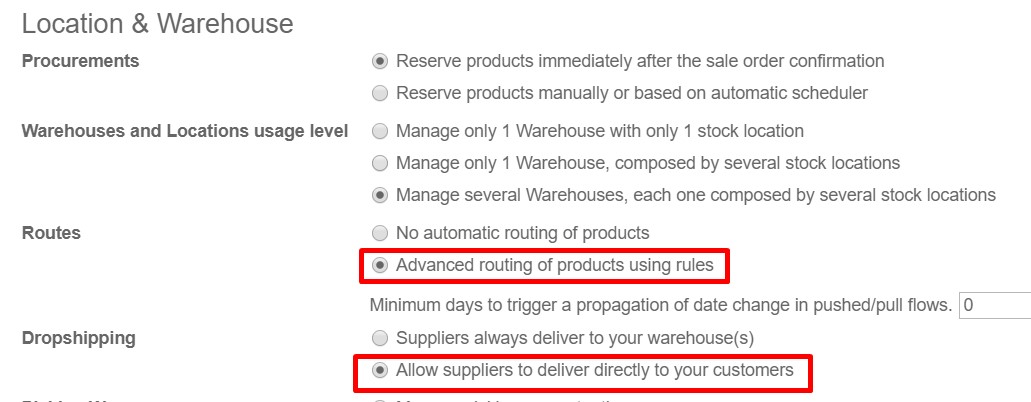
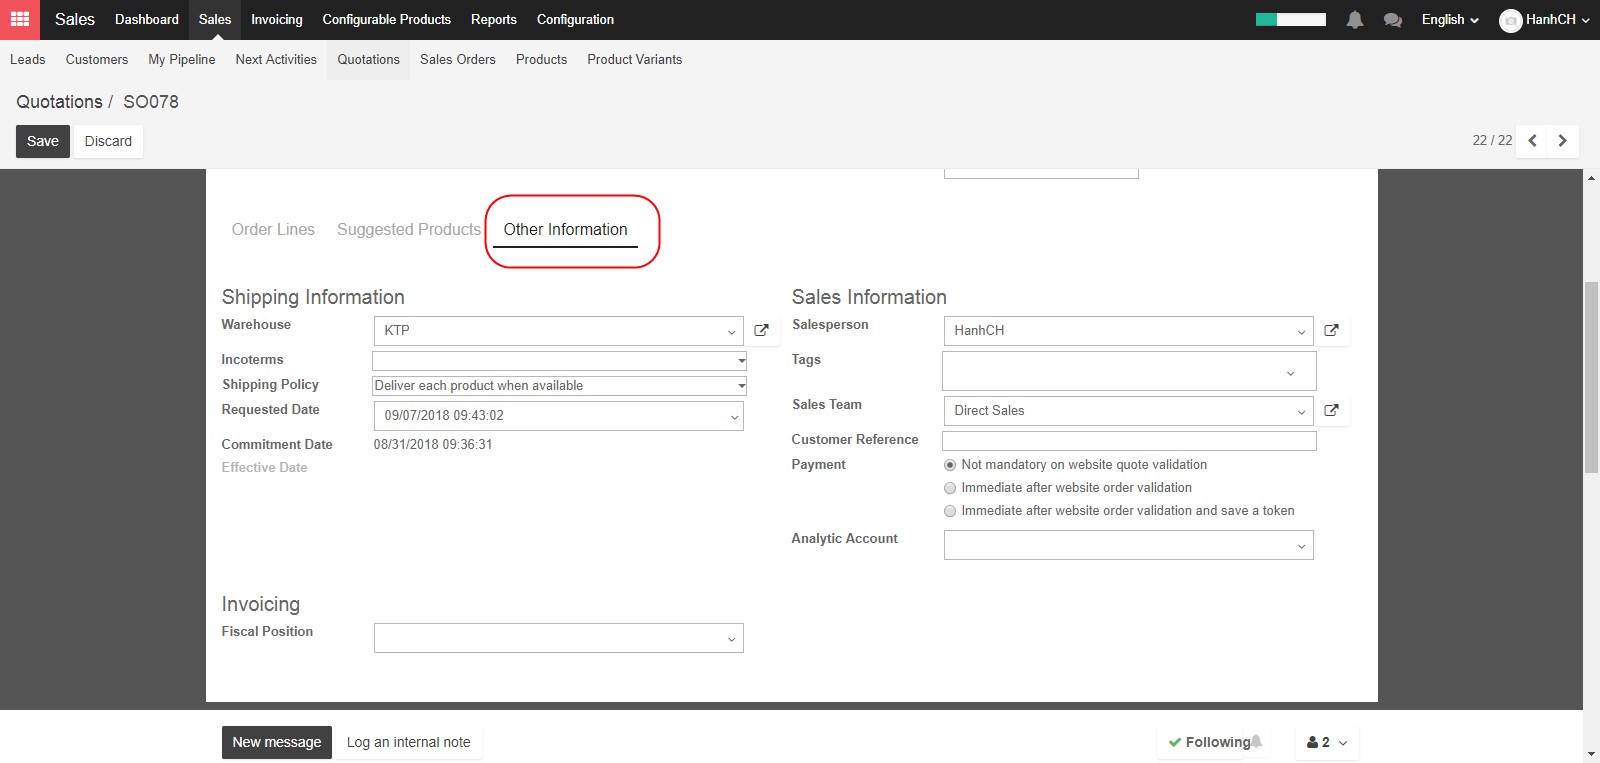
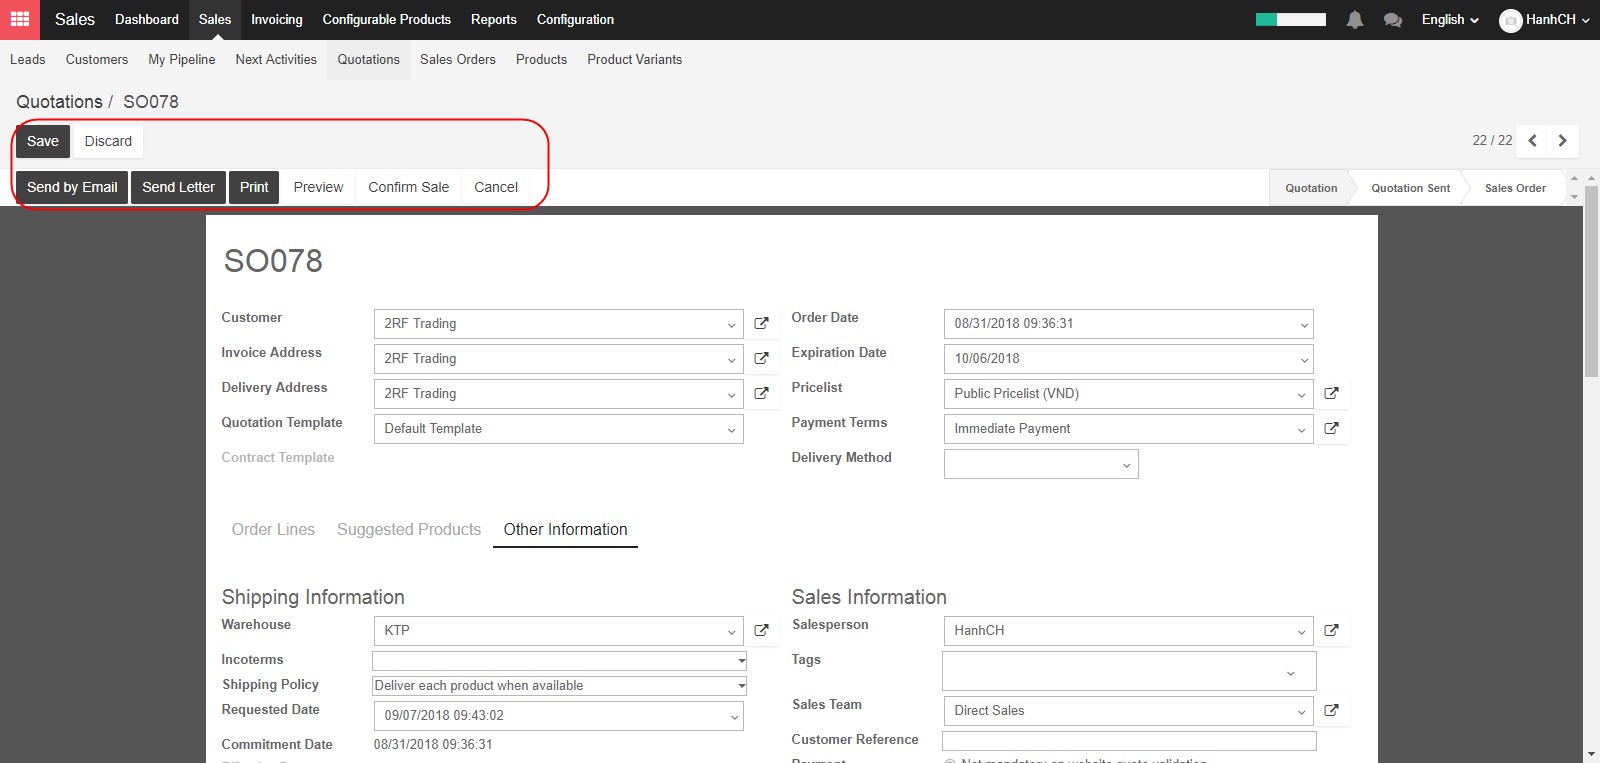
Now let’s look at the Other Information tab. Here, you can fill in the remaining fields where appropriate, as follows. Under Shipping Information include the Departure Warehouse and any Incoterms. You can select a shipping policy, in this case either Deliver each product when available or Deliver all products at once. The requested date is the date by which your customer has requested the items to be delivered. If you want to deliver as quickly as possible, leave this field blank. Under Sales Information you should include a Salesperson, who can follow up with the quotations or with a sales order, and a Sales Team.

Once you’ve completed the Quotation, click Save at the top. You may also click Send by Email to send the quote to your customer, Print if you will deliver a paper copy, or Preview if you want to see how the quote will appear to your customer.

The status of the quotation will change to Quotation Sent in the top right of the screen.

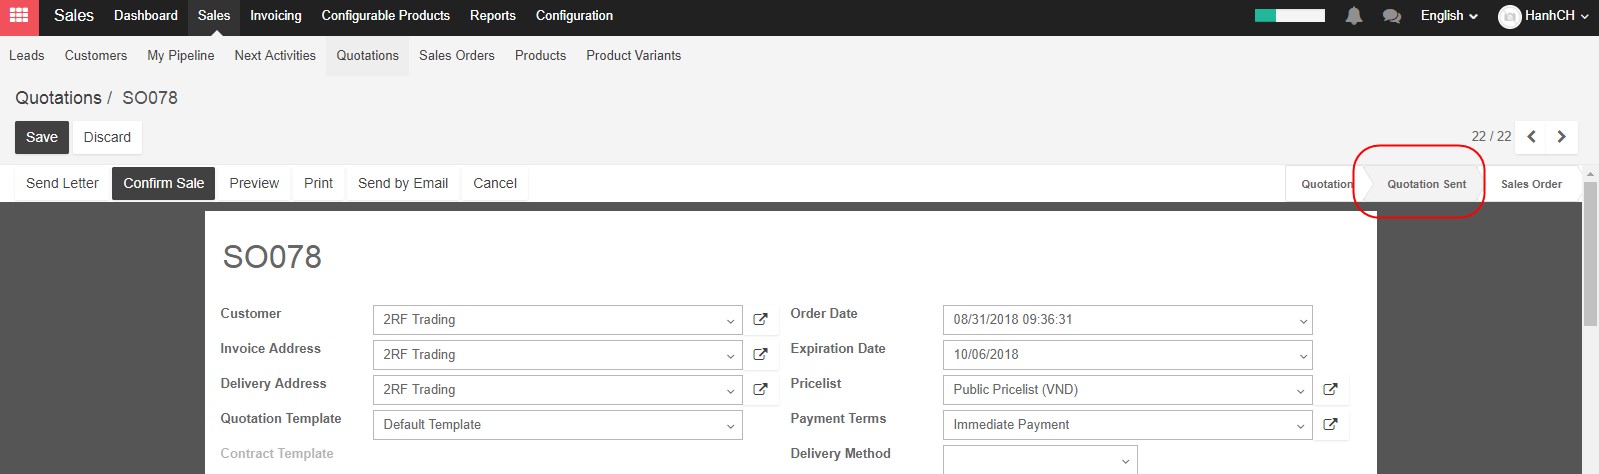
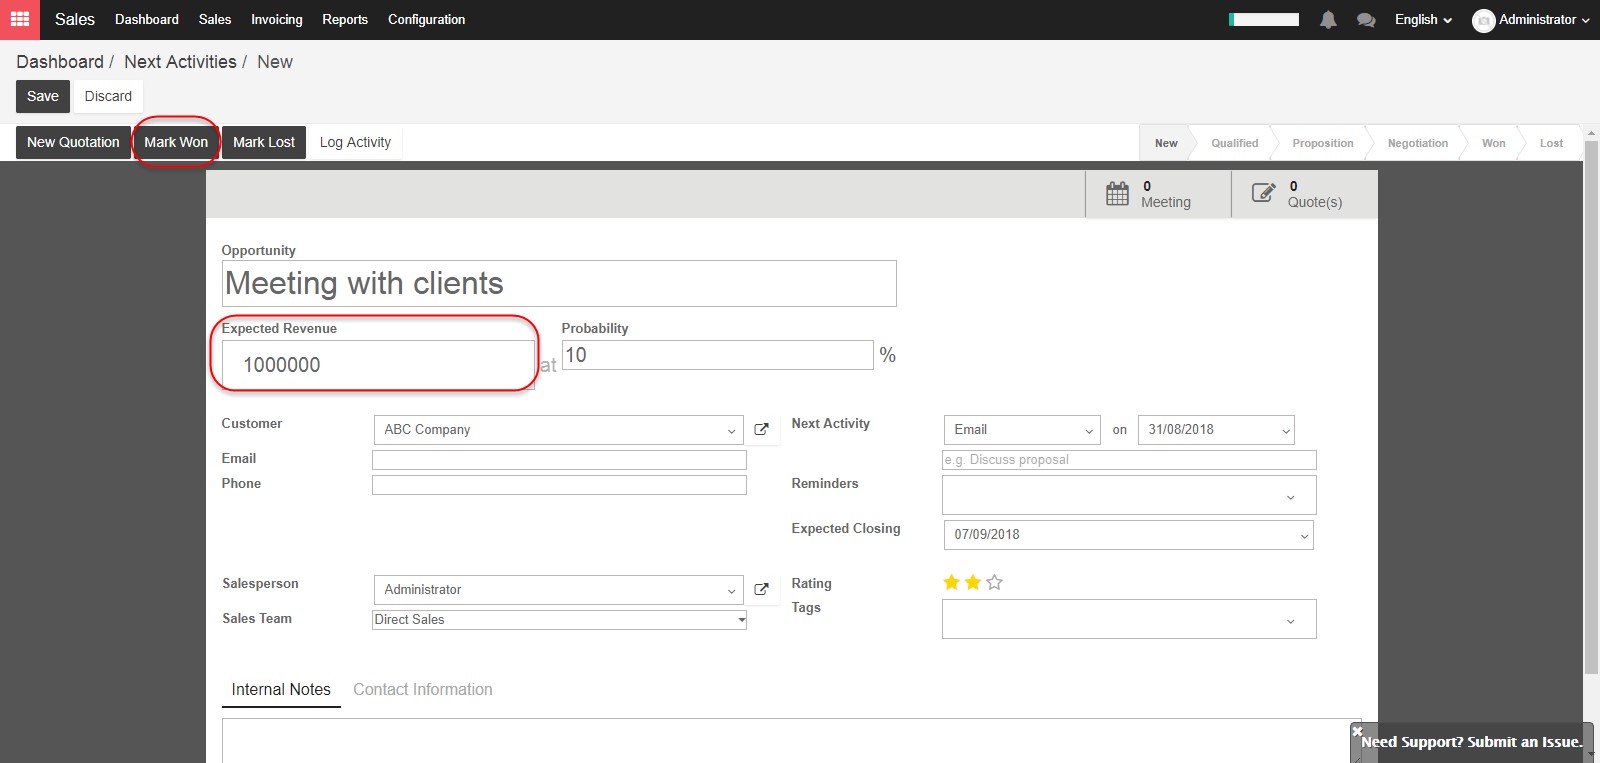
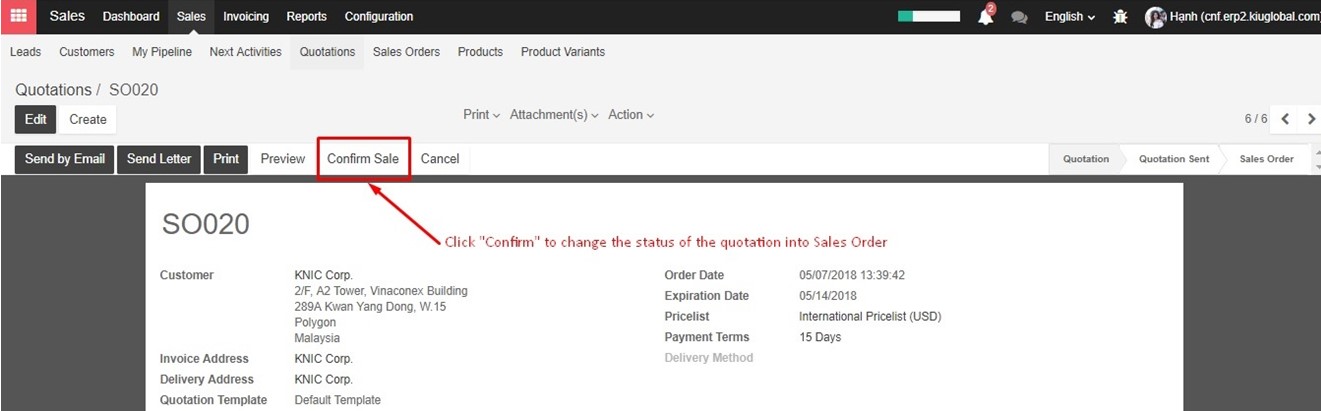
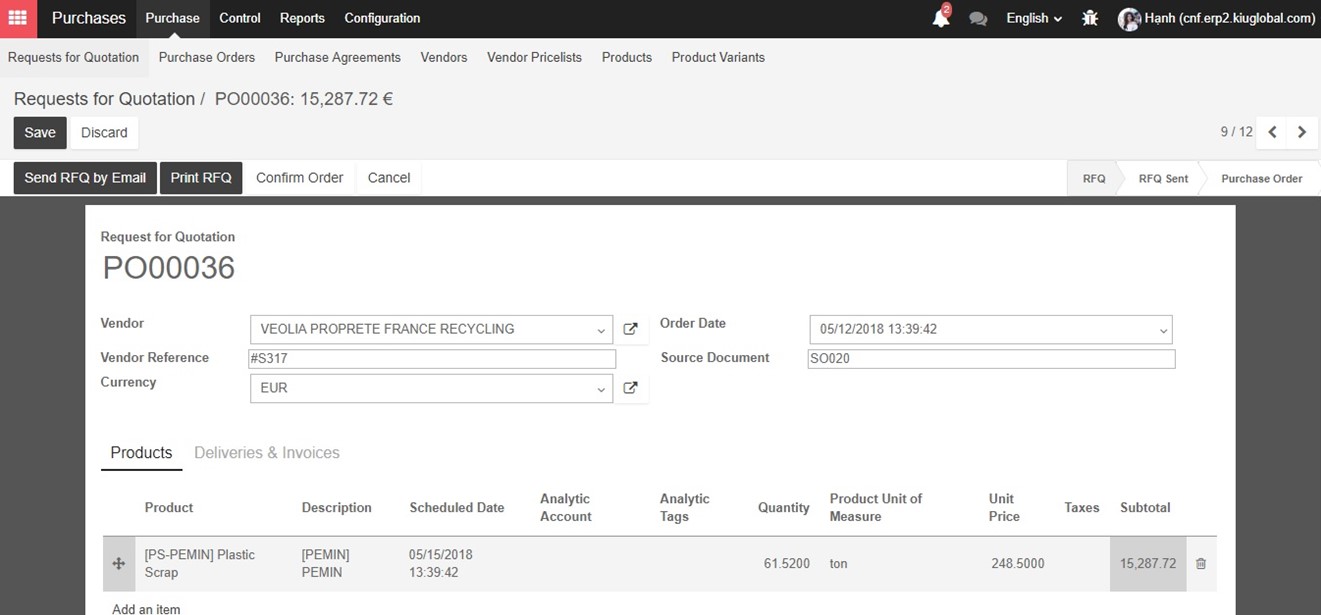
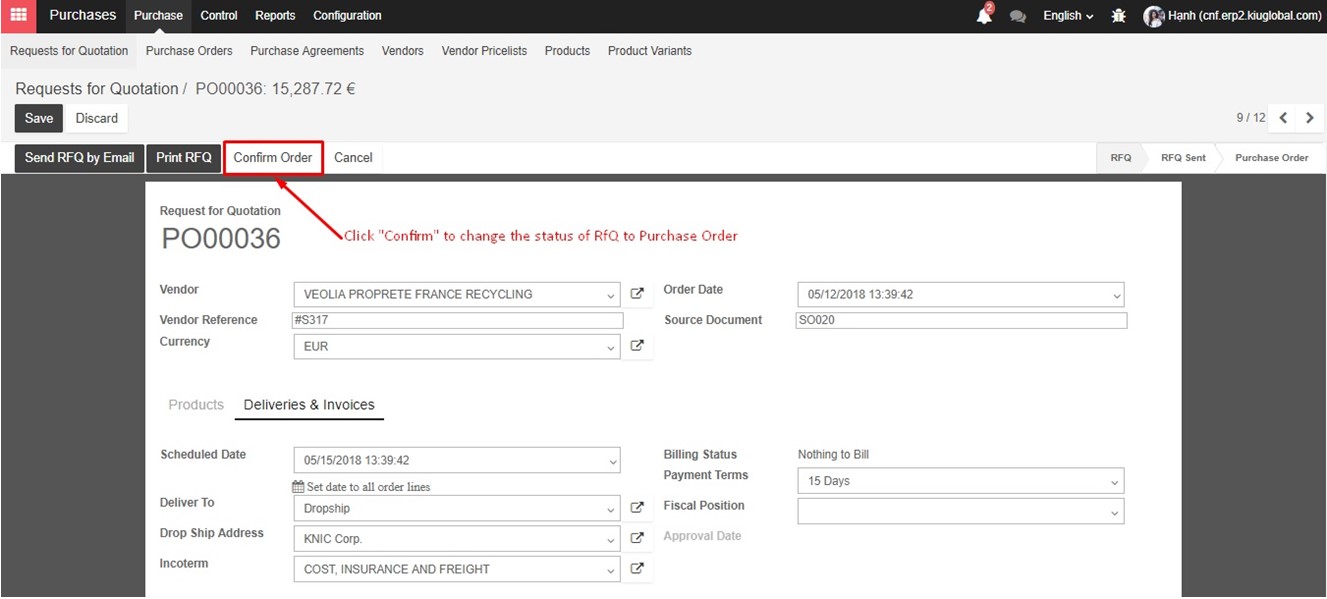
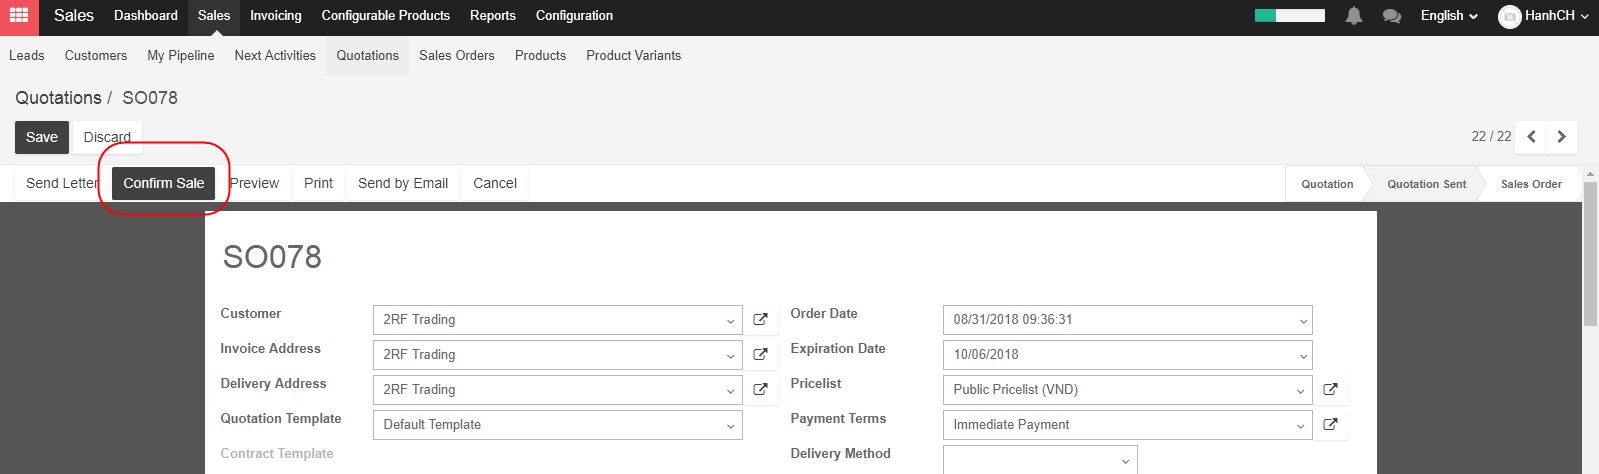
If the customer accept the conditions in the quotations, you can select Confirm Sale

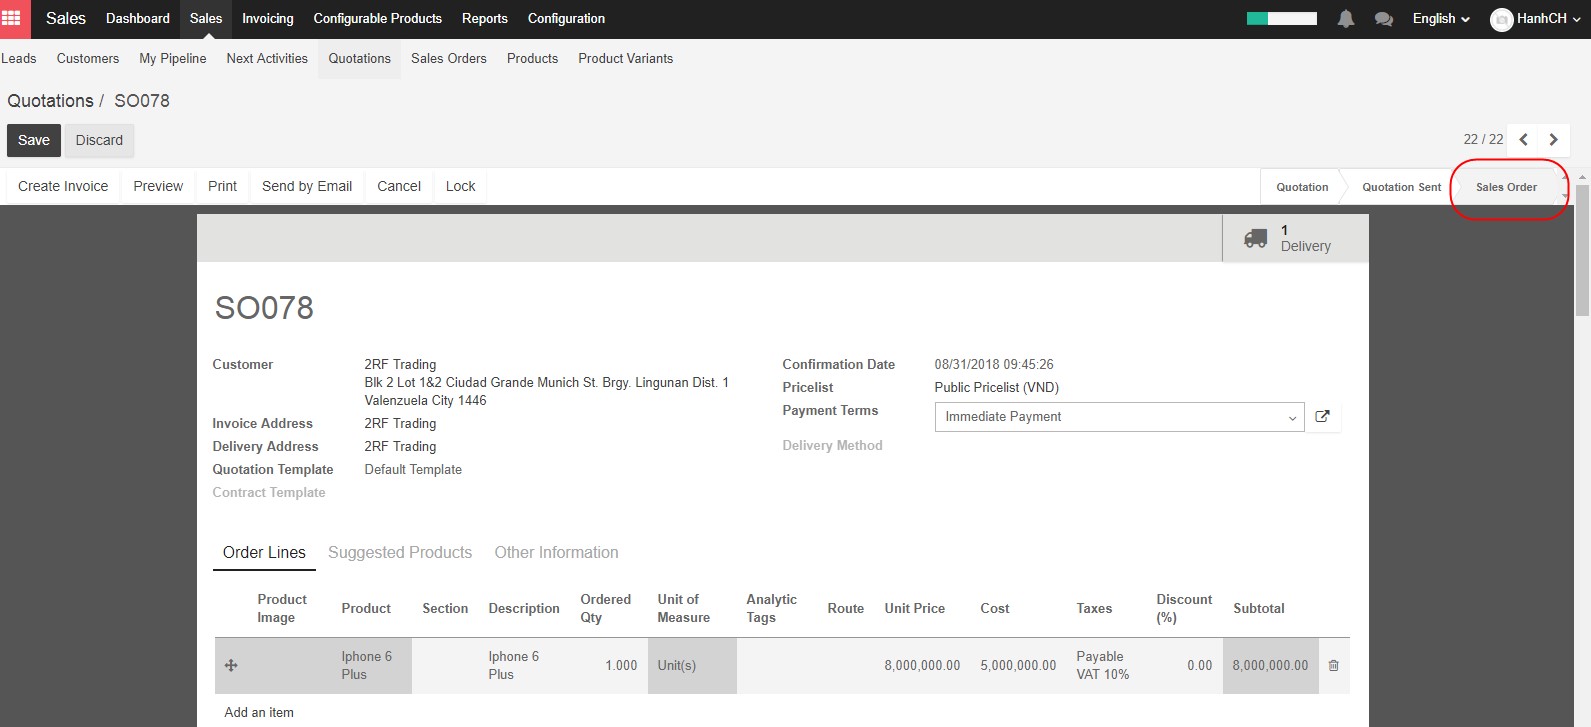
And this quotation will be transferred to Sales Order

You don’t have to start every order with a formal quotation. If you have an existing customer who is aware of your pricing, or who contacts you directly to sell them one of your products, you can create a Sales Order to start a new sales process.

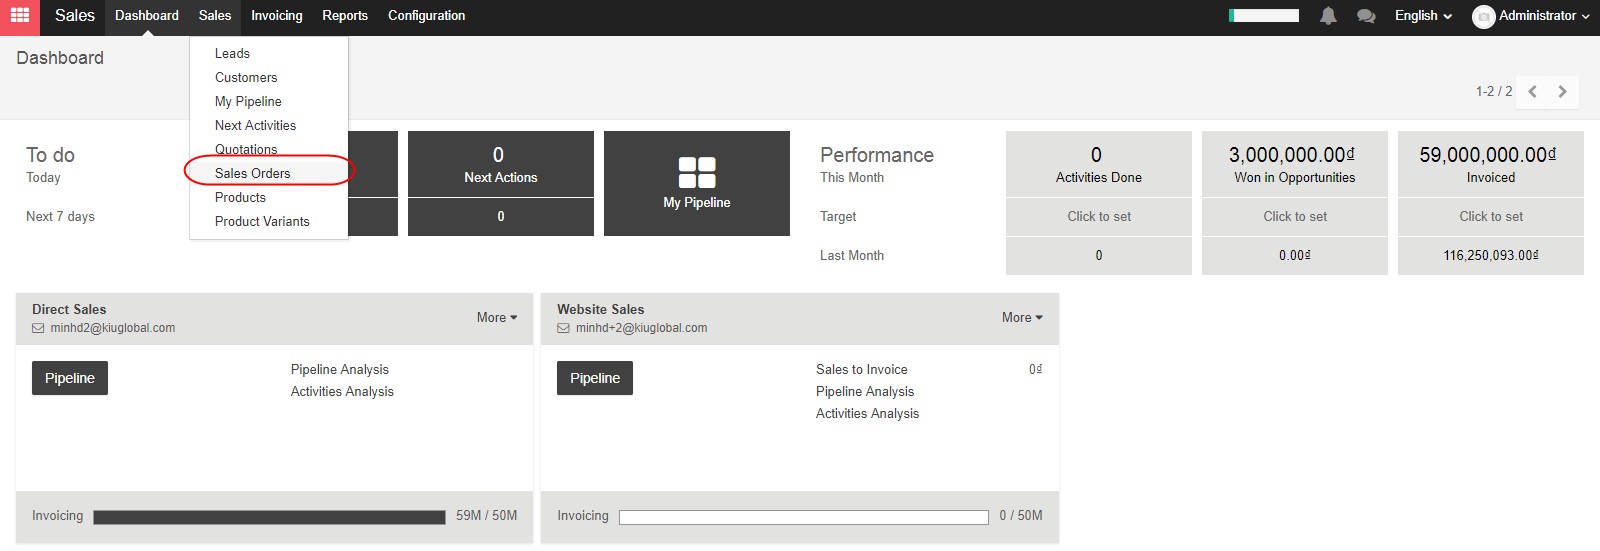
To create a new Sales Order, click the Sales dropdown menu at the top, then select Sales Order.

Click on the Create button at the top of the screen to create a new Sales Order.

The Sales Order is essentially the same as the Quotation that we just finished working with. You can add Customer information at the top, and Product information in the tabs at the bottom.

When you have filled in all of the fields, you can click “Confirm Sale” at the top of the screen.

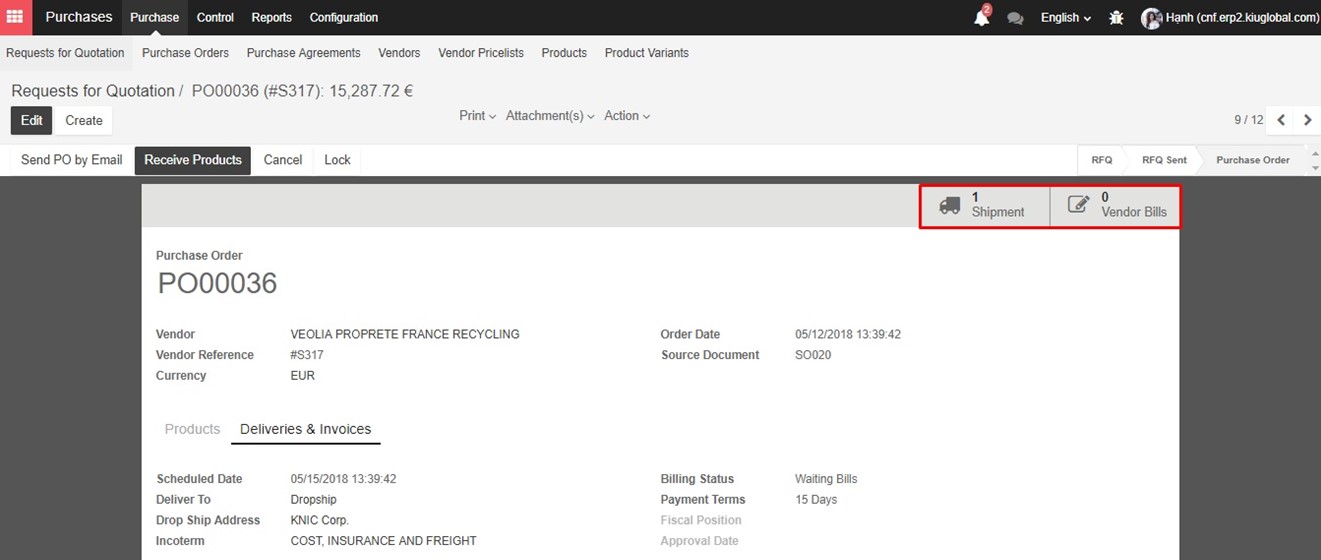
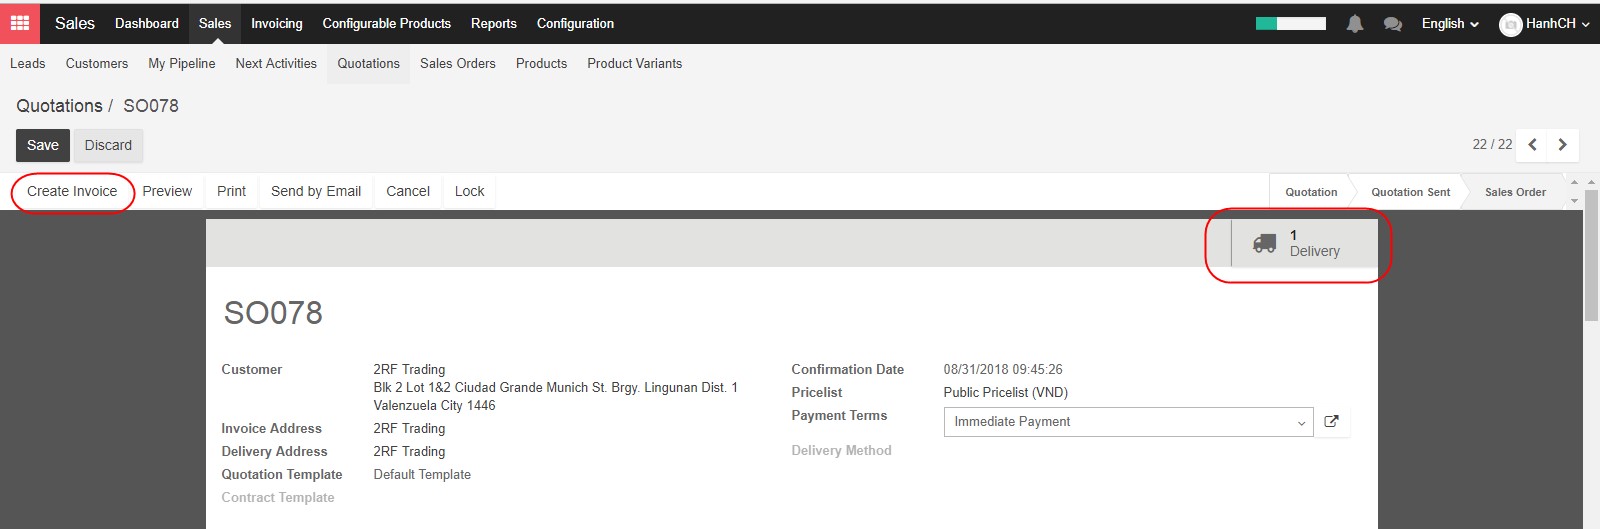
The status in the top right of the screen will change to Sales Order and now products will be sent out from your warehouse.

You will also see the Delivery box appearing in the top right of the screen now, and the Create Invoice button will appear in the top left corner.

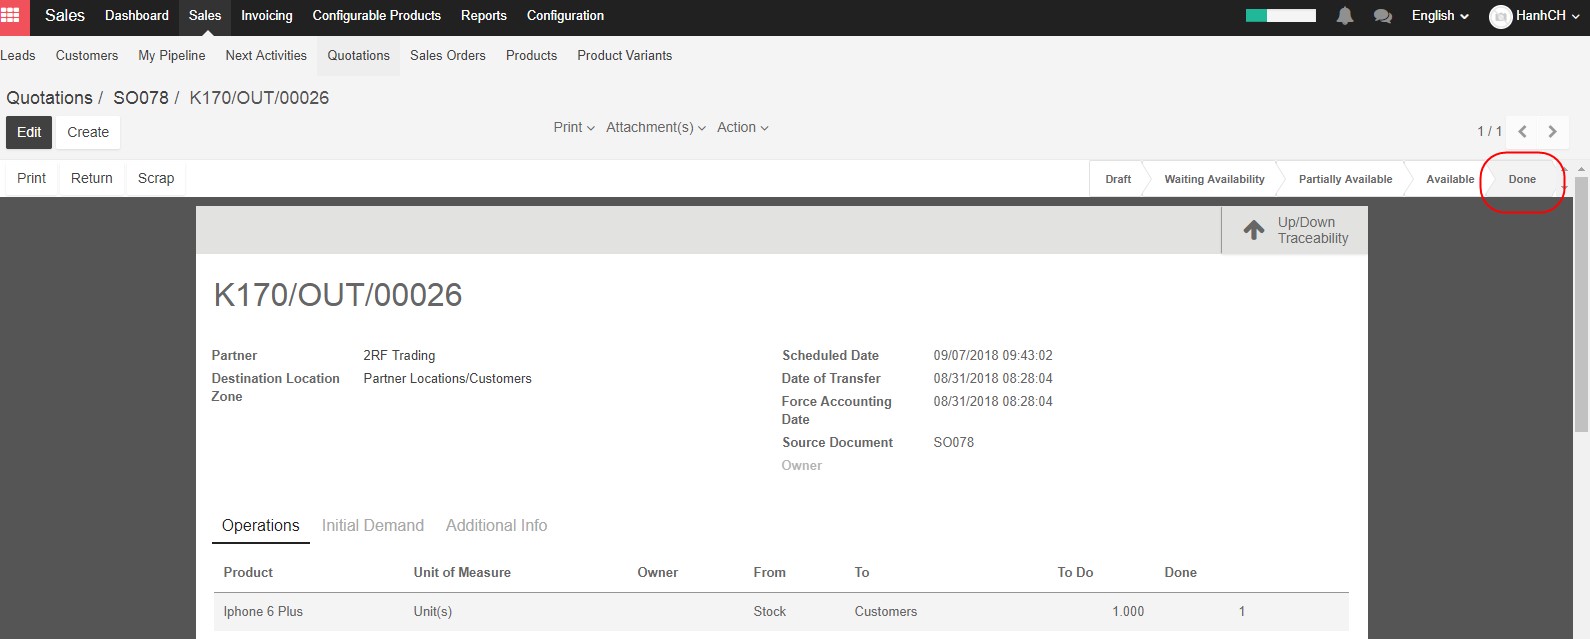
Let’s click the Delivery icon. We will confirm that the shipment was delivered. While this step would normally be done by inventory staff, however in several cases the sales members can also deliver goods, so we can perform it using one account.

Using the Edit button at the top, or the small Pencil icon on the order lines, update the Done line with the number of items that were delivered.

Input the actual goods receive in the deliver

When the number of items in the Done column matches the number of items in the To Do column, you can click Validate in the top left to confirm that your shipment arrived,

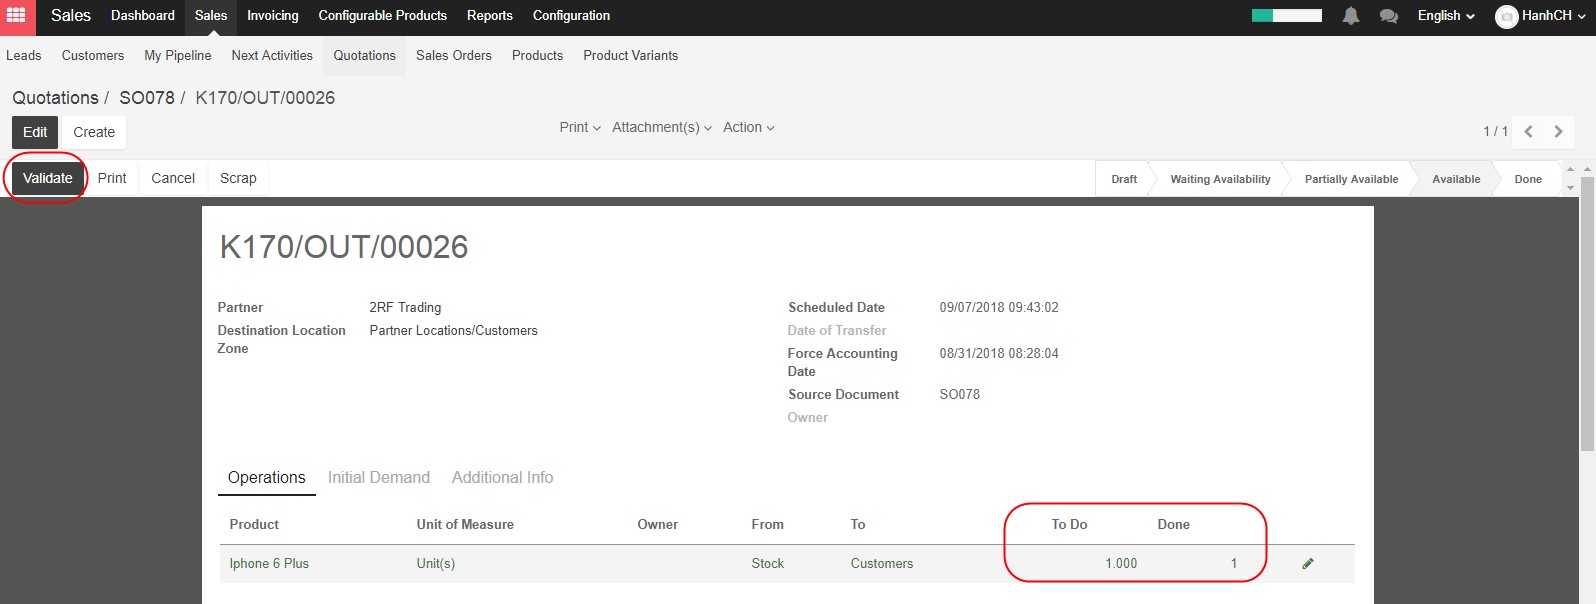
The status of the order will change to Done in the top right

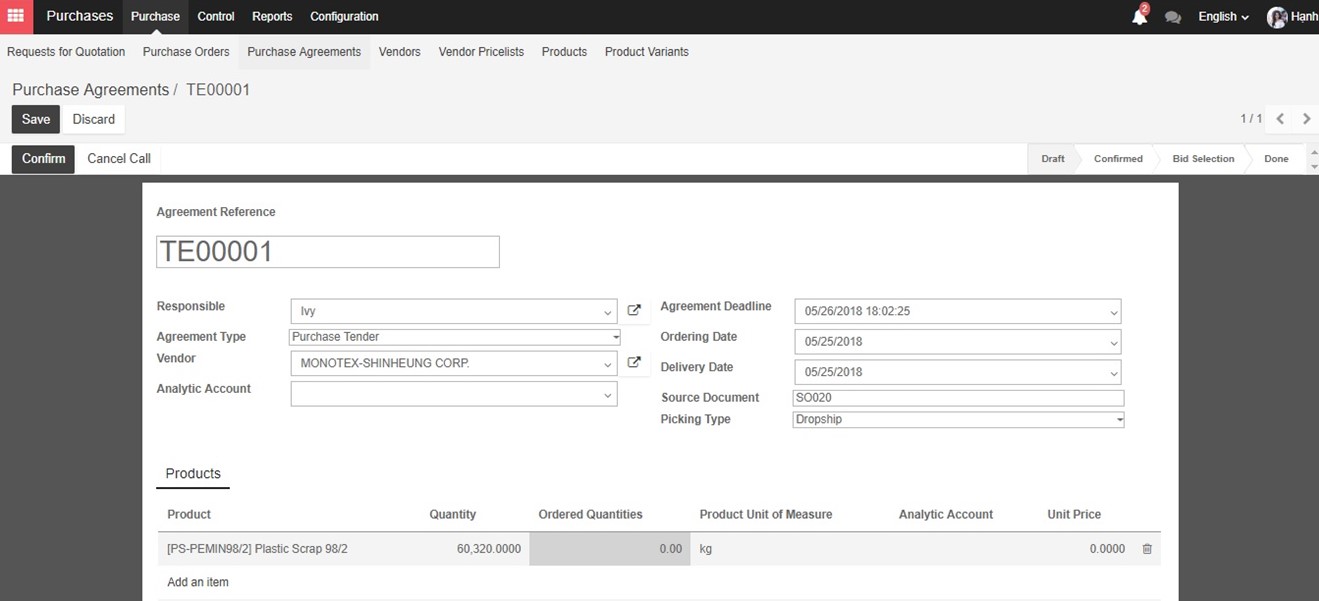
Let’s go back to the Sales Order and Create invoice. When you create an invoice, in the product form you can select one of two options for invoicing policies, either on ordered quantity or on delivered quantity.

If you choose invoicing on ordered quantity, you can create an invoice before the delivery step and the pre-filled quantity will be the entire shipment that the customer ordered. Otherwise, if you choose invoicing on delivered quantity, you can only create draft invoices, to be validated by your accountant after completing delivery. You can create invoices for partial deliveries.

Now click on the Create invoice button, which should be visible in the top left corner. A new dialogue will open, allowing you to select one of four options.

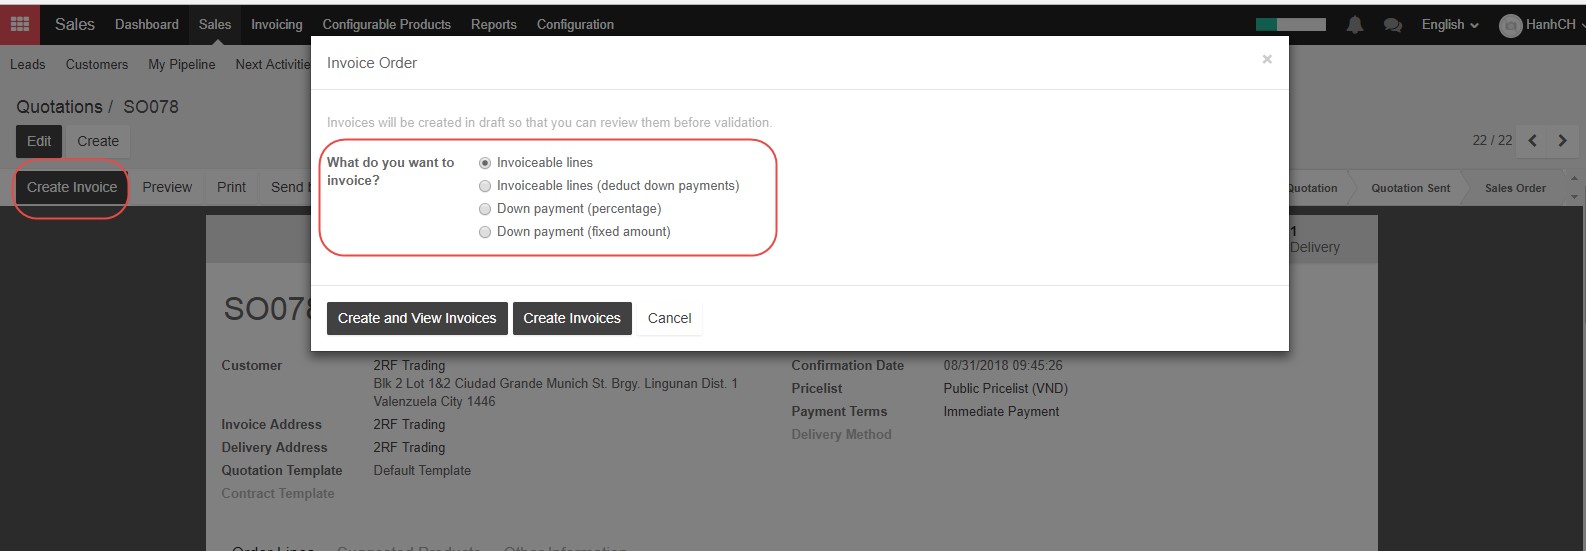
First, you can create a full invoice for everything in the order.

Second, you can create a full invoice for everything in the order, minus any down payment which has already been paid.

Third, you can create an invoice for a down payment, as a fixed percentage of the invoice value.

And fourth, you can create a down payment with a fixed value.

Let’s select the first option, to create a full invoice for everything in our order, and then click Create and View Invoices. You’re able to view the invoice now, however the functions after this will be completed by your accounting department.

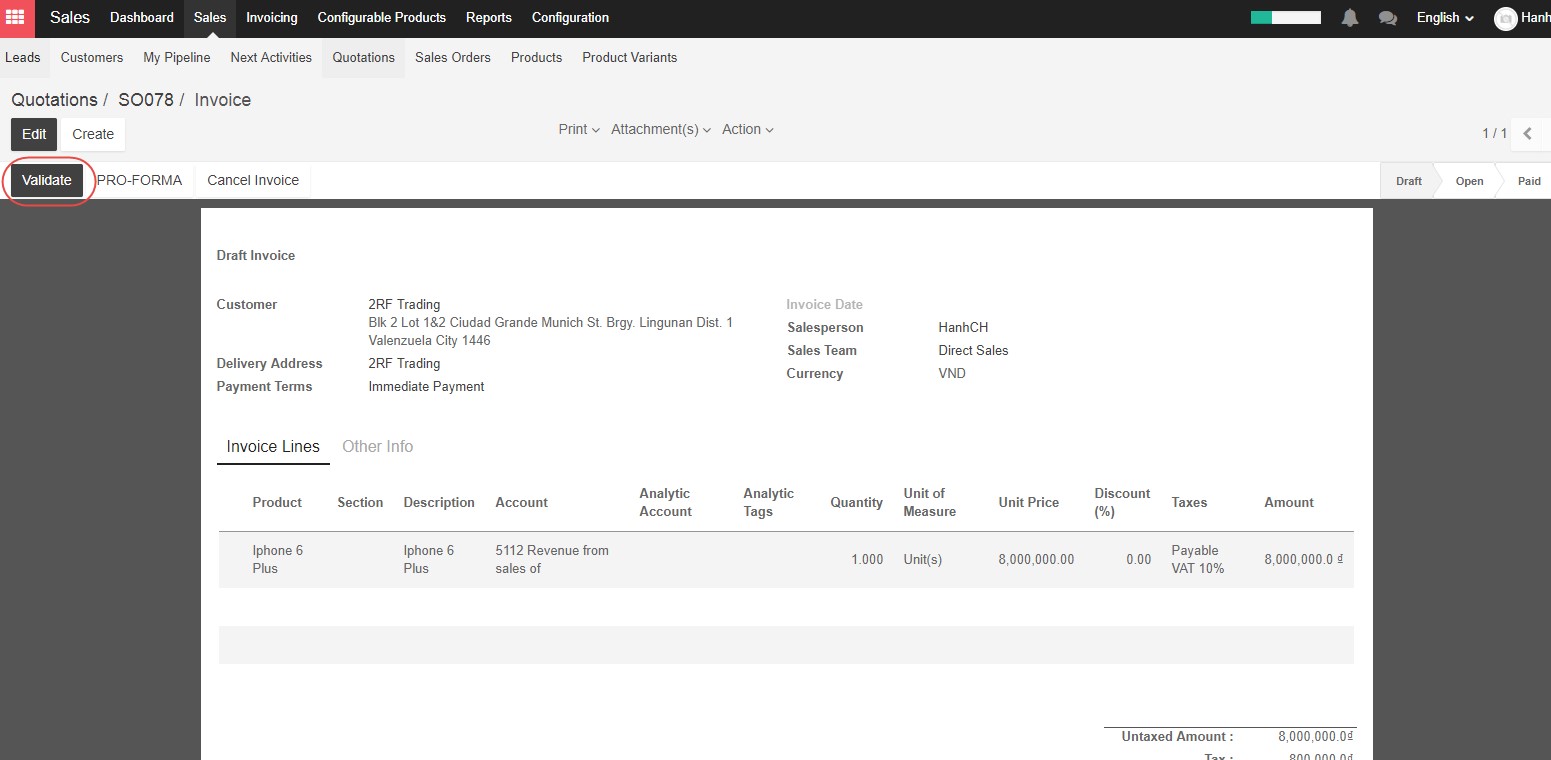
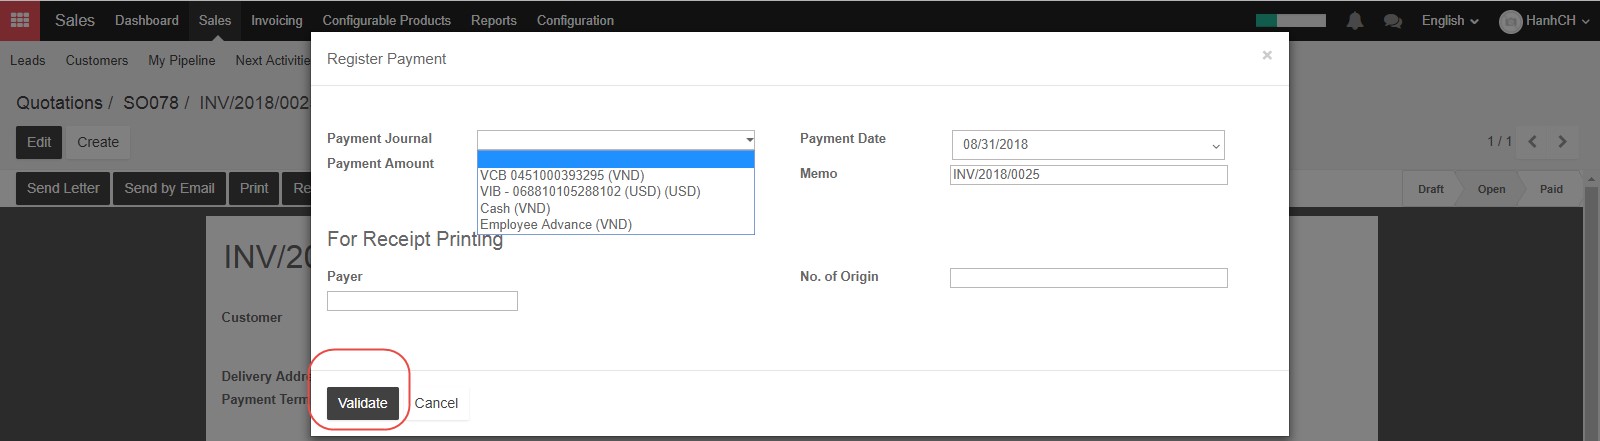
The accounting department will be able to complete the invoice, and register the payment

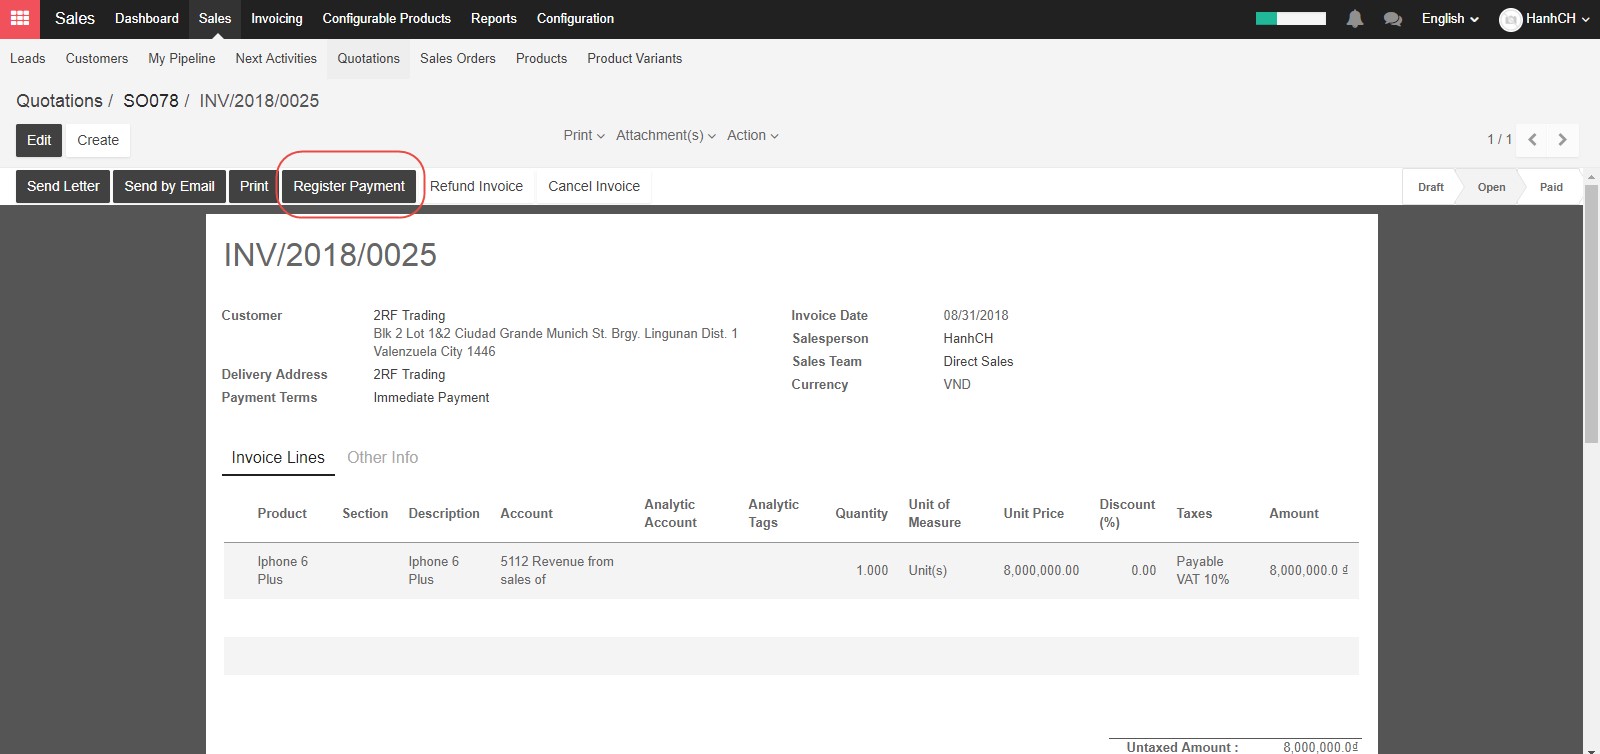
Check the payment amount, select appropriate journal to record the payment (bank or cash) then click Validate

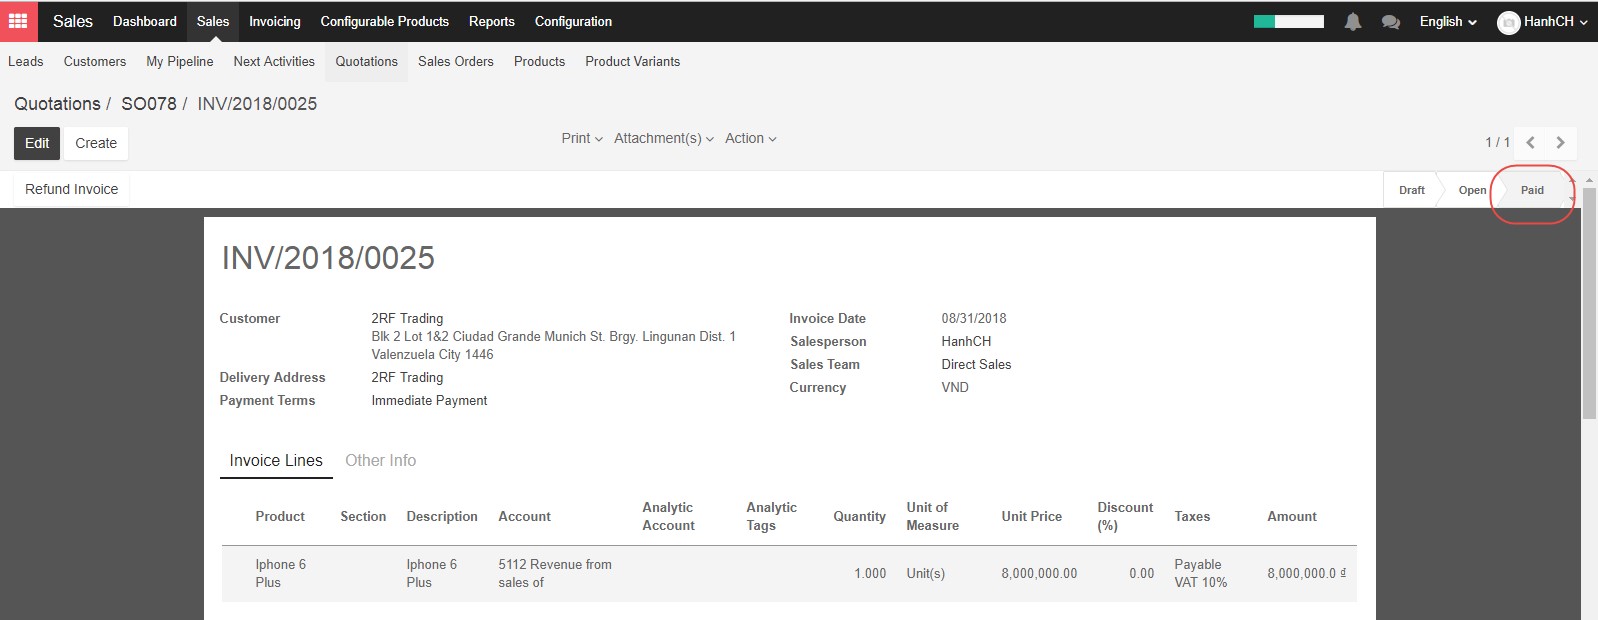
Then status of the invoice will change to Paid in the top right

This is the last step of regular sales process.

3.3.6. How to generate leads from my website

Your website should be your company’s first lead generation tool. With your website being the central hub of your online marketing campaigns, you will naturally drive qualified traffic to feed your pipeline. When a prospect lands on your website, your objective is to capture his information in order to be able to stay in touch with him and to push him further down the sales funnel.

This is how a typical online lead generation process work :

  • Your website visitor clicks on a call-to action (CTA) from one of your marketing materials (e.g. an email newsletter, a social media message or a blog post)
  • The CTA leads your visitor to a landing page including a form used to collect his personal information (e.g. his name, his email address, his phone number)
  • The visitor submits the form and automatically generates a lead into Kiu CRM

In KIU, the Website and CRM modules are fully integrated, meaning that you can easily generate leads from various ways through your website. However, even if you are hosting your website on another CMS, it is still possible to fill KIU CRM with leads generated from your website.

After active the lead stage, firstly we can create a lead using the Contact Form. Every lead created through the contact form is accessible in the Sales module, by clicking on Sales ‣ Leads. The name of the lead corresponds to the Subject field on the contact form and all the other information is stored in the corresponding fields within the CRM. As a salesperson, you can add additional information, convert the lead into an opportunity or even directly mark it as Won or Lost.

Secondly, for creating a lead using the Former Builder, you can create fully-editable custom forms on any landing page on your website with the Form Builder snippet. As for the Contact Form module, the Form Builder will automatically generate a lead after the visitor has completed the form and clicked on the button Send. Select Website builder module, go to your desired landing page and click on Edit at the top right hand corner to access the available snippets.

 The Form Builder snippet lays under the Feature section, in the left hand side:

As soon as you have dropped the snippet where you want the form to appear on your page, a Form Parameters window will pop up. From the Action drop-down list, select Create a lead to automatically create a lead in Kiu CRM.  On the Thank You field, select the URL of the page you want to redirect your visitor after the form being submitted (if you don’t add any URL, the message “The form has been sent successfully” will confirm the submission).

You can then start creating your custom form. To add new fields, click on Select container block and then on theustomize button. 3 options will appear:

  • Change Form Parameters: allows you to go back to the Form Parameters and change the configuration
  • Add a model field: allows you to add a field already existing in Kiu CRM from a drop-down list. For example, if you select the Field Country, the value entered by the lead will appear under the Country field in the CRM – even if you change the name of the field on the form.
  • Add a custom field: allows you to add extra fields that don’t exist by default in Kiu CRM. The values entered will be added under “Notes” within the CRM. You can create any field type : checkbox, radio button, text, decimal number, etc.

Any submitted form will create a lead in the backend.

3.3.5. How to generate leads from incoming emails

There are several ways for your company to generate leads with KIU CRM. One of them is using your company’s generic email address as a trigger to create a new lead in the system. In KIU, each one of your sales teams is linked to its own email address from which prospects can reach them. For example, if the personal email address of your Direct team is direct@mycompany.example.com, every sent email will automatically create new opportunity into the sales team.

The first thing you need to do is to configure your outgoing email servers and incoming email gateway from the Settings module ‣ General Settings.

Then set up your alias domain from the field shown here below and click on Apply.

For set up team alias, Go on the Sales module and click on Dashboard. You will see that the activation of your domain alias has generated a default email alias for your existing sales teams.

You can easily personalize your sales teams aliases. Click on the More button from the sales team of your choice, then on Settings to access the sales team form.

Into the Email Alias field, enter your email alias and click on Save. Make sure to allow receiving emails from everyone. From there, each email sent to this email address will generate a new lead into the related sales team.

Additionally to your sales team aliases, you can also create a generic email alias that will also generate a new contact in KIU CRM. Still from the Sales module, go to Configuration ‣ Settings and set up your catch-all email domain.

3.3.4. How to import contacts to the CRM

After active the lead stage as mentioned in 3.3.3. How to create a contact, On the new submenu Sales ‣ Leads, click on Import:

Select your Excel file to import from the Load File button

Make sure its extension is .csv and don’t forget to set up the correct File format options (Encoding and Separator) to match your local settings and display your columns properly. KIU will automatically map the column headers from your CSV file to the corresponding fields if you tick The first row of the file contains the label of the column option. This makes imports easier especially when the file has many columns. Of course, you can remap the column headers to fit the importing data