KIU BMP will summarize and create a report to manage your company assets in Reports ‣ Assets. You can filter and customize reports as your preference.
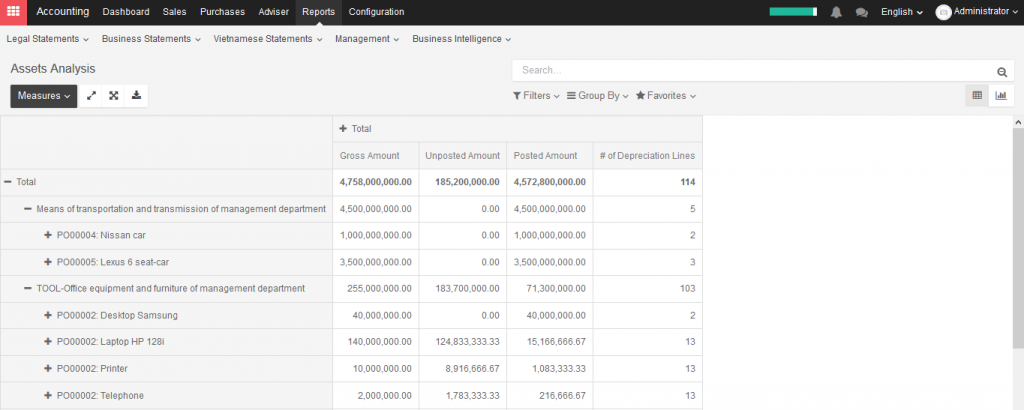
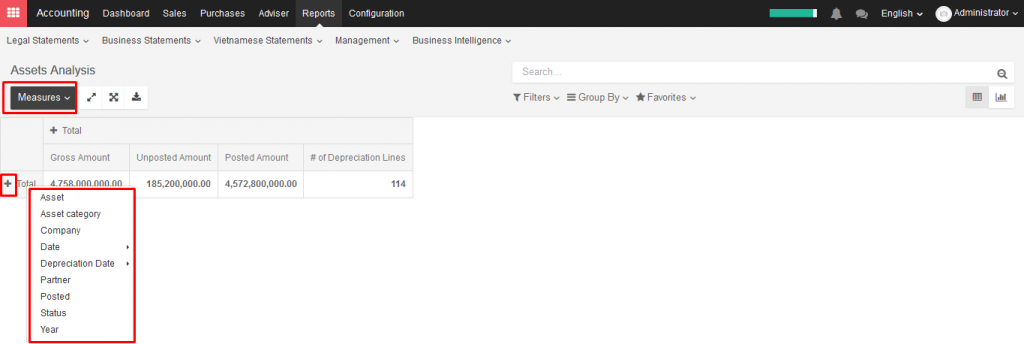
KIU BMP will summarize and create a report to manage your company assets in Reports ‣ Assets. You can filter and customize reports as your preference.


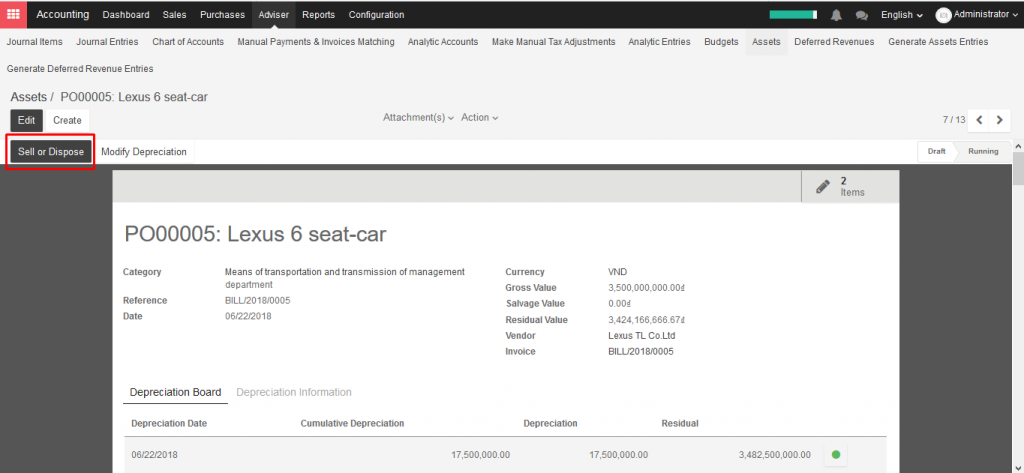
If you sell or dispose of an asset, you need to completely depreciate this asset. Click on the button Sell or Dispose in depreciation form.
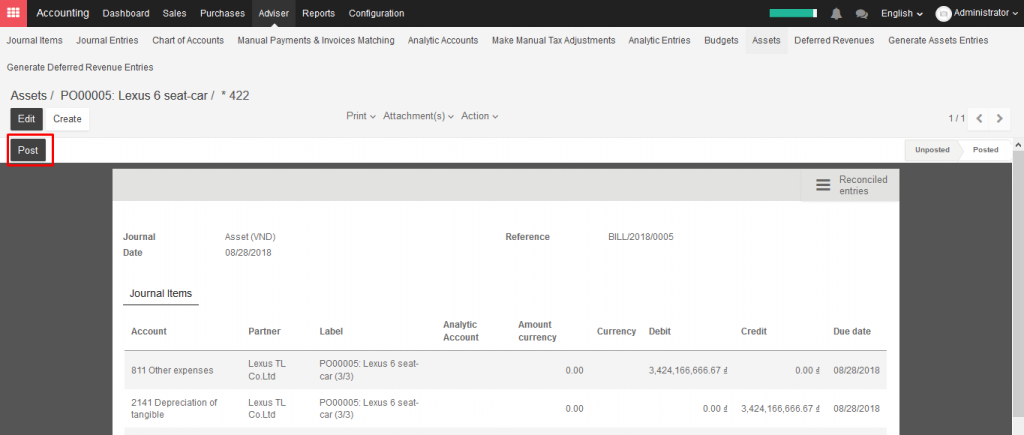
The system will generate entry automatically. This action will post the full costs of these assets but it will not record the sales transaction that should be registered through a customer invoice.
Assets depreciation generate automatically from Vendor bills
To depreciate an asset, open Accounting module ‣ Accounting ‣ Assets

KIU will create depreciation journal entries automatically at the right date for every confirmed asset. (not the draft ones). You can control the depreciation board: a green bullet point means that the journal entry has been created for this line.
But you can also post journal entries before the expected date by clicking on the green bullet and forcing the creation of a related depreciation entry.
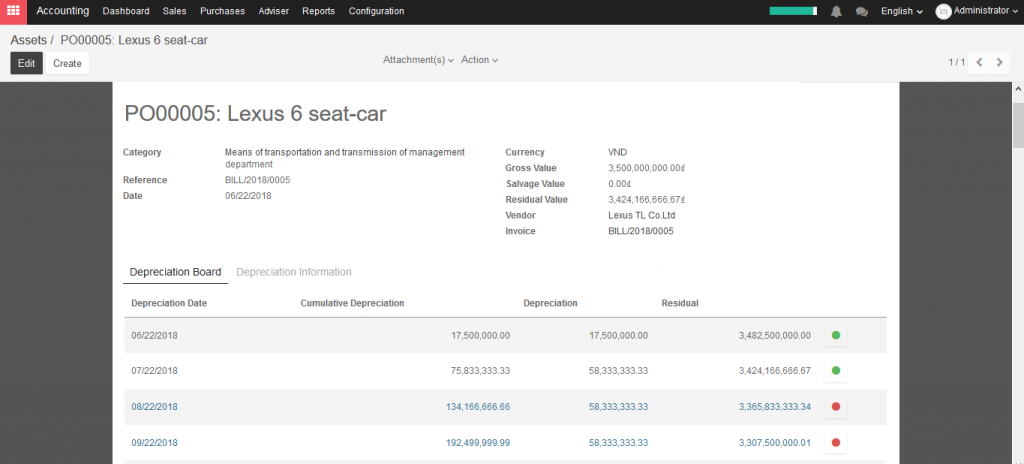
In the Depreciation board, click on the red bullet to post the journal entry. Click on the Items button on the top to see the journal entries which are already posted.
→ Create assets depreciation manually
To register an asset manually, go to the menu Adviser ‣ Assets.
Once your asset is created, don’t forget to Confirm it. You can also click on the Compute Depreciation button to check the depreciation board before confirming the asset.
Note: If you create assets manually, you still need to create the supplier bill for this asset. The asset document will only produce the depreciation journal entries, not those related to the supplier bill.
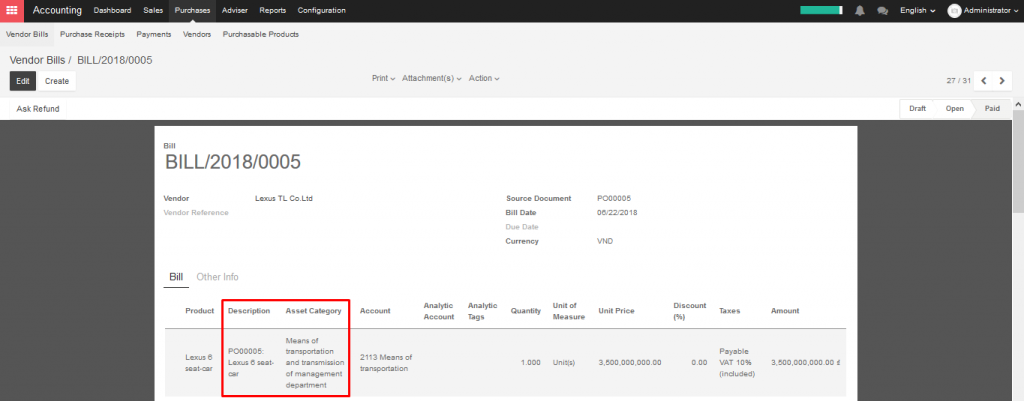
Assets can be automatically created from supplier bills. All you need to do is to set an asset category on your bill line. When the user will validate the bill, an asset will be automatically created, using the information of the supplier bill.
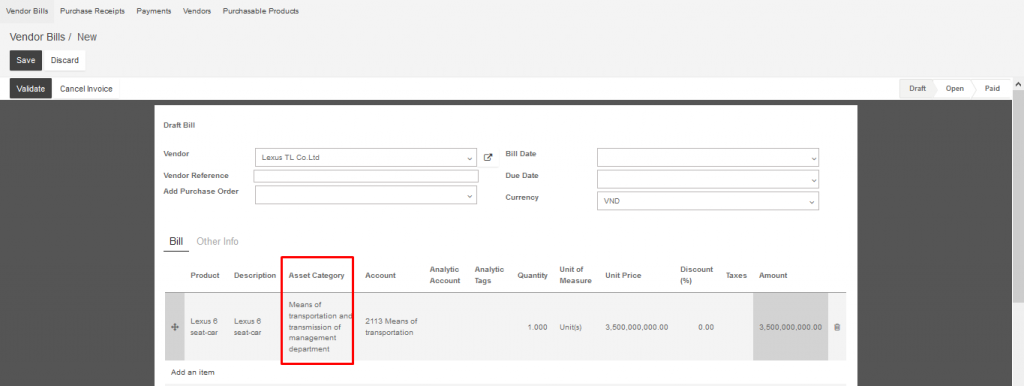
Depending on the information on the asset category, the asset will be created in draft or directly validated. It’s easier to confirm assets directly so that you won’t forget to confirm it afterwards. (Check the field Skip Draft State on Asset Category) Generate assets in draft only when you want your adviser to control all the assets before posting them to your accounts.
Besides, you can also buy this asset through purchase order, then create Vendor bills.
 .
.
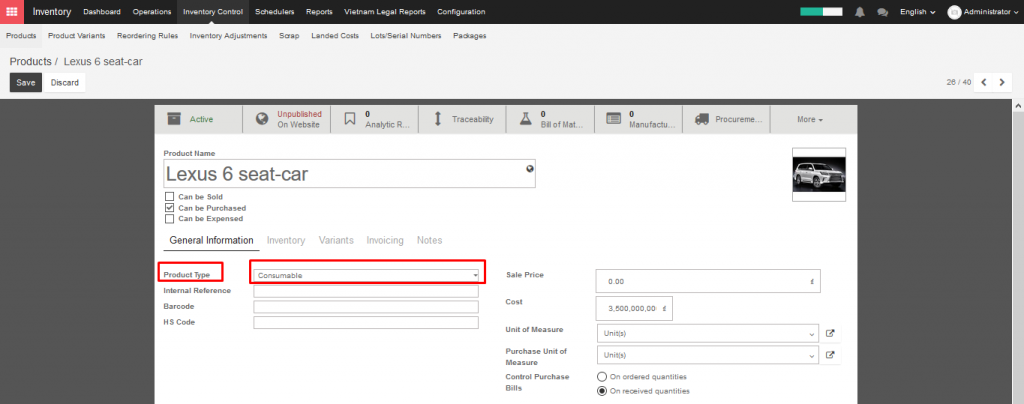
An asset will be created in product form as another product.
Open Sales/Purchase/Inventory module ‣ Products ‣ Create
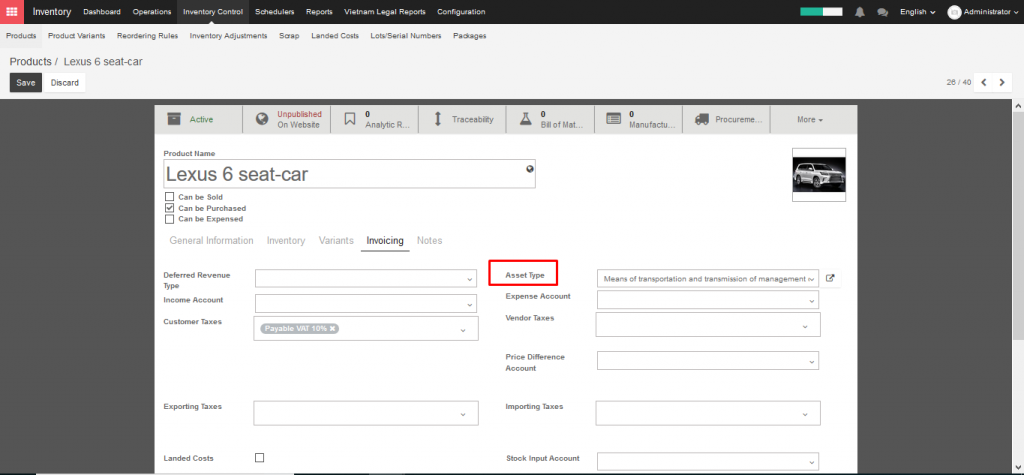
To determine a product as an asset, you have to choose an asset category for this product and it will automatically be filled in the supplier bill.
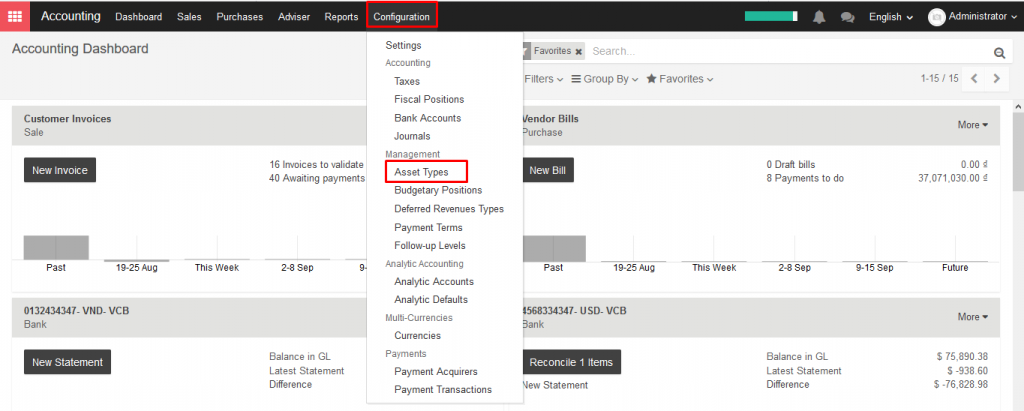
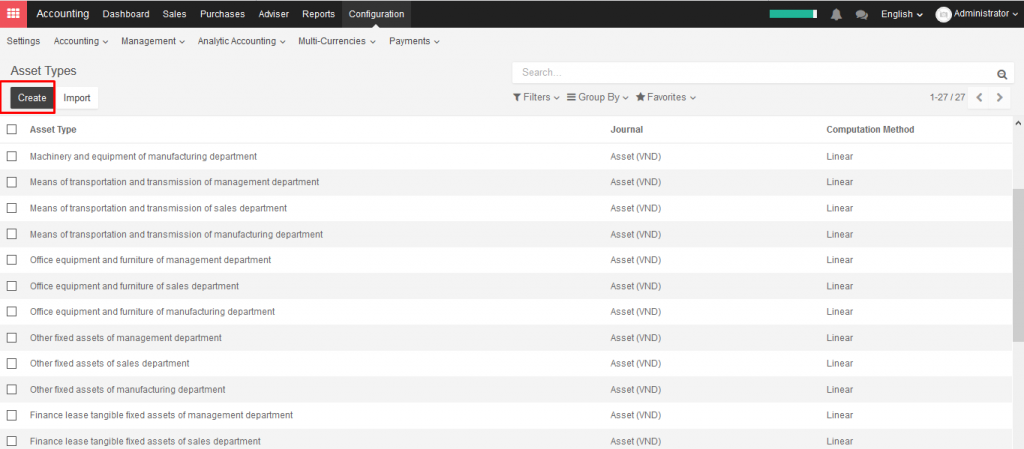
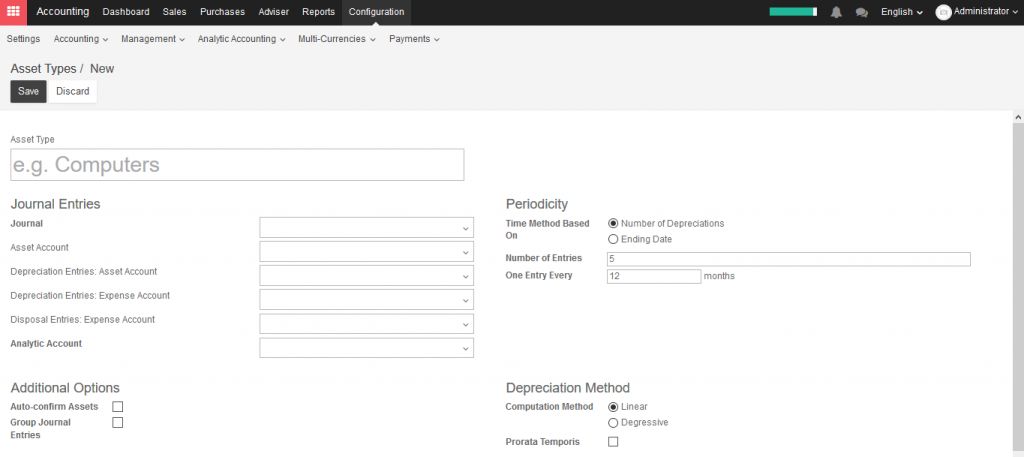
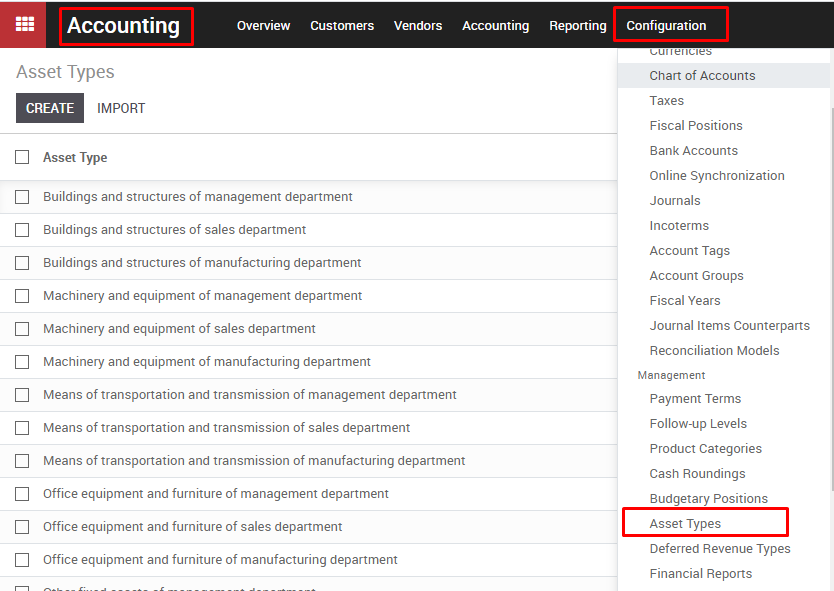
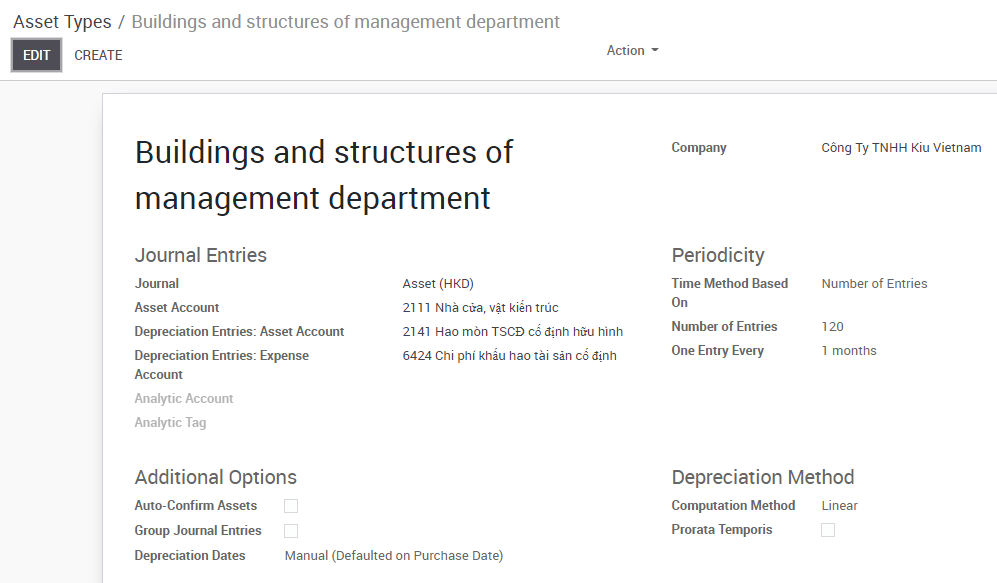
To define asset types, go to Configuration ‣ Asset Types ‣ Create
Input opening balance for account except Inventory Valuation account
Create an Initial balance journal ( If the journal hasn’t been created). In the Accounting module, go to Configuration (Accounting) -> Journal
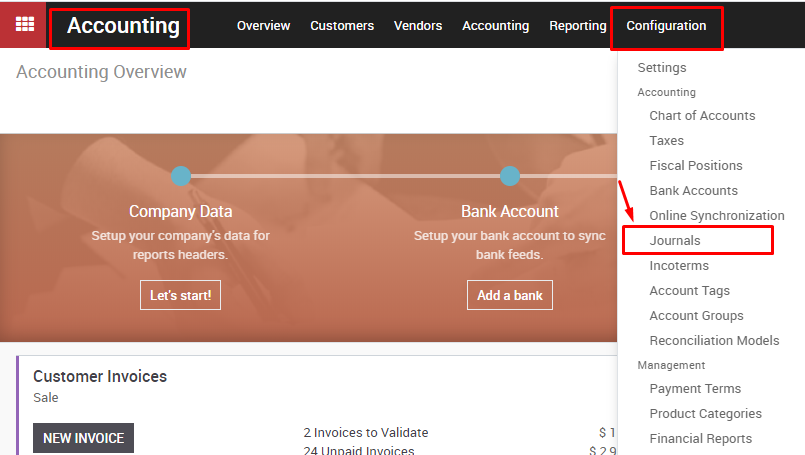
Click on Create button to create a new journal with the following information:
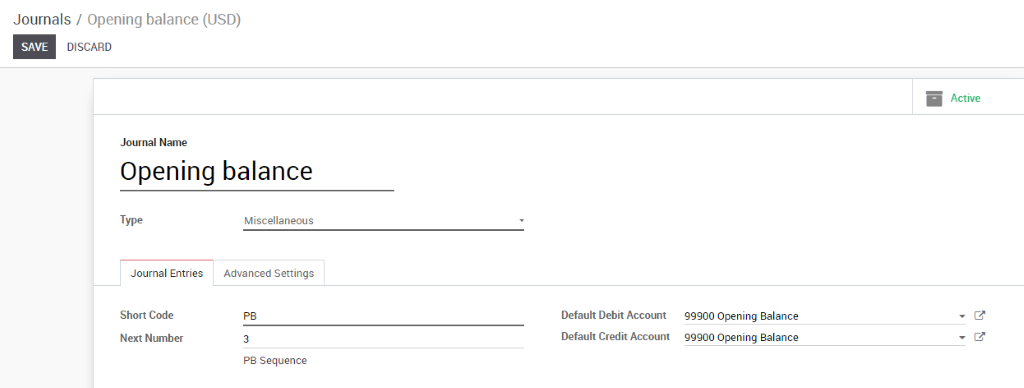
Click Save when finished
Input the Opening balance: In the Accounting module, go to Adviser-> Journal entries. Click on Create button on the top-left screen to create a new journal entry
When finished, click on Save then Post the entry.
( Example)
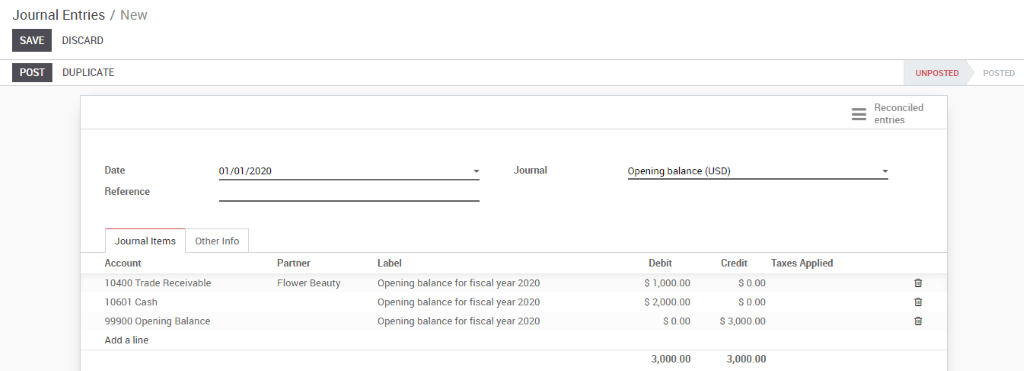
.
Go to Accounting -> Accounting-> Journal entries. Using filter, group by to optimize your search
Note: The journal entries aren’t automatically created though Kiu BMP, user have to create manually, example: record capital contributions from investor (Accounting-> Accounting-> Journal entries. Click “Create”.)

Journal entries related to product: base on the Internal category setting up on the product form
Note: The system will take value from the Accounting tab first. If there is no setting information here, the system will get value from Internal category
To check the journal entries related to these products, user can check at accounting journal for product here, it usually Stock journal
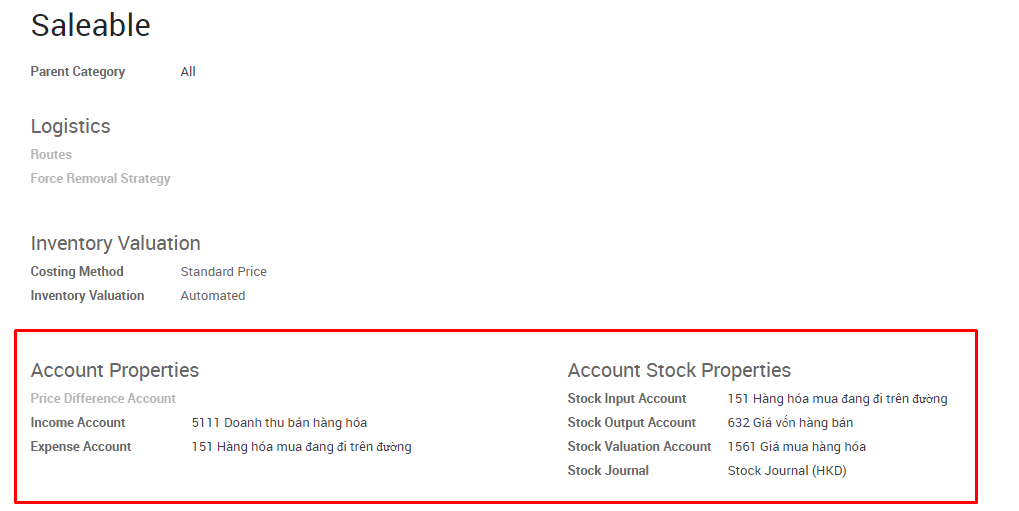

When recording vendor bills and customer invoices, the system will record account receivable and account payable as in Contract form
To check the journal entries related to these invoices, user can check at Vendor bill journal and Customer invoice journal
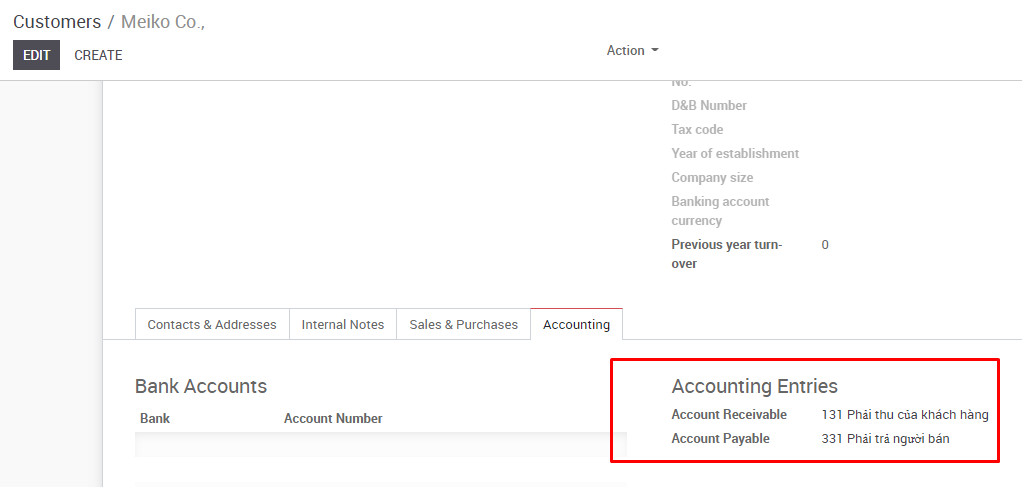
When recording payment, system will record account which was set up in Cash/Bank journal
To check the journal entries, user can check at Cash journal and Bank journal
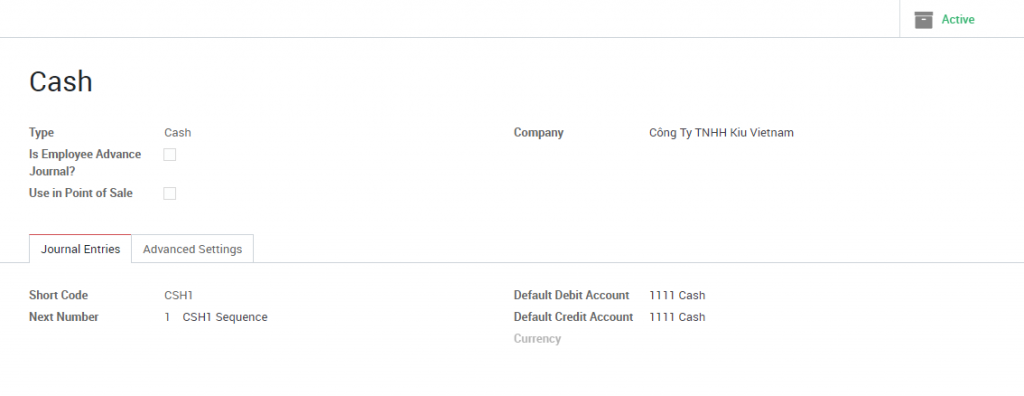
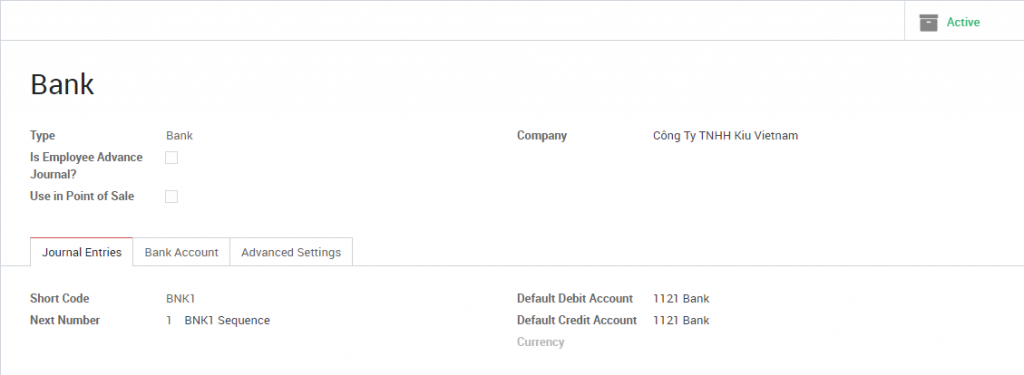
When recording the transaction related to taxes, the system will takes value from Tax menu
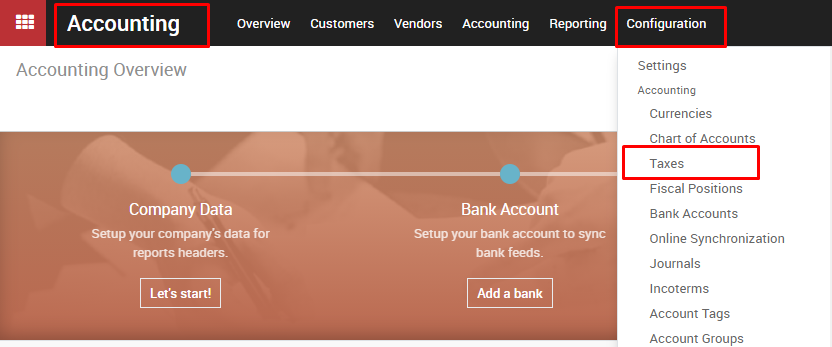

When recording the transaction related to asset, system will takes value from Asset menu
Customer invoice:
Salesperson is responsible for creating draft invoices (from the Sales module). The accountant just needs to go to Accounting >>Customer >> Customer Invoices, then select the correct bill draft, check the invoice information, then click Confirm.
Vendor bill:
Go to Accounting >> Vendor >> Vendor bills, click on “ Create” button
Register a payment: