
Part 4: User Settings
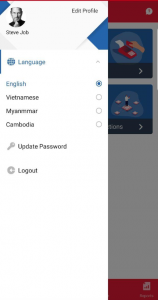
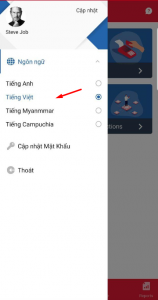
Users can easily take some normal settings related language and login information in App.
|
Step 1 – Go Settings |
Step 2 – Choose Language |
|
 |
 |
|
|
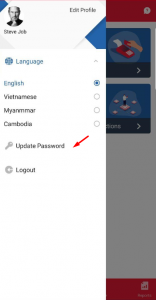
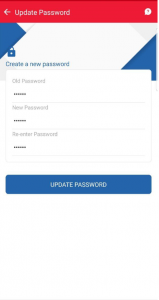
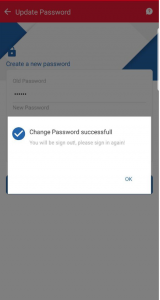
Step 1 – Go Settings |
Step 2 – Update new password |
Step 3 – Confirm |
 |
 |
 |
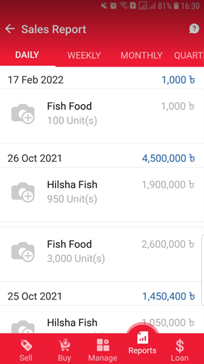
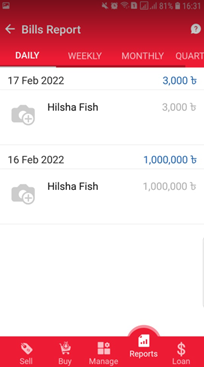
Part 3: Report
We support 4 types of reports: Sales, Expenses, Bills, Cash flow
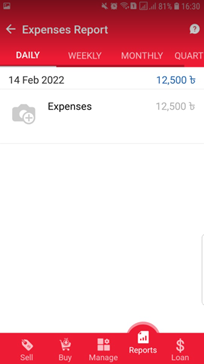
Sales, Expenses, and Bills reports have the same format with time range : Daily, Weekly, Monthly, Quarterly. Data is automatically updated when user uses the App.
| Reports | Sales report | Expenses report |
 |
 |
 |
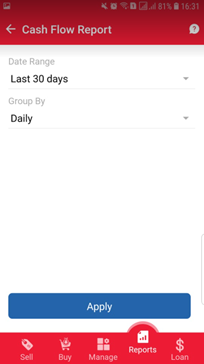
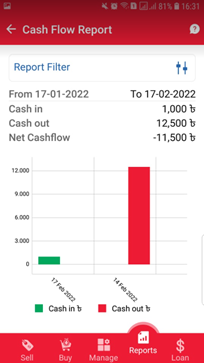
Cash Flow report will provide users an overview of business status. Users can check how Cash in/ out and Net profit fluctuates in a time range.
NOTE: Cash in on POS will update when user closes POS Session.
| Set time range for filter | Apply for checking Cash Flow report |
 |
 |
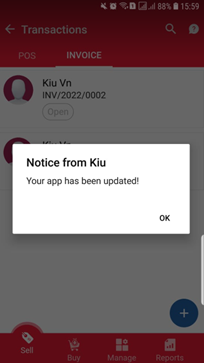
5. Loan Application
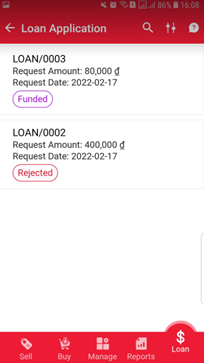
This is the part which helps users can send a loan request to a credit institution or bank. Only with invoices which are in payment can request a loan.Users can easily follow the status of each loan request on tab Loan Application: Sent, Approved, Funded, Repaid and Rejected.
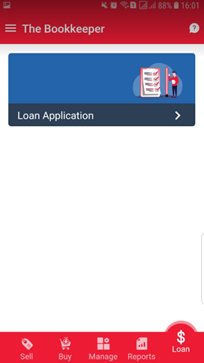
| When users meet demand of using Loan, user will receive notification that App is updated |
Loan menu will appear on App |
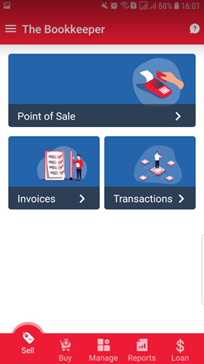
In order to create a Loan Application, go to Sell menu, click on Transactions |
 |
 |
 |
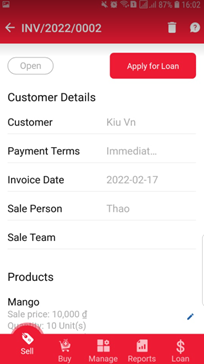
| Click on invoice, detail of invoice will shown with the button “Apply for Loan” | A pop up to request for taking survey will be shown in the 1st time create Loan Application | Credit Score Survey screen will appear, click on “Start Survey” to start |
 |
 |
 |
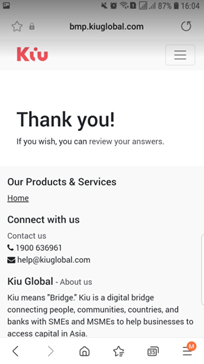
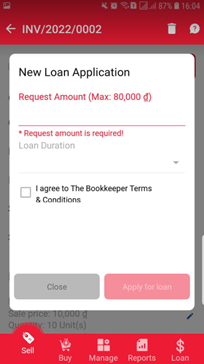
| Answer the list of mandatory questions, then click “Submit” for end of survey | Submit successfully notification. Score result will be shown on SaaS. | After done survey, click on “Apply for Loan” again to fill in Loan Application. Max amt is set up as 80% of invoice amount |
 |
 |
 |
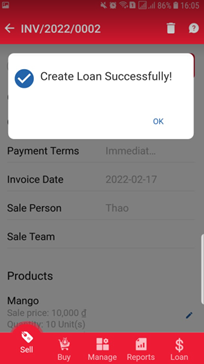
| Loan Application submit successfully notification. Invoice will be marked with tag “Loan requested” | Go to Loan menu to see a list of Loan Application. |
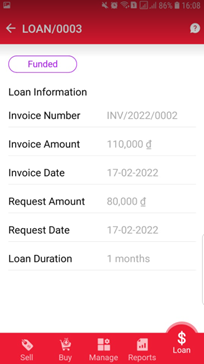
Loan Application detail screen |
 |
 |
 |
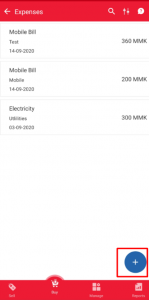
4. Expenses
This part helps you control expense incurred (such as: Rent, Salaries, Mobile Bill,… and so on)
|
Step 1 – Click “+” button |
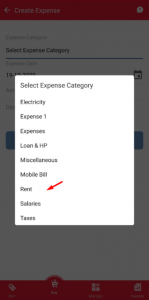
Step 2 – Select Expense |
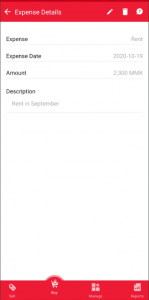
Step 3 – Fill Expense info |
 |
 |
 |
|
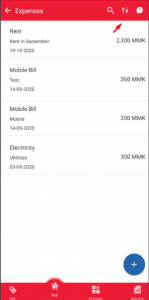
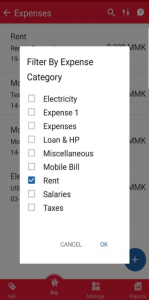
Step 4 – Expense detail |
Step 5 – Click filter to search |
Step 6 – Choose expense category |
 |
 |
 |
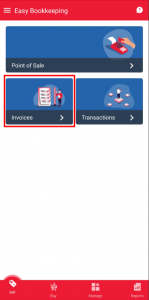
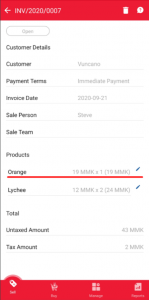
3. Invoices
Invoices is one of the most important menus in The Bookkeeper application. This menu help you sell products like in POS menu: sell multi products, enter discounts (if any) by creating new invoices for your customers. But the best thing in this menu is you can let your customer pay partially instead of immediate payment in POS. You also can choose payment methods, payment terms when record invoices.
After recording a new invoice, you can save then register payment or save and sending an pdf invoice version for your customer by email
This app provides Invoices tab in Sale Transactions menu let you follow how much your customers paid, due amount in each invoice
You also can adjust your invoices if record wrong. Invoice status must be submitted. The invoice number will be kept the same after you adjust but the total amount and inventory will be updated.
- To make a new invoice follow these step:
|
Step 1 – Go to Create Invoices |
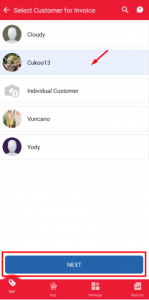
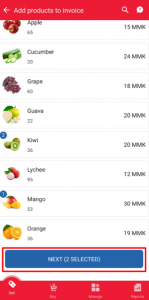
Step 2 – Choose customer |
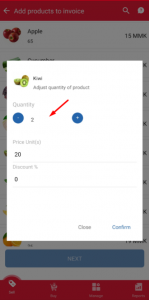
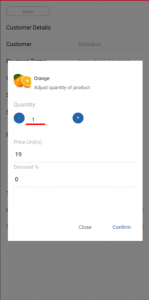
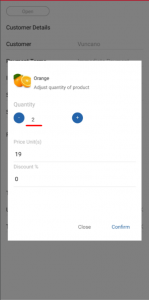
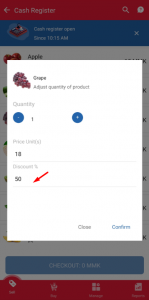
Step 3 – Enter quantity, discount |
 |
 |
 |
|
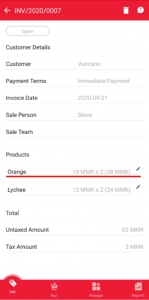
Step 4 – Confirm to proceed |
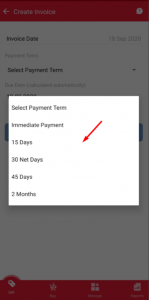
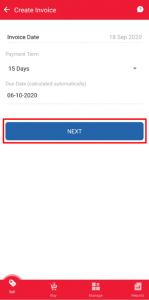
Step 5 – Choose payment term |
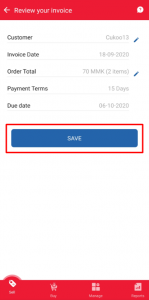
Step 6 – Review invoice |
 |
 |
 |
|
Step 7 – Save invoice |
Step 8 – Pay now or pay later |
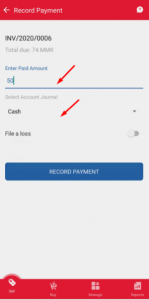
Step 9 – Enter paid amount, journal |
 |
 |
 |
|
● Users can pay partially or pay full amount by enter amount in box |
||
|
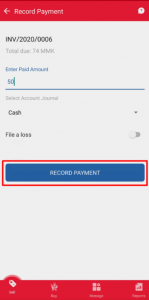
Step 10 – Confirm to proceed |
Step 11 – Payment Recorded |
|
 |
|
|
|
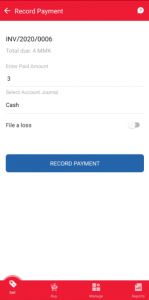
● If users want to write off for a partially paid invoice, they can turn on “File as loss” as steps below: |
||
|
Step 1 – Record payment |
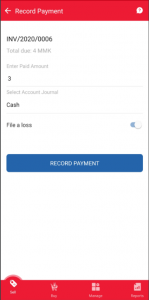
Step 2 – Choose “File as loss” |
Step 3 – Invoice status updated |
 |
 |
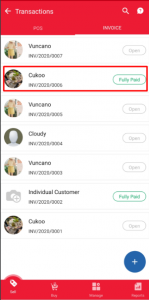 |
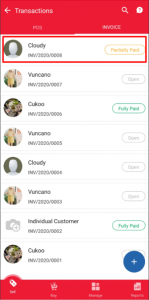
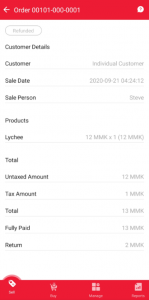
- To view how much you customer paid in each invoice or adjust invoices, go to Sale Transaction:
|
Step 1 – Choose POS order |
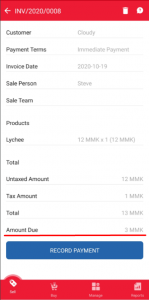
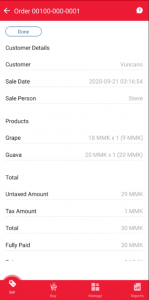
Step 2 – Detail order |
|
 |
 |
|
|
Note that “Paid partially” Invoice and “Paid” Invoice can not adjust. |
||
|
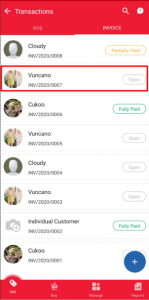
Step 1 – Choose Invoice |
Step 2 – Click on adjust invoice |
Step 3 – Tap to edit quantity |
 |
 |
 |
|
Step 4 – Edit quantity |
Step 5 – Click Confirm to save |
Step 6 – Invoice updated |
 |
 |
 |
2. Selling at POS
This is the most important part, helping you manage the quantity and amount of goods sold during the day. The system automatically calculates grand total amount in case customer buy multiple products at the same time or help you calculate excess amounts to be returned to the customer.
- To check out products, you should follow steps below:
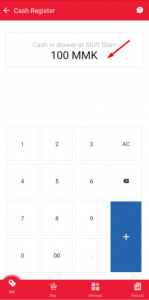
In Step 2: Users set opening balance in this box.
|
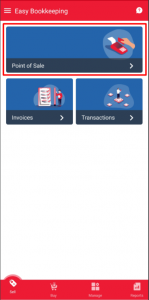
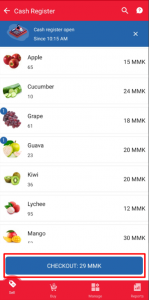
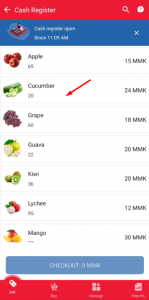
Step 1 – Go to POS menu |
Step 2 – Open session |
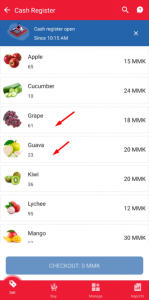
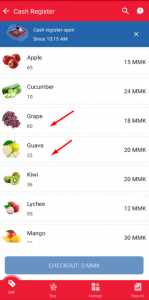
Step 3 – Choose product |
 |
 |
 |
|
Step 4 – Choose product quantity |
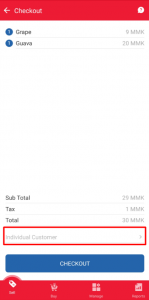
Step 5 – Click on Check out button |
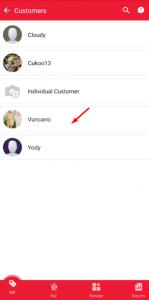
Step 6 – Choose customer |
 |
 |
 |
|
Step 7 – You can search customer |
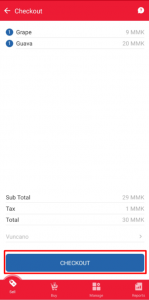
Step 8 – Click on Check out button |
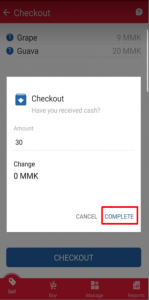
Step 9 – Enter paid amount |
 |
 |
 |
|
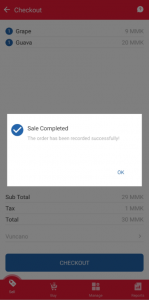
Step 10 – Order completed |
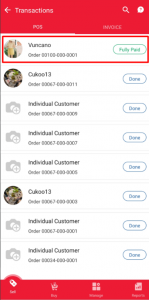
Step 11 – Sales Transactions |
Step 12 – Inventory updated |
 |
 |
 |
|
||
|
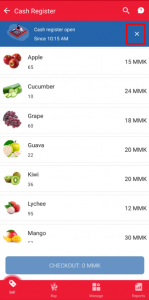
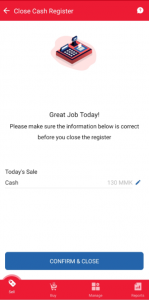
Step 1 – Close session |
Step 2 – Check cash in drawer |
|
 |
 |
|
|
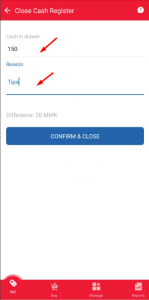
● If Cash in your drawer is not the same as calculated in App, you should click on “Adjust Cash” |
||
|
Step 3 – Adjust Cash |
Step 4 – Type amount and reason |
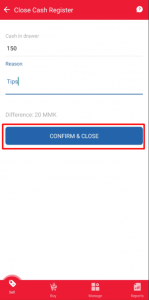
Step 5 – Confirm and close |
 |
 |
 |
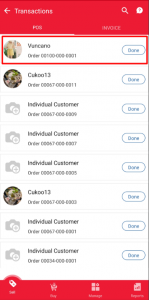
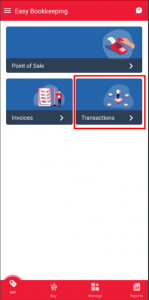
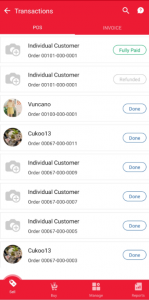
- To view POS orders, go to Dashboard, click on Sale Transactions menu > tab POS
|
Step 1 – Go to Sale Transactions |
Step 2 – Choose POS order |
Step 3 – Detail POS order |
 |
 |
 |
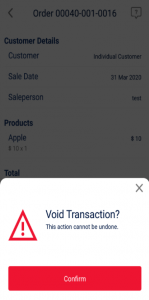
- Voiding POS orders means canceling the order you recorded before, products will be returned and money is refunded. Each POS order only can void one time. A new refund order will be created if you complete voiding a transaction.
|
Step 1 – Go to Sale Transactions |
Step 2 – Choose POS order |
Step 3 – Click on Void Transaction |
 |
 |
 |
|
Step 4 – Confirm to void |
Step 5 – POS order after voiding |
Step 6 – A refund order created |
 |
 |
 |
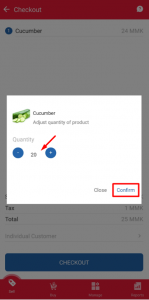
- If your product quantity is not enough to sell or less than the minimum quantity set up before, the system will alert and do not let you sell. To continue selling at POS, you have to adjust quantity more than the minimum
|
Step 1 – Click on Edit product quantity |
Step 2 – Enter quantity |
Step 3 – Quantity updated |
 |
 |
 |
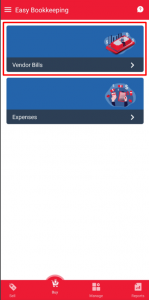
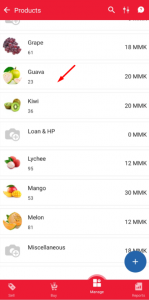
1. Vendor Bills
This part helps you manage the quantity of products in stock and the products’ cost price
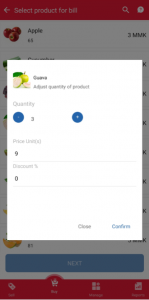
- Note that in step 4&5, it is necessary to update cost price of products because if not, unit price will be the same as Sale price.
|
Step 1 – Go to Vendor Bill module |
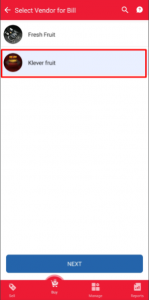
Step 2 – Select Vendor |
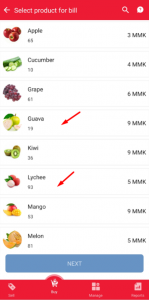
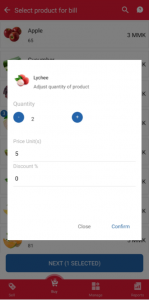
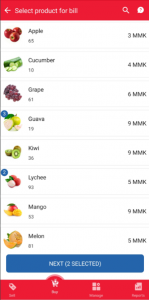
Step 3 – Select Products |
 |
 |
 |
|
Step 4 – Choose qty |
Step 5 – Choose qty |
Step 6 – Click “Next” button |
 |
 |
 |
|
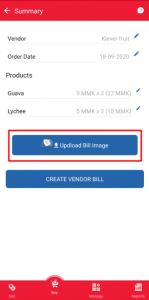
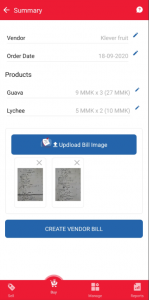
● Each time clicking “Upload Bill Image”, users can only choose one picture. In order to upload another picture, users continue to click “Upload Bill Image” |
||
|
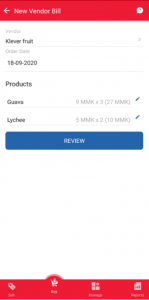
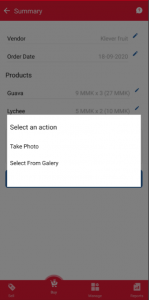
Step 7 – Review Bill info |
Step 8 – Upload Bill Image |
Step 9 – Select image |
 |
 |
 |
|
Step 10 – Create Vendor Bill |
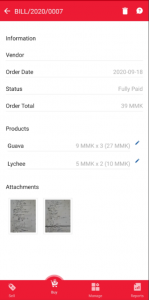
Step 11 – Vendor Bill detail |
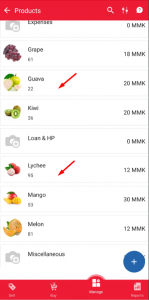
Step 12 – Inventory updated |
 |
 |
 |
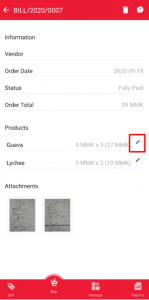
- To make adjustment an existing Vendor Bill
|
Step 1 – Click Make adjustment |
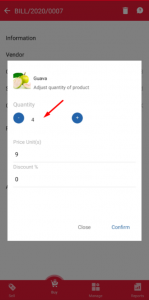
Step 2 – Click “Tap to edit” |
Step 3 – Revise Qty or Price |
 |
 |
 |
|
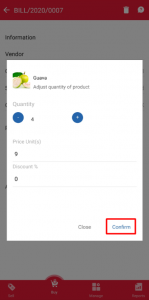
Step 4 – Click “Confirm” to save |
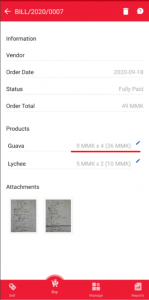
Step 5 – Bill detail updated |
Step 6 – Inventory updated |
 |
 |
 |
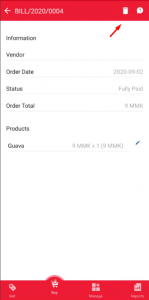
- To delete an existing Vendor Bill
|
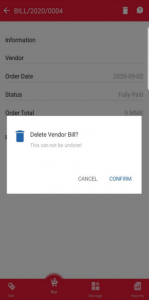
Step 1 – Click “Delete” |
Step 2 – Confirm to remove |
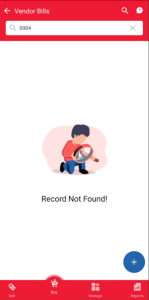
Step 3 – Remove completed |
 |
 |
 |
|
|
||
|
Step 4 – Inventory updated |
||
 |
||
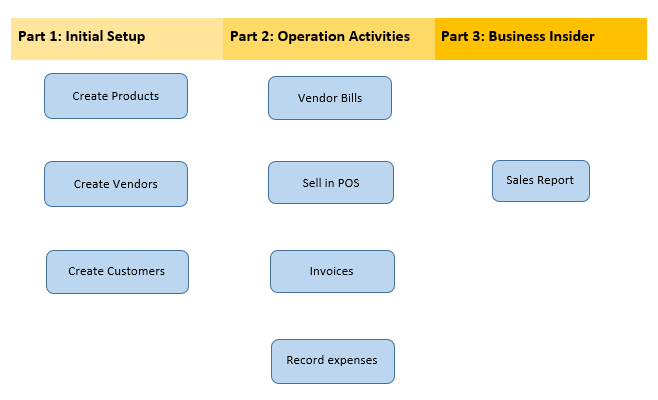
Part 2: Operation Activities
6. How to update/delete existing customer
- How to update customer
|
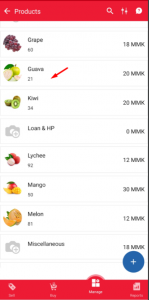
Step 1 – Choose Customer |
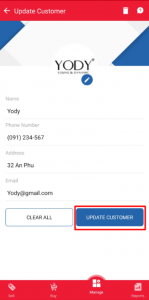
Step 2 – Click “Update” button |
Step 3 – Fill Customer info |
 |
 |
 |
- How to update existing customer
|
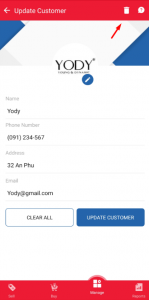
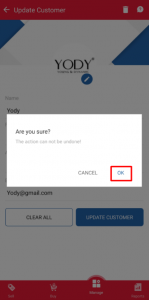
Step 1 – Click “Delete” to remove |
Step 2 – Confirm to remove |
 |
 |