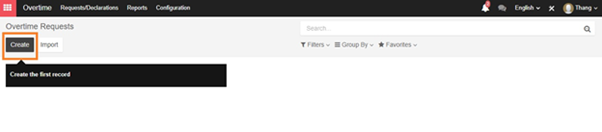
In order to register overtime, employee can use the Overtime module

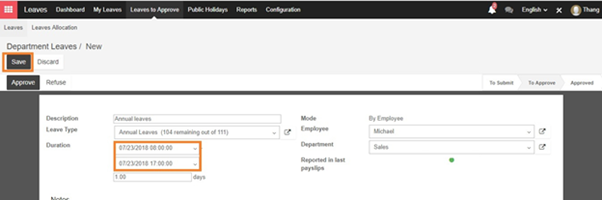
From the main menu, employee can choose “Create” to create a request for overtime working
In the request from, employee can input the time they intend to work overtime and reason. Then click on “Save” button for system to recognize the Overtime. Finally click on “Confirm” button to verify overtime request.
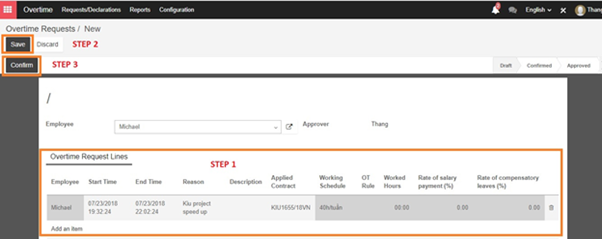
Note: if there are different rate belong to 2 overtime, then employee has to register 2 overtime request line belong to different rate
For example:
Working Schedule from 8:00 to 17:00 and work overtime:
– From 17:01-‣ 22:00 125% daily wage
– From 22:01-‣ 24:00 135% daily wage
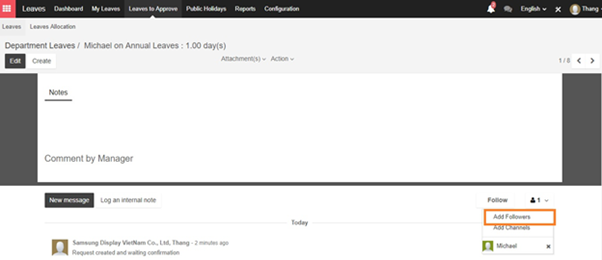
After confirming the request, employee can add the related person to this approval by adding followers function in the request form
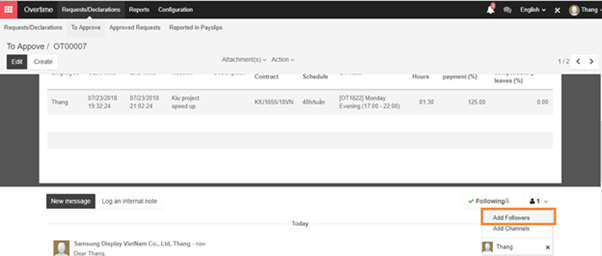
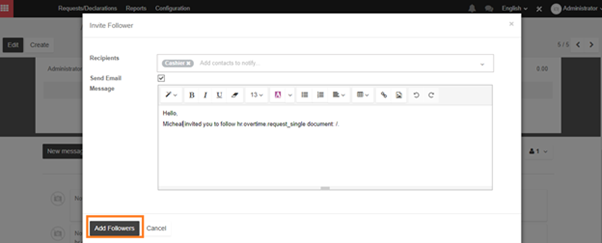
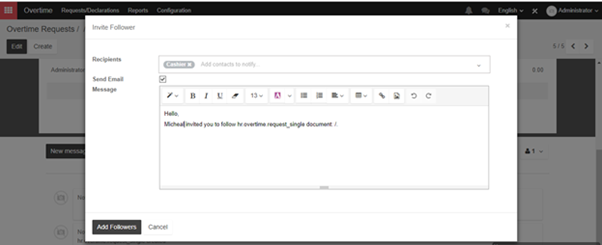
A pop-up will appear when clicking on Add Followers button, this pop-up help to send email to related person to this request. Just fill in the Recipients box and content of message and Click on Add Followers button.
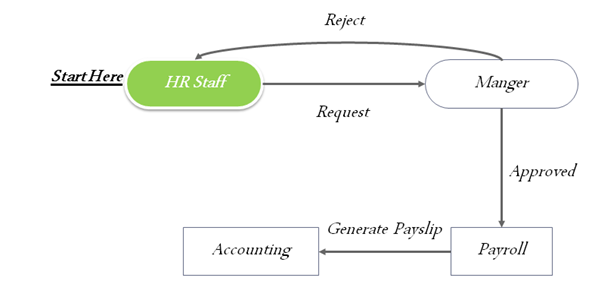
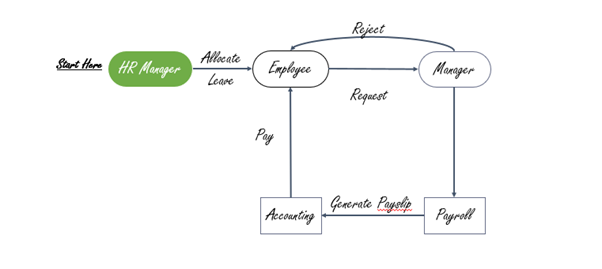
When completing adding followers for requests of overtime, employee will have to wait for manager to approve it.
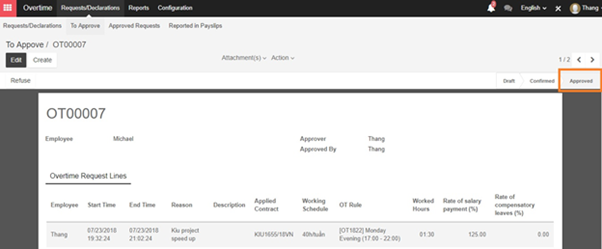
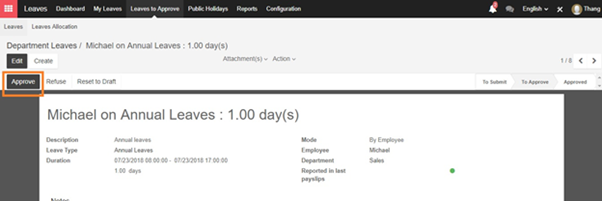
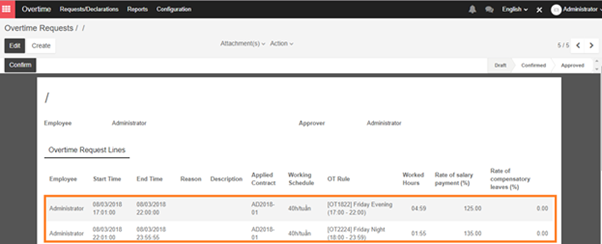
Manager can access the Overtime module and access to Request To Approve to see the approvals in pending state and click on each request to see the detail

In the form view of request for Overtime, manager can Refuse or Approve employee’s request.
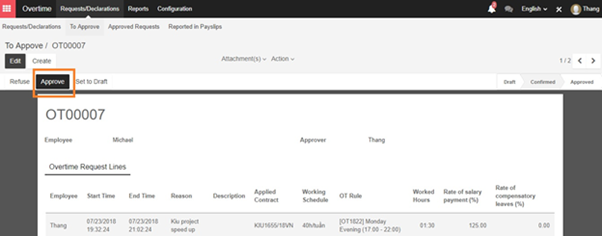
When manager approve the request and the state of request turn into “Approved”. Overtime request for the employee successfully registered.