Access to product list. Click Create. In the new product adding window, enter the product name and product information.
Check the box Can be sold, Can be purchased, and / or Can be expense i.e. this product can be spent in HR management, for example tickets flights, business travel expenses, etc.
Then fill in the information in sub-tab below
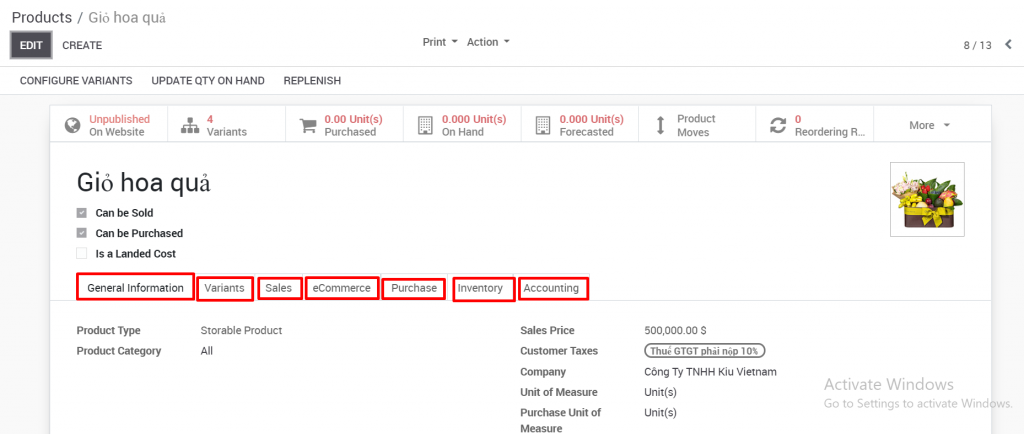
GENERAL INFORMATION
Products type
- Consumable: A type of product that is not managed through stock. Select this type for products that are consumed by the business, for example printing paper and pens are imported for use in business administration, not imported for business.
- Service: Select a service type for a product that is a service, not a physical product.
- Storable products: Is the physical product type that needs to be stored and managed through the stock.
-
** Can be set up in the Sales module to enable the sale of digital products (If the KIU BMP package includes Website module – Premium package)
Internal Reference: for the internal control of the products.
Barcode: which allows you to enter a barcode number to track your products.
HS code: which stands for the Harmonized System Code is a set of standardized names and numbers to classify traded products for international shipping and goods declaration.
Product category: The product category will be divided according to the accounting method. Kiu has established accounting groups (e.g. finished products, goods, raw materials, etc.) for the selection of firms. Enterprises can click on the arrow next to the side to check the accounts set up of an internal group and can change it to suit their own accounting style
Table 1. Product categories
|
The Internal category or Product Category is setted up in the Inventory module. Go to: Inventory >> Configuration >> Product Categories.
Example of Product categories setup.
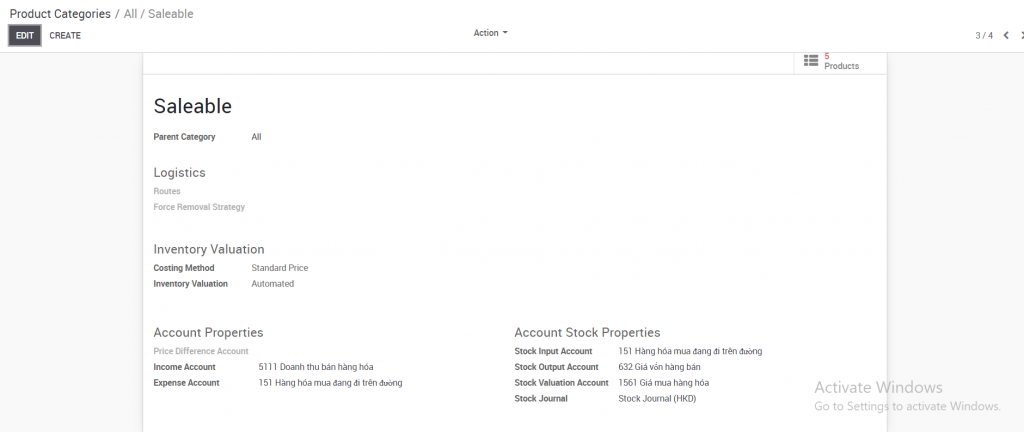
1. Parent Category: The configuration of the subgroup will be inherited from the parent group. If the account is not accounted for in the Child category but is accounted for by the Parent category then the system will pick the settings by the Parent category.
2. Costing method: Select the standard, real, or average cost method
- Standard: Manual cost calculation and updated on product form
- Average : COGS is automatically systematically based on the average of all the products in stock
- Real: COGS is automatically calculated by the system according to the actual input value of the product (selection must be combined with FIFO, LIFO or FEFO removal strategies
-
3. Inventory Valuation:
- Manual: manual calculation and manual accounting in the software
- Automated: The software automatically calculates the inventory value of the products according to the set cost method and automatically generates the accounting entries.
-
4. Account Properties: Set up different accounts for finished products, raw materials, goods, services etc. Specific accounts will depend on the accounting method of each enterprise. Enterprises can refer to the Kiu Product categories that have been created and adjusted to suit their business.
- Price Difference Account: Set up an exchange rate difference account here if the business manages multiple currencies, usually Account 4131.
- Income Account: Upon confirmation of the invoice of this product, the system will credit the income account which is set up here.
- Expense Account: Upon confirmation of the vendor bill of this product, the system will debit the expense account set here.
- Stock input/output account: are used to track the real time inventory valuation. Incoming stock is tracked in the first account, and outgoing stock in the second. If you leave these fields blank, the category values will apply
- Stock valuation account: When real-time inventory pricing is performed, this account will be the account that records the present value of the product.
- Stock journal: Related entries will be diary when real-time inventory valuation
-
|
Sale price: Enter the selling price if the business sells on a fixed selling price strategy or can also leave this field blank.
Cost: Costs entered here have no meaning in terms of cost of goods sold but are only for the purpose of entering inventory at the beginning of the period.
Unit of measure: Select the product management unit in stock. Read more instructions on unit of measure below
Table 2. How to create unit of measure
|
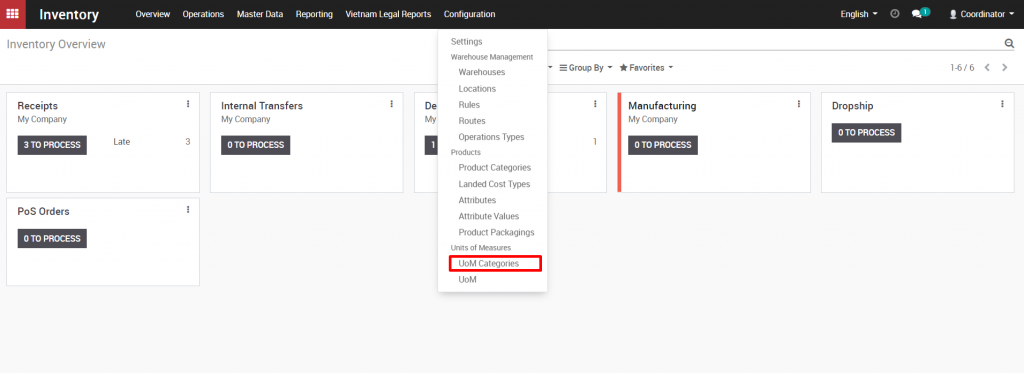
Set up a group of units of measure
Inventory >> Configuration >> UOM categories
Kiu has established several groups of units of measure. The enterprise should only create new unit groups that are not in the list of created Kiu.
Set up the unit of measure
Sales >> Configuration >> UOM. Click Create.

-
- Unit of measure: Enter the unit name, note only to create a new unit that is not already in the list.
- Category: Select one of the premade unit groups. Note that a product can be purchased, sold, and managed in stock in different units. However, these units must belong to the same group of units.
- Type: If it is the base unit of a group, select “Reference Unit of Measure for this category”. (The field “Rounding Precision” will decide whether this unit is divided into other smaller units. He can also be divided into subordinate units eg meters into dm or cm).
Note: A unit group has only one base unit.

Conversely, if the unit is bigger or smaller than the reference unit, enter the proportions accordingly,For example 1 km = 1000m.
|
VARIANTS
Add a descriptive attribute for similar products by clicking Add a line:
Attribute: Indicate the name of the variant (Example: Color, size, flavor, etc.)
Attribute value: Add a specific description for the selected attribute above
Click Save

Once saved, the info card showing this product comes in 2 variations. To update a variation’s value, click on the variation profile.

To set variable prices, enter the property’s additional price information in the corresponding column. If the variation has no price difference for the original product, enter a value of 0 in this column.

SALES
Pos:
- Available in POS : Check this box if you want the product to be sold through the Point of Sale section.
Invoicing:
- Ordered Quantities: issue invoice the customer for this product prior to shipment.
- Delivered Quantities: issue invoice the customer for this product upon completion of delivery.
-
ECOMMERCE
- Website (only applied to businesses integrated with the online sales website module):\
- Categories: Select additional groups to display this product on your business website. Note that these groups should be set up in the Website module in advance. Go to Website module >> Configuration
- Alternative products: can choose 1 or more at the same time alternative products to suggest customers to buy on the website.
- Accessories : choose products that customers often buy with this product to suggest customers to buy on the website.
PURCHASE
Vendors:
- Setting up supplier information is required on the Purchases tab if you want to set up an automated sourcing rule.
- For example, when the qty on hand of a product reaches the minimum inventory level, or when a customer orders a product in stock that is out of stock (a purchase route and MTO setted up), etc. . The system will automatically generate a draft quote request for the supplier set up in this Inventory tab. If more than one provider is setted up, the system will select the one with the lowest price.
- In the absence of pre-set supplier information, each business generates an order to buy this product with the supplier, the supplier and the price of the product will be automatically updated at the Inventory tab.
-

Click Add a line. In the window that opens, select the available provider and / or enter the required information:
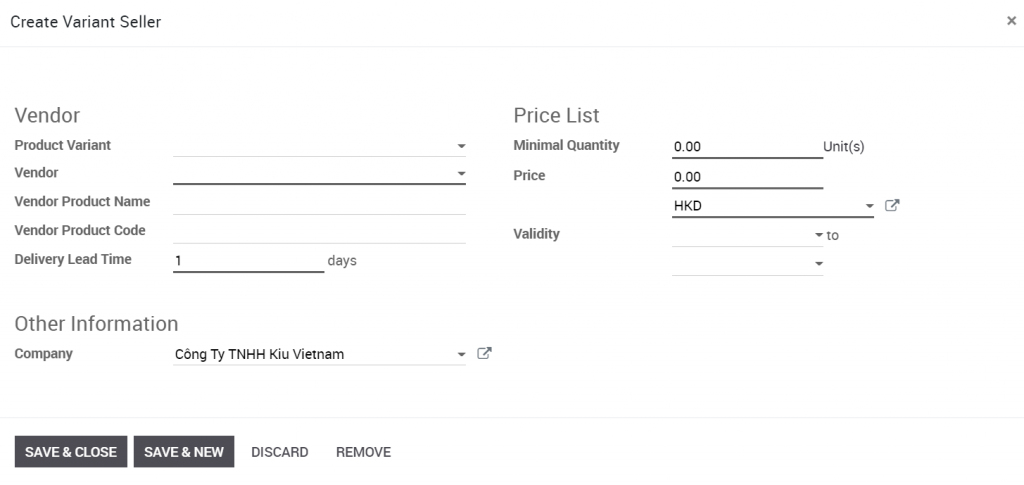
Reordering: When the need arises, you have two options:
- Create a draft purchase order: If you want to do procurement from individual supplier purchases.
- Propose a call for tenders: If you want to manage supply procurement through solicitation, choose the better bidder
-
Vendor Bill:
- On ordered quantities: Allow invoice before delivery
- On received quantities: The invoice is only received after receiving the goods
-
INVENTORY
Routes: Select the route for the product to include:
- Buy: if the product is purchased.
- Manufacture: if the product is self-produced and put into the warehouse.
- Make to order: the product is purchased or manufactured with the purchase order.
- Drop Shipping: Products are delivered directly from the supplier to the customer warehouse without entering the stock of the business.
-
Traceability: For tracking specific lots / products, especially regarding information such as expiration date, warranty period, etc. If you choose to have unique serial number / serial tracking, you will be asked to set your lots / serial number when you enter the warehouse, if you choose not to trace, you just need to receive the goods.
- Manufacturing Lead Time: is the number of days required to produce a product.
- Customer Lead Time: is the number of days from a sales order confirmation until the delivery of a product, or it could also be the delivery time you promised to your customers.
-
ACCOUNTING
Set up accounting accounts
Set up accounting for each specific product here. If this setting is left blank, the system applies the settings of the Product category to which this product belongs.
Cost of Operations: Tick cost of operations if you want to allocate this product (typically service products such as customs cost, handling cost, etc.) to cost of operations (See Cost of Cost Allocation Guide. sales). Once marked, a method of allocation will appear, you can choose a default method, but you can still customize a specific shipment / product later.



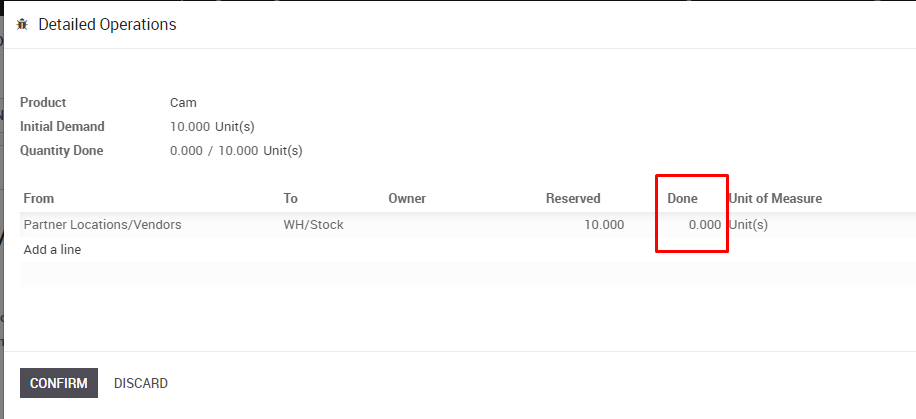
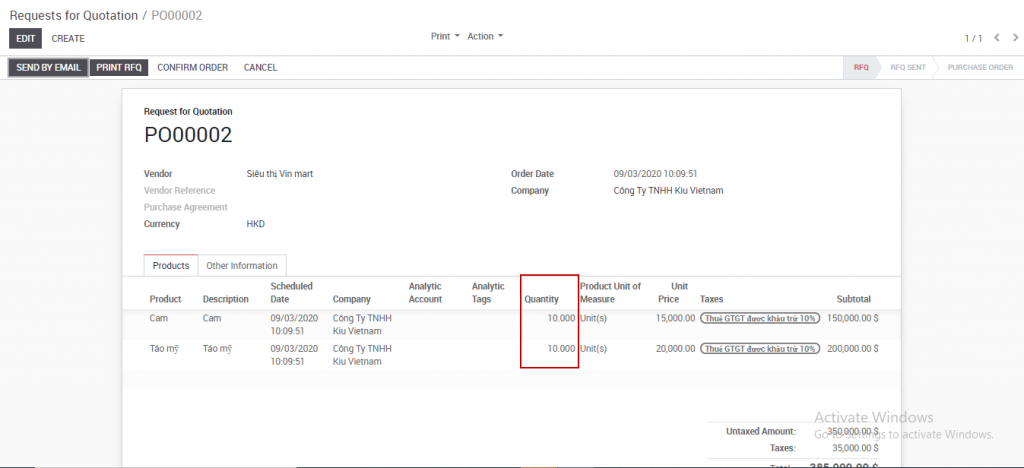
 Input quantity for each product
 .
. .
.


