Step 1: Follow the link POS > Reporting > Sales Details to open report

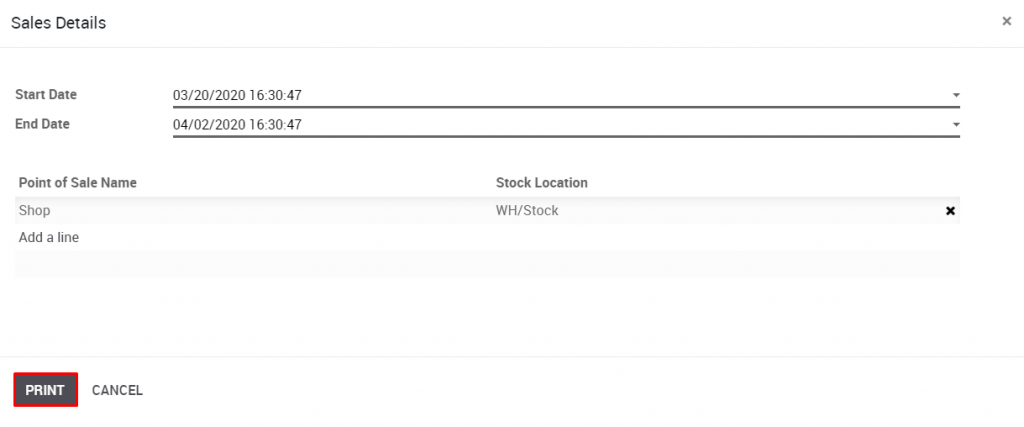
Step 2: Input time range parameter and click Print. The report will be downloaded automatically in pdf format.
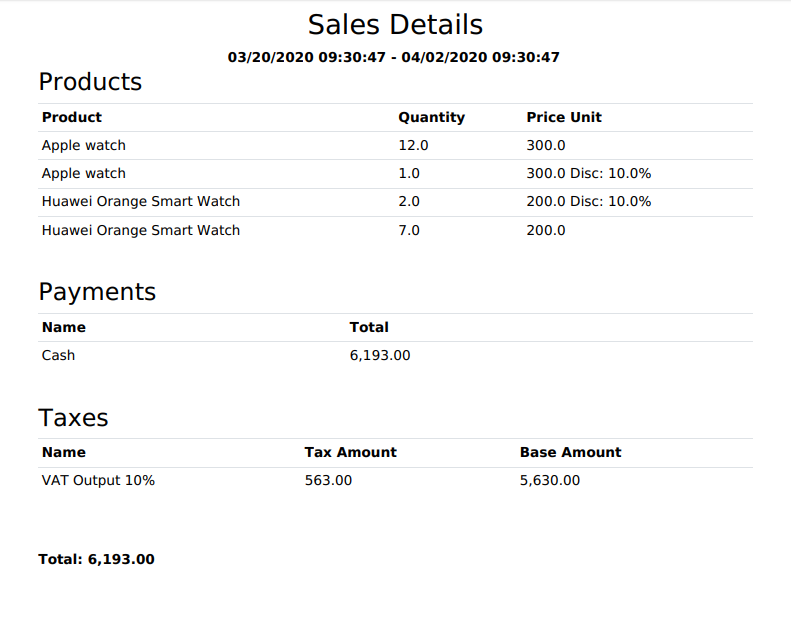
Step 3: Open the downloaded report and check your sales details.
Step 1: Follow the link POS > Reporting > Sales Details to open report

Step 2: Input time range parameter and click Print. The report will be downloaded automatically in pdf format.

Step 3: Open the downloaded report and check your sales details.

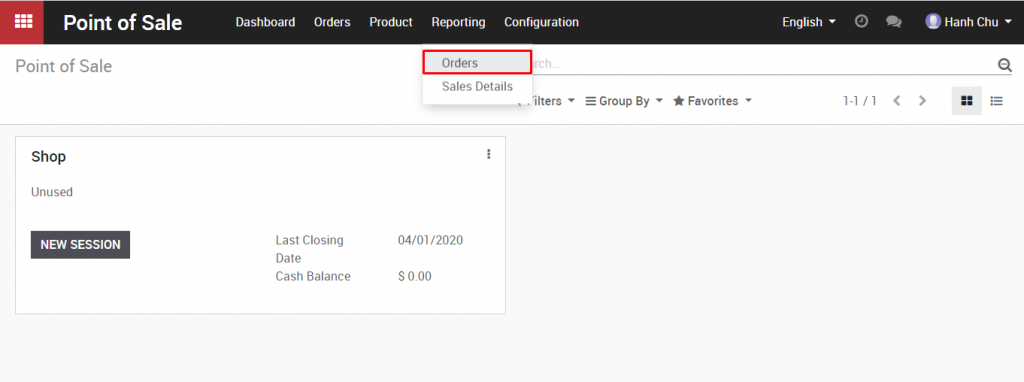
Step 1: Follow the link POS > Reporting > Orders to open report
Step 2: Make use of function buttons to have order report display in graph or pivot table (excel format)
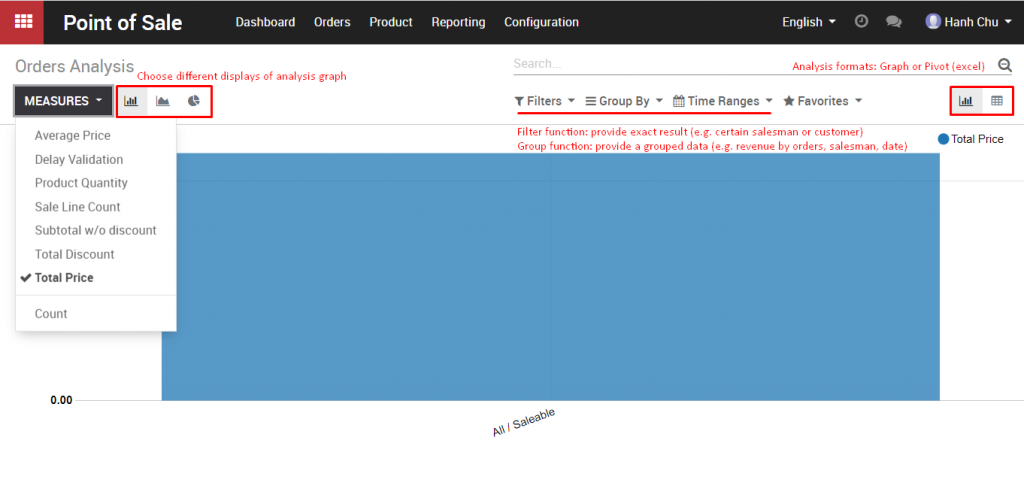
Step 3: In excel format, users can expand orders analysis by using existing parameters (e.g. by salesman, by product, by order date, by customer, etc.) and function buttons.
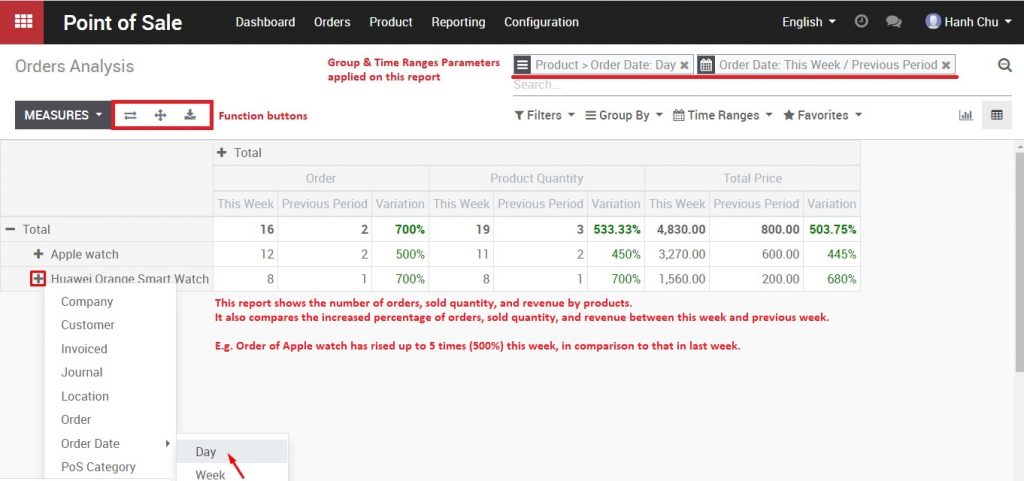
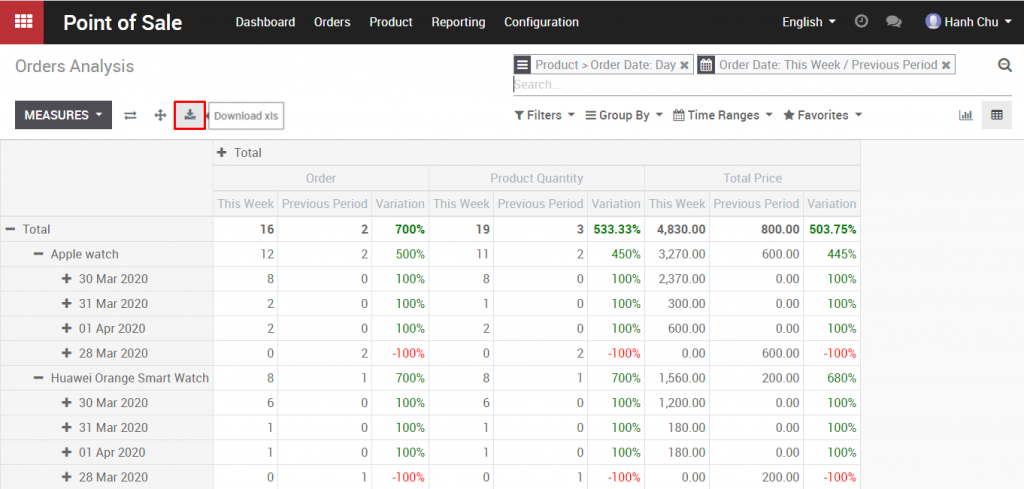
Step 4: Download report. The report can be ONLY downloaded in excel format.
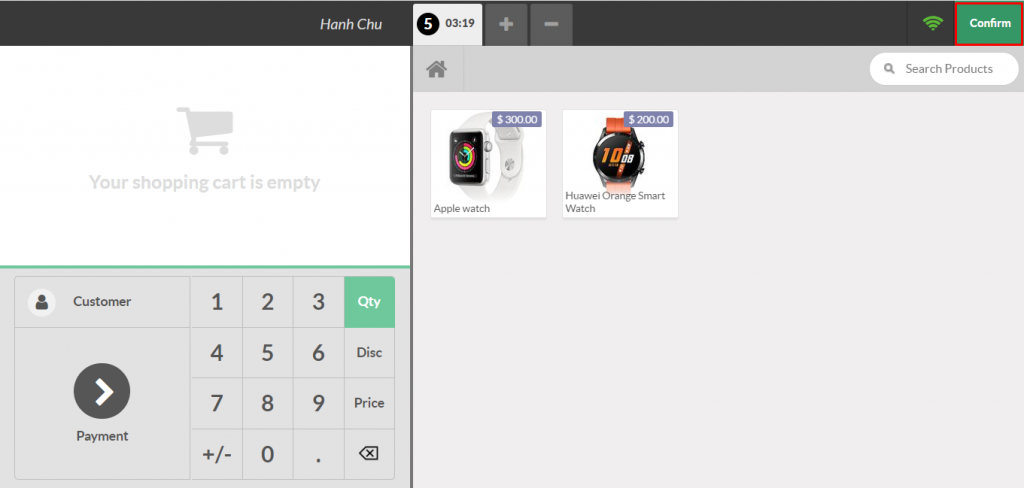
Step 1: To exit the POS interface, click Close.
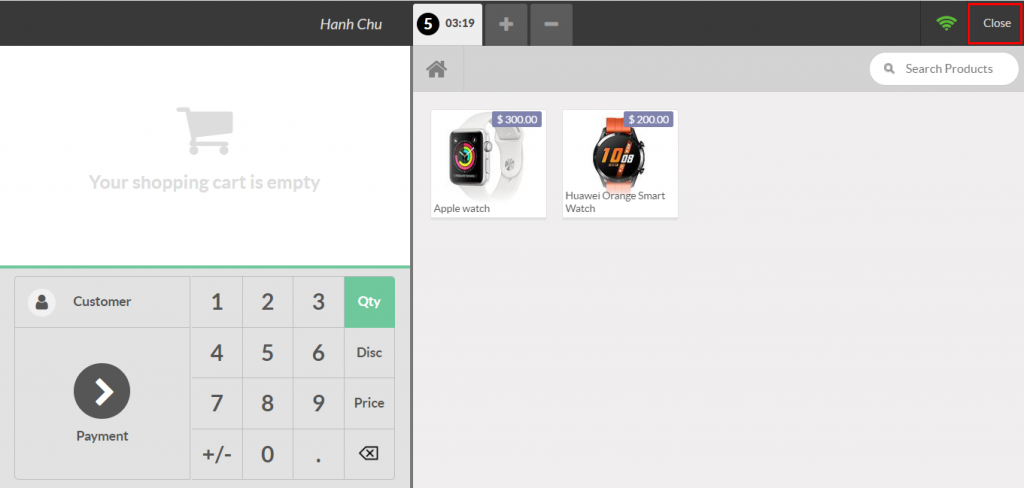
Confirm the exit
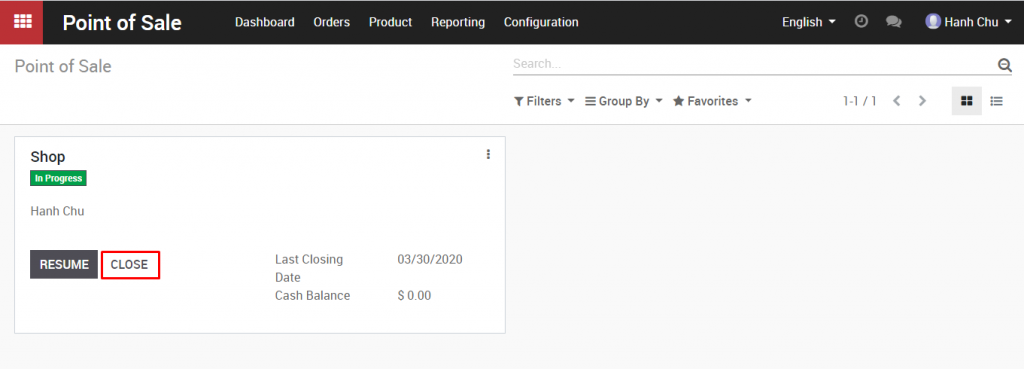
Step 2: In POS Dashboard, click Close
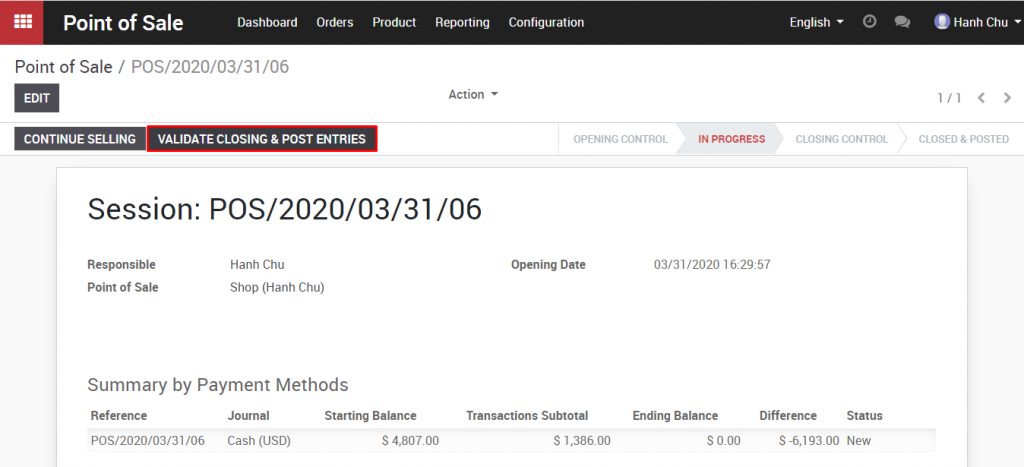
Step 3: Check the session summary and click Validate closing & Post Entries
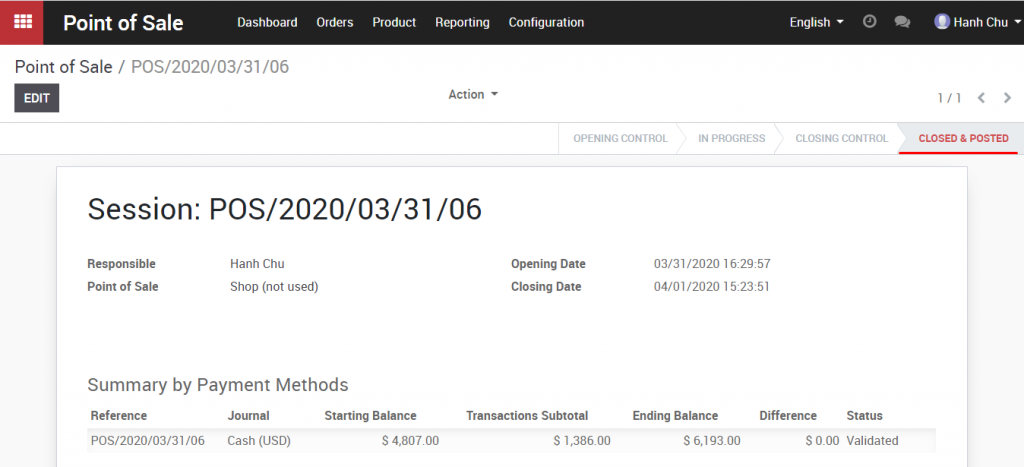
The session is successfully validated
In order to return the transaction, it is compulsory to have one session in progress.
Step 1: While the POS session is in progress, access to the list of transactions in Point of Sale > Orders > Orders.

Open the order to be returned.

Step 2: Click Return Products to create the returned transaction.
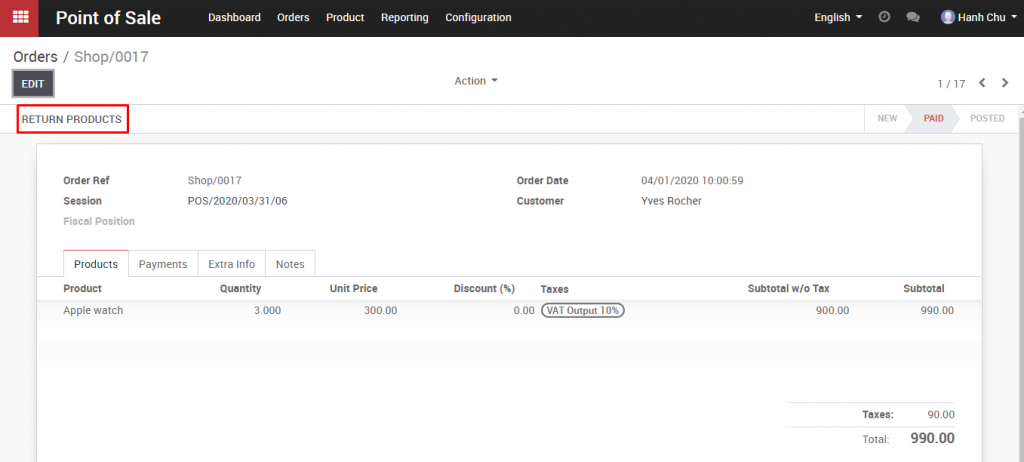
Step 3: Record returned payment & products by modifying the amount of returned products.
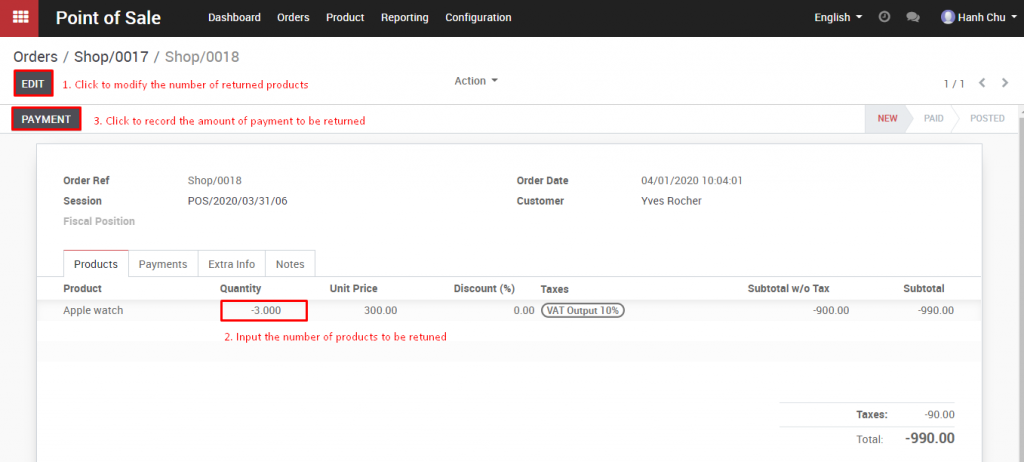
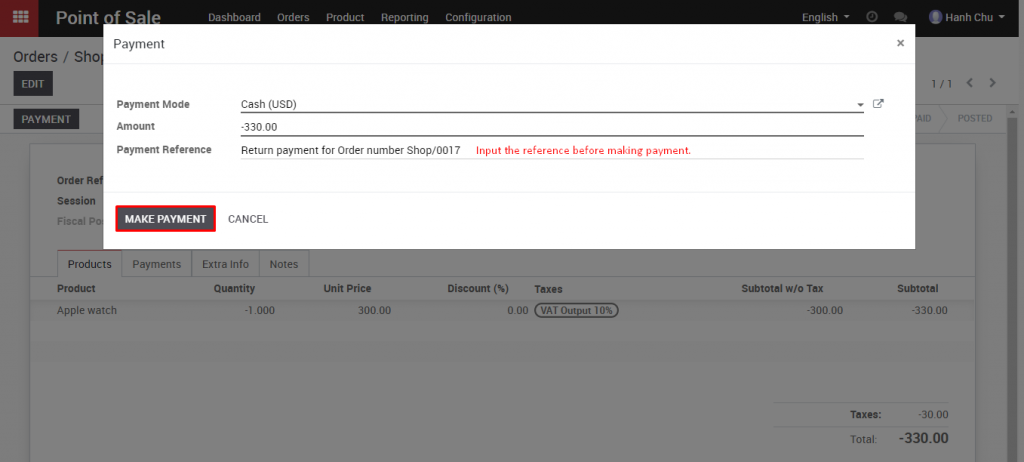
After inputting the returned payment reference, click Make Payment to confirm the amount.

After inputting the returned payment reference, click Make Payment to confirm the amount.
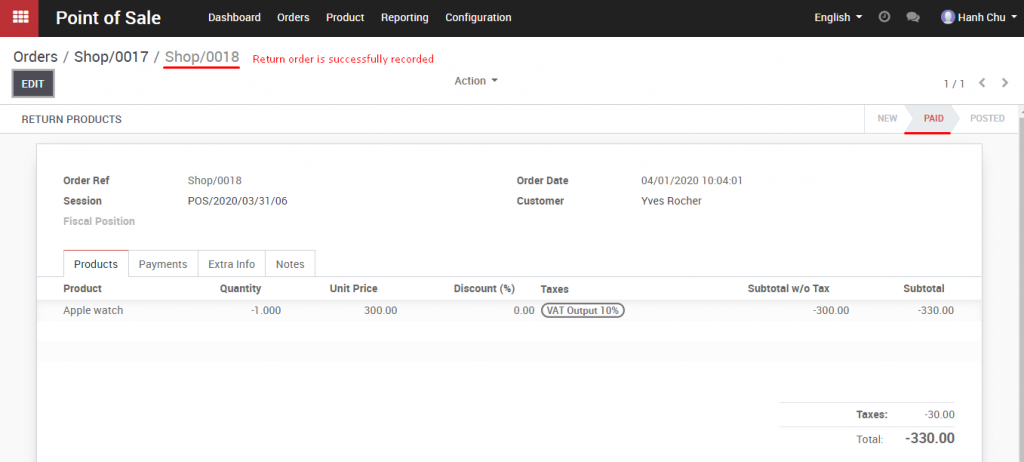
The return order is successfully created.
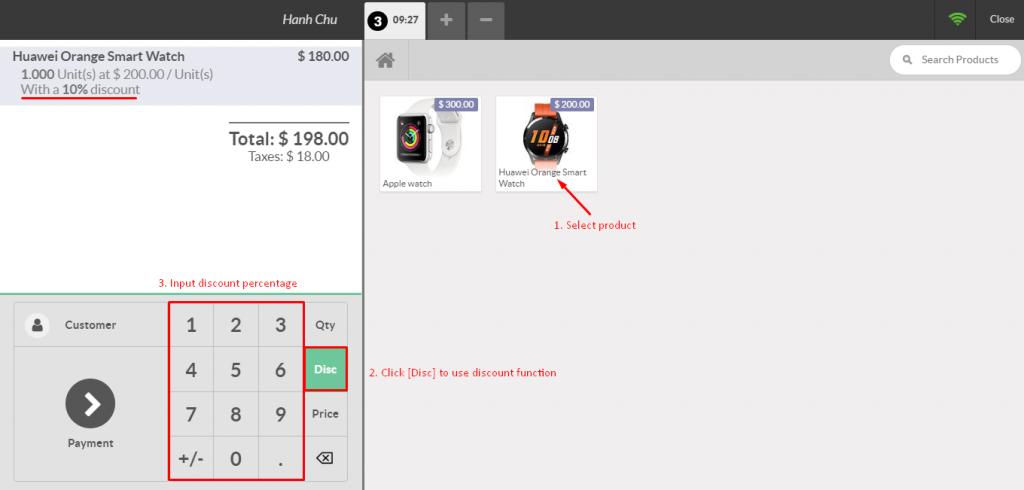
Step 1: Select product and press [Disc] to use the discount function, and input discount percentage.
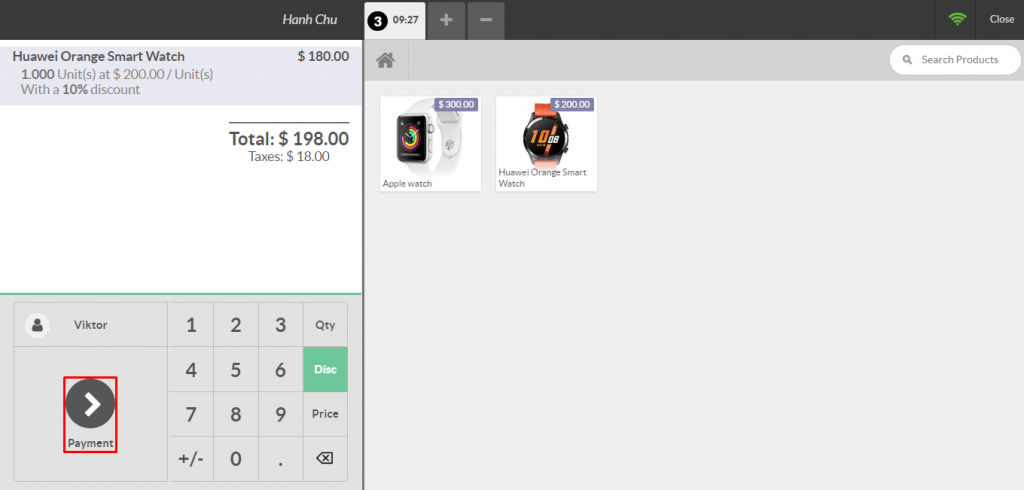
Step 2: Record payment for discounted transaction by clicking Payment
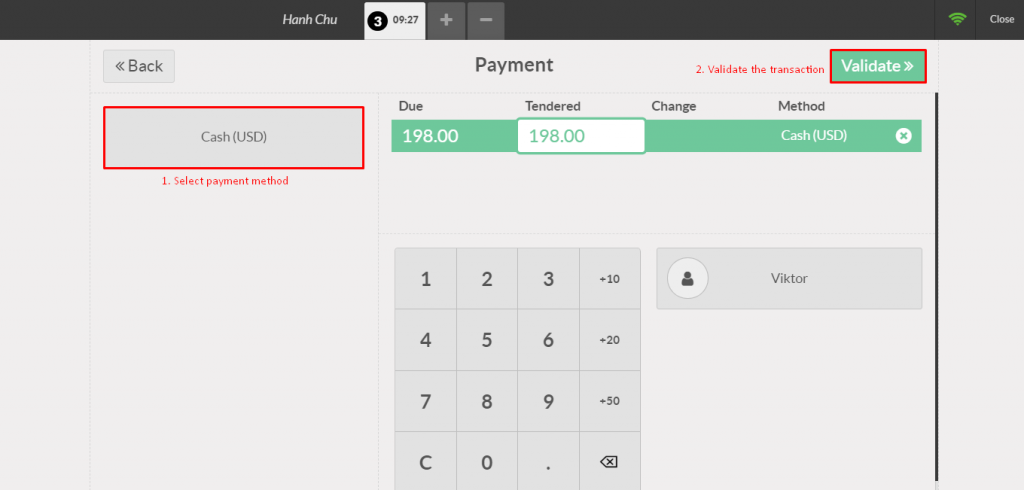
In the payment screen, the seller chooses the payment method, and validates the transaction.
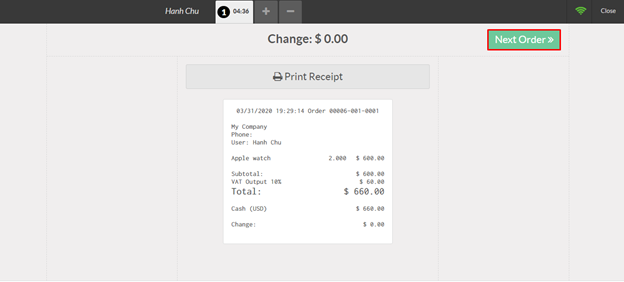
After the transaction is successfully recorded, click Next Order to handle other orders.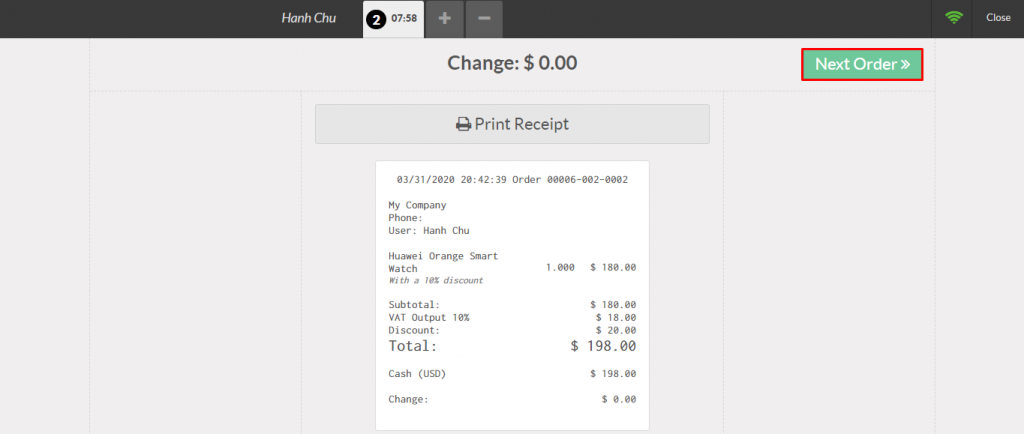
Step 1: Open new session at Point of Sale > Dashboard, click New Session

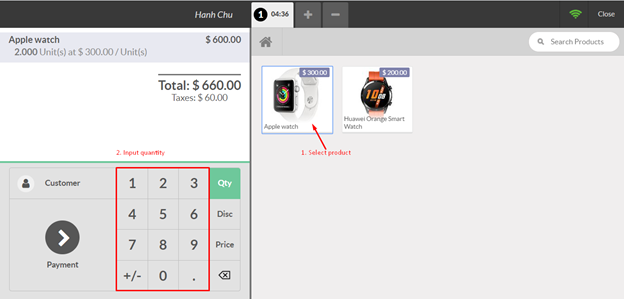
Step 2: Place order by selecting product and inputting the quantity of products.
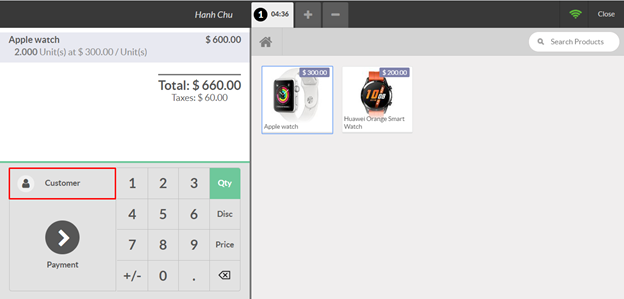
Step 3: Identify customer Seller needs to click on Customer
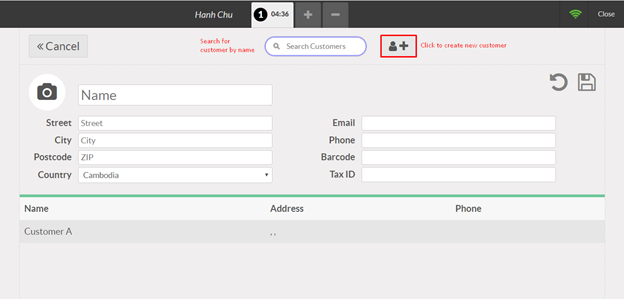
Sellers can either search for existing customers or create new customers by inputting customer’s information in the following form and clicking the symbol Save.
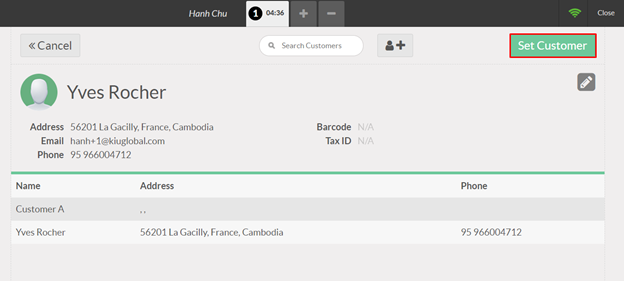
Click on Set Customer to choose the correct customer
Step 4: Record payment by clicking Payment
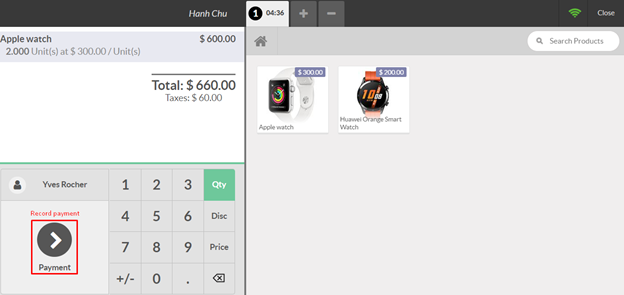
In the payment screen, the seller chooses the payment method, issues an invoice to the customer and validates the transaction.
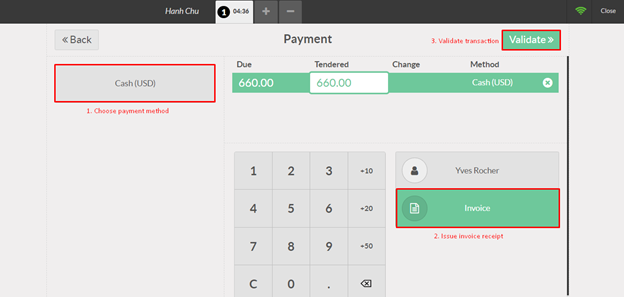
As the order is successfully recorded, click Next Order to place other orders.
