7.8.2. How to work with serial numbers?

Serial Number Tracking is used to track products with serial numbers on every transactions. You can track the current location of the product with serial numbers. When the products are moved from one location to another location, the system will automatically identify the current location of the product based on last movement of the product. So you can get the last location where the products are moved.

–          Configuration:

You need activate the tracking of serial numbers in the settings. Go to Inventory -> Configuration ‣ Settings, select Track lots or serial numbers. Then click on Apply.

–          Product Configuration:

Go into Inventory Control ‣ Products, and open the product of your choice. Click on Edit, and in the Inventory tab, select By Unique Serial Number, then click on Save.

–          Manager serial numbers:

  • Transfer

In order to process a transfer of a product tracked by serial number, you have to input the number(s). In order to be able to assign serial numbers to products with tracking features enabled you will first need to mark your transfer as to do. Click on the Mark as TODO button to display the Lot Split icon.

Click on the serial number icon :

A window will pop-up. Click on Add an item and fill in the serial numbers.

  • Inventory adjustment:

Inventory of a product tracked by serial numbers can be done in 2 ways:

  • Classic inventory by products
  • Inventory of a serial number

When doing a classic inventory, there is a Serial Number column. If the product has already been assigned with a number, it is already pre-filled.

Click on Add an item if the product has not been inventoried yet. You can easily create serial numbers, just type in a new number in the column.

The quantity should be 1 for each line. You can also just do the inventory of a serial number. In this case, you will have to fill in the serial number. You can also create a new one from here. Just type in the number, a window will pop out to link it to a product.

  • Serial number traceability:

The serial number given to these items allow you to keep track of where they were received, put in stock, to whom they were sold and where they were shipped to.

To track an item, open the Inventory module, and in Inventory Control ‣ Serial Numbers/lots, click on the serial number corresponding to your search.

7.8.1. What’s the difference between lots and serial numbers?

Lots correspond to a certain number of products you received and store altogether in one single pack.

Serial numbers are identification numbers given to one product in particular, to allow to track the history of the item from reception to delivery and after-sales.

  • When to use:

Lots are interesting for products you receive in great quantity and for which a lot number can help in reportings, quality controls, or any other info. Lots will help identify a number of pieces having for instance a production fault. It can be useful for a batch production of clothes or food.

Serial numbers are interesting for items that could require after-sales service, such as smartphones, laptops, fridges, and any electronic devices. You could use the manufacturer’s serial number or your own, depending on the way you manage these products

  • When not to use:

Storing consumable products such as kitchen roll, toilet paper, pens and paper blocks in lots would make no sense at all, as there are very few chances that you can return them for production fault.

On the other hand, giving a serial number to every product is a time-consuming task that will have a purpose only in the case of items that have a warranty and/or after-sales services. Putting a serial number on bread, for instance, makes no sense at all.

7.7.3. How to configure and run schedulers?

Scheduling only validates procurements that are confirmed but not yet started. These procurement reservations will themselves start production, tasks or purchases depending on the configuration of the requested product.

You take into account the priority of operations when starting reservations and procurements. Urgent requests, those with a date in the past, or requests with a date earlier than the others will be started first. In case there are not enough products in stock to satisfy all the requests, you can be sure that the most urgent requests will be produced first.

→ Run the scheduler manually

You can also start the scheduler manually from the menu Inventory ‣ Schedulers ‣ Run Schedulers. The scheduler uses all the relevant parameters defined for products, suppliers and the company to determine the priorities between the different production orders, deliveries and supplier purchases.

→ Configure and run the scheduler (only for advanced users)

You can set the starting time of the scheduler by modifying the corresponding action in the menu Settings ‣ Technical ‣ Automation ‣ Scheduled Actions. Modify the Run mrp Scheduler configuration.

7.7.2. How to manage stock that you don’t own?

Some suppliers can sometimes offer you to store and sell products without having to buy those items: this technique is called consignee stock. Consignee stock is a great way for manufacturers and suppliers to launch new products. As resellers may be reluctant to buying a product that they are not sure to be able to sell, consignee stock will allow them to propose an item to check its market without having to pay for it in the first place. Kiu BMP has the ability to manage consignee stocks through the advanced settings.

Go to Inventory -> Configuration -> Settings and in the Product Owners section, select Manage consignee stocks (advanced), then click on Apply.

In the Inventory’s Dashboard, open the Receipts and create a new reception. You can see that in the right side of the page, a new Owner line has appeared. You can specify the partner which owns the stock or leave it blank if you are the owner.

7.7.1. How to scrap products?

Scrap means waste that either has no economic value or only the value of its basic material content recoverable through recycling. In your warehouse you sometimes find products that are damaged or that are unusable due to expiry or for some other reason. You often notice this during picking or physical inventory. Since you cannot normally sell or store these products, you have to scrap product. When goods are scrapped they are not reflected in the system as a part of the inventory. The scrapped material will be physically moved to scrap area.

  • Configuration

When you install inventory management, the system automatically creates one default scrap location, namely Virtual location/Scrapped.

To create an extra scrap location, Go to Inventory ‣ Configuration ‣ Settings and check Manage several warehouse, each one composed by several stock locations, then click on Apply.

Then you can create a new scrap location in Configuration ‣ Warehouse Management ‣ Locations. To define a scrap location, you have to check Is a scrap location? on location form view.

  • Different ways to scrap product
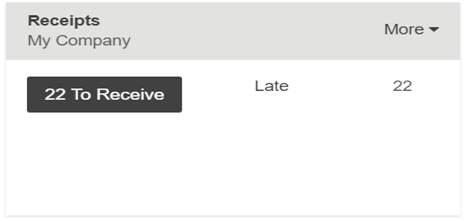
  • Scrap from Receipt : To scrap product from incoming shipment , go to Inventory -> Dashboard -> Receipts

Open the incoming shipment and click on the Scrap button

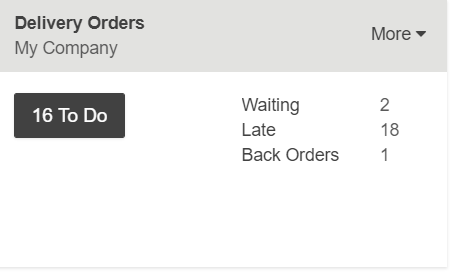
Scrap from delivery order : To scrap product from outgoing shipment, go to Inventory -> Dashboard -> Delivery orders

Open the outgoing shipment and click on the Scarp button

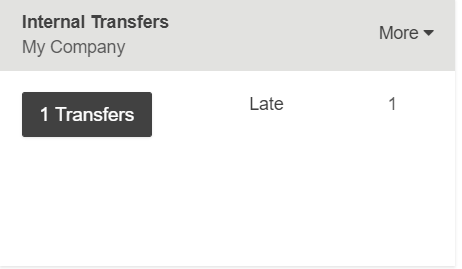
Scrap from internal transfer : Go to Inventory -> Dashboard -> Internal transfer

Open the internal transfer and click on the Scarp button

Purchase – table of content

2.1. Regular Purchase process
2.1.1. Request for Quotation
2.1.2. Confirm Purchase Order
2.1.3. Confirm Receipt
2.1.4. Create a vendor bill
2.1.5. Bill Control
2.1.6. Lock a purchase order
2.1.7. Cancel a purchase order
2.1.8. Request managers approval for expensive orders
2.1.9. Analyze the performance of my vendors
2.1.10. Determine when to pay a vendor bill with 3-way matching
2.1.11. Raise warnings on purchase orders
2.1.12. Dropship products

2.2. Master Data
2.2.1. Set multiple vendors on a product
2.2.2. Import vendors pricelists

2.3. Purchase Agreements
2.3.1. Manage Blanket Orders
2.3.2. Manage Call for Tender

2.4. Replenishment Flows
2.4.1. Don’t run out of stock thanks to Reordering Rules
2.4.2. Trigger purchase of products based on sales (Make to Order)
2.4.3. Schedule your receipts and deliveries


2.4.3. Schedule your receipts and deliveries

To manage your supply chain scheduling, you will need to use KiuBMP Lead Times.

Lead Times are the expected times needed to receive, deliver or manufacture products.

Configure Lead Times

Vendor Lead Time

The vendor lead time is the time needed by your vendor to deliver the product to you.

To configure your vendor lead times, go to a product page, under the purchase tab, click on a Vendor once there you can change the delivery lead time for that Vendor & Product.

Customer Lead Time

The customer lead time, on the other hand, is the time you need to deliver the product to your customer.

To configure your customer lead time open a product and go under the Inventory tab. You can then add how many days you need.

Manufacturing lead time

The manufacturing lead time is the time you need to manufacture the product.

To configure your manufacturing lead time open a product and go under the Inventory tab. You can then add how many days you need.

Configure Security Lead Times

KiuBMP also lets you configure Security Days allowing you to cope with potential delays along the supply chain and make sure you meet your engagements.

The easiest way is to go to Settings from any module and type Lead Time in the search bar. From there, tick each box and configure your various Security Lead Time for your needs.

Alternatively, you can go in the settings of the Inventory module and Manufacturing module to configure those settings.

Lead & security times in a use case

For example you sell a car today (January 1st), that is purchased on order, and you promise to deliver your customer within 20 days (January 20). Here is your product’s configuration:

  • Security lead time for sales : 1 day
  • Security lead time for purchase : 1 day
  • Vendor delivery lead time : 9 days

In such a scenario, the scheduler will trigger the following events based on your configuration.

  • January 19: scheduled delivery date (20th January – 1 day of security lead time for Sales)
  • January 18: scheduled receipt date (19th January – 1 day of security lead time for Purchase)
  • January 10: order date = deadline to order from your vendor (19th January – 9 days of vendor lead time)


2.4.2. Trigger purchase of products based on sales (Make to Order)

If you don’t keep stock of your products, you may need to trigger purchase orders on each sale you make.

Thanks to being a fully integrated solution, KiuBMP lets you do that easily in just one step.

Configure the product

Open a product form and, under the inventory tab, tick the routes Buy and Make To Order.

Don’t forget to also set a vendor under the Purchase tab.

Note

The InventorySales and Purchases modules have to be installed in KiuBMP for this feature to work.

Create a sales order using Buy & MTO

Create a new sales order with your product. When you confirm the order, a delivery order is created with the status Waiting for another operation.

A new RfQ will automatically be created in your Purchases module. Note that you can see for which SO this RfQ has been created thanks to the Source Document field, visible on the RfQ.

When you confirm the RfQ into a purchase order, a receipt is automatically created and directly accessible from your purchase order with the use of the Shipment button.

You can validate the receipt of your products. When you will go back to the delivery order, you will see that the products are now ready to be shipped.

Tip

As long as your RfQ is not confirmed, KiuBMP will keep adding PO Lines automatically under it.


2.4.1. Don’t run out of stock thanks to Reordering Rules

To make sure you never run out of stock, you might want to define Reordering Rules on products. Thanks to reordering rules, KiuBMP will help you to replenish your stock when it reaches a minimum stock level.

Set a reordering rule

Open a stockable product, you’ll find the Reordering Rules tab.

Note

You can also access all your reordering rules from Inventory ‣ Master Data ‣ Reordering Rules.

Once in the next menu, you can create the reordering rules linked to your product. From now on, every time this product reaches the minimum quantity it will replenish your stock to your maximum quantity.

Tip

The replenishments will take place when the scheduler in the Inventory module runs. By default in KiuBMP, the schedulers will run every night at 12:00PM.

See also: How to configure and run schedulers?

From now on, every time a product with a reordering rule reaches the minimum stock, the system will automatically see how to fulfill that need based on the product configuration (e.g create an RfQ, create an MO, etc.).

Troubleshooting

For your reordering rules to work, your product needs to be correctly configured. If you are using Buy route, you need a vendor on the product. If you are using Manufacturing route you will been a BoM on the product. If the product is not fully configured or there is a mistake in your routes, a next activity will be logged on the product informing you there is an issue with the configuration.


2.3.2. Manage Call for Tender

A Call for Tender is a special procedure to request offers from multiple vendors to obtain the most interesting price.

Configuration

For this feature to work, go to Purchases ‣ Configuration ‣ Settings and activate the Purchase Agreements feature.

Create a Call for Tender

To use this feature, go to Purchases ‣ Purchase Agreements.

Create a new purchase agreement, access the Agreement Type drop down menu and select Call for Tender.

When you are satisfied with your purchase agreement, confirm it will move from Draft to Confirmed and a new RFQs/Orders appeared in the top right corner of the document.

Request new quotations from the Call for Tender

From the Call for Tender, KiuBMP will auto-fill the RFQ with the product(s) from your Call for Tender.

Select the best offer

The various RFQs and orders linked to the Call for Tenders will be under the RFQs/Orders button where you can select and confirm the best offer.

Close the Call for Tender

Once you’re done with your Call for Tender don’t forget to close it.