It often happens that your employees have to spend their personal money while working on a project for your client. Let’s take the example of an consultant paying an hotel to work on the site of your client. As a company, you would like to be able to invoice that expense to your client.
Expenses configuration
To track & invoice expenses, you will need the expenses app. Go to Apps ‣ Expenses to install it.
You should also activate the analytic accounts feature to link expenses to the sales order, to do so, go to Invoicing ‣ Configuration ‣ Settings and activate Analytic Accounting.
Add expenses to your sales order
From the expense app, you or your consultant can create a new one, e.g. the hotel for the first week on the site of your customer.
You can then enter a relevant description and select an existing product or create a new one from right there.

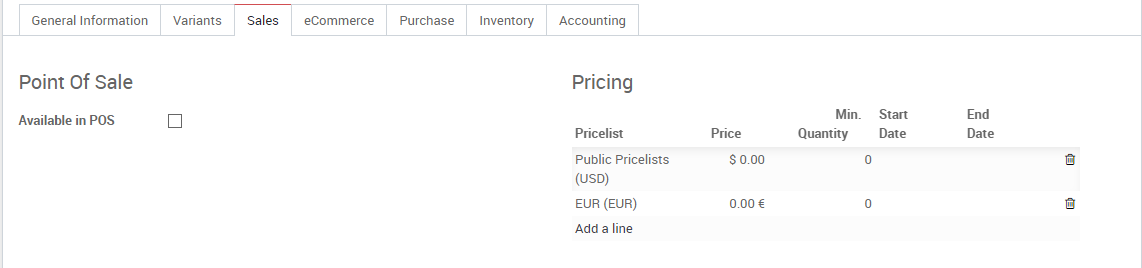
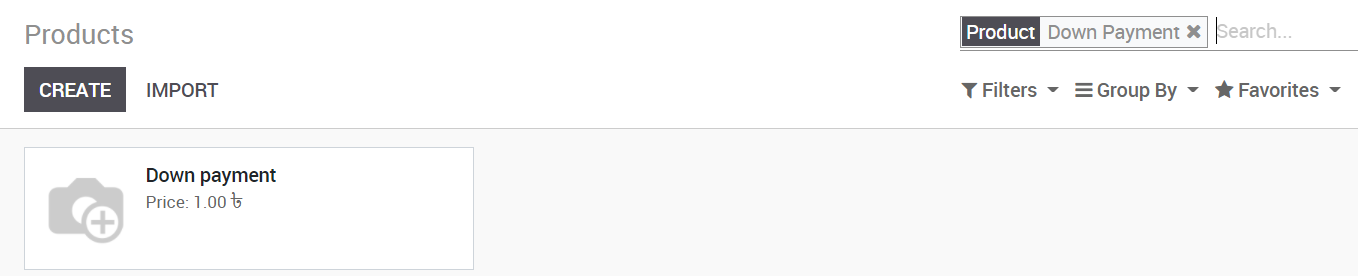
Here, we are creating a Hotel product:
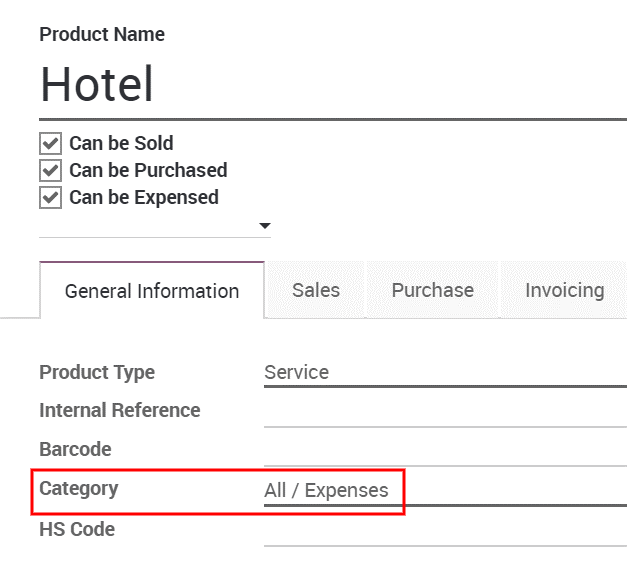
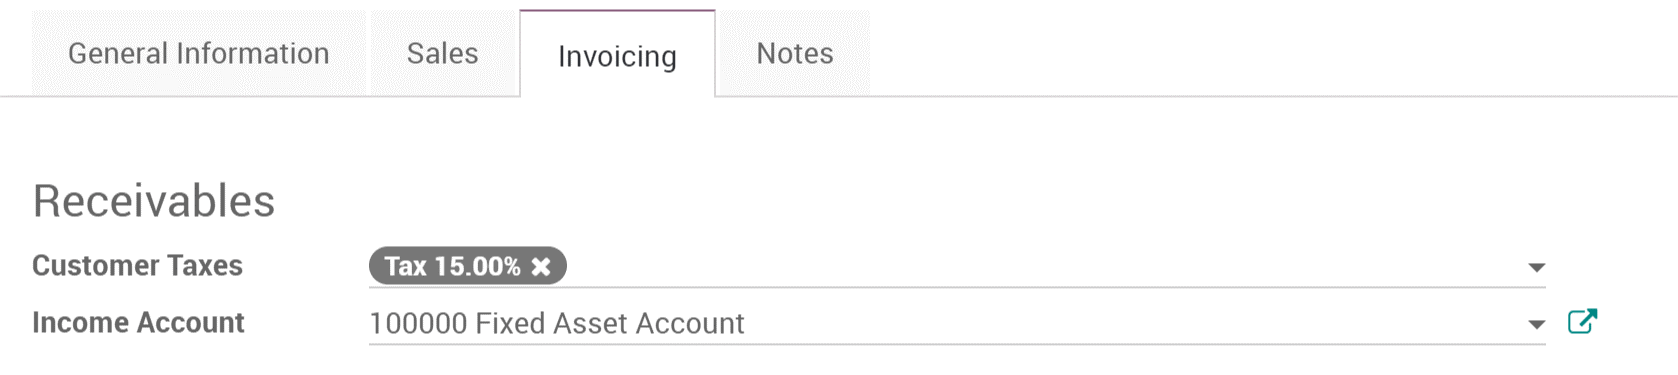
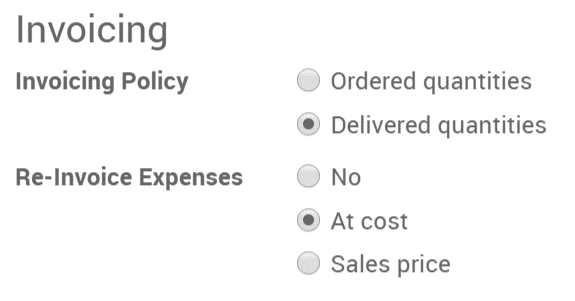
Under the invoicing tab, select Delivered quantities and either At cost or Sales price as well depending if you want to invoice the cost of your expense or a previously agreed on sales price.
To modify or create more products go to Expenses ‣ Configuration ‣ Expense products.
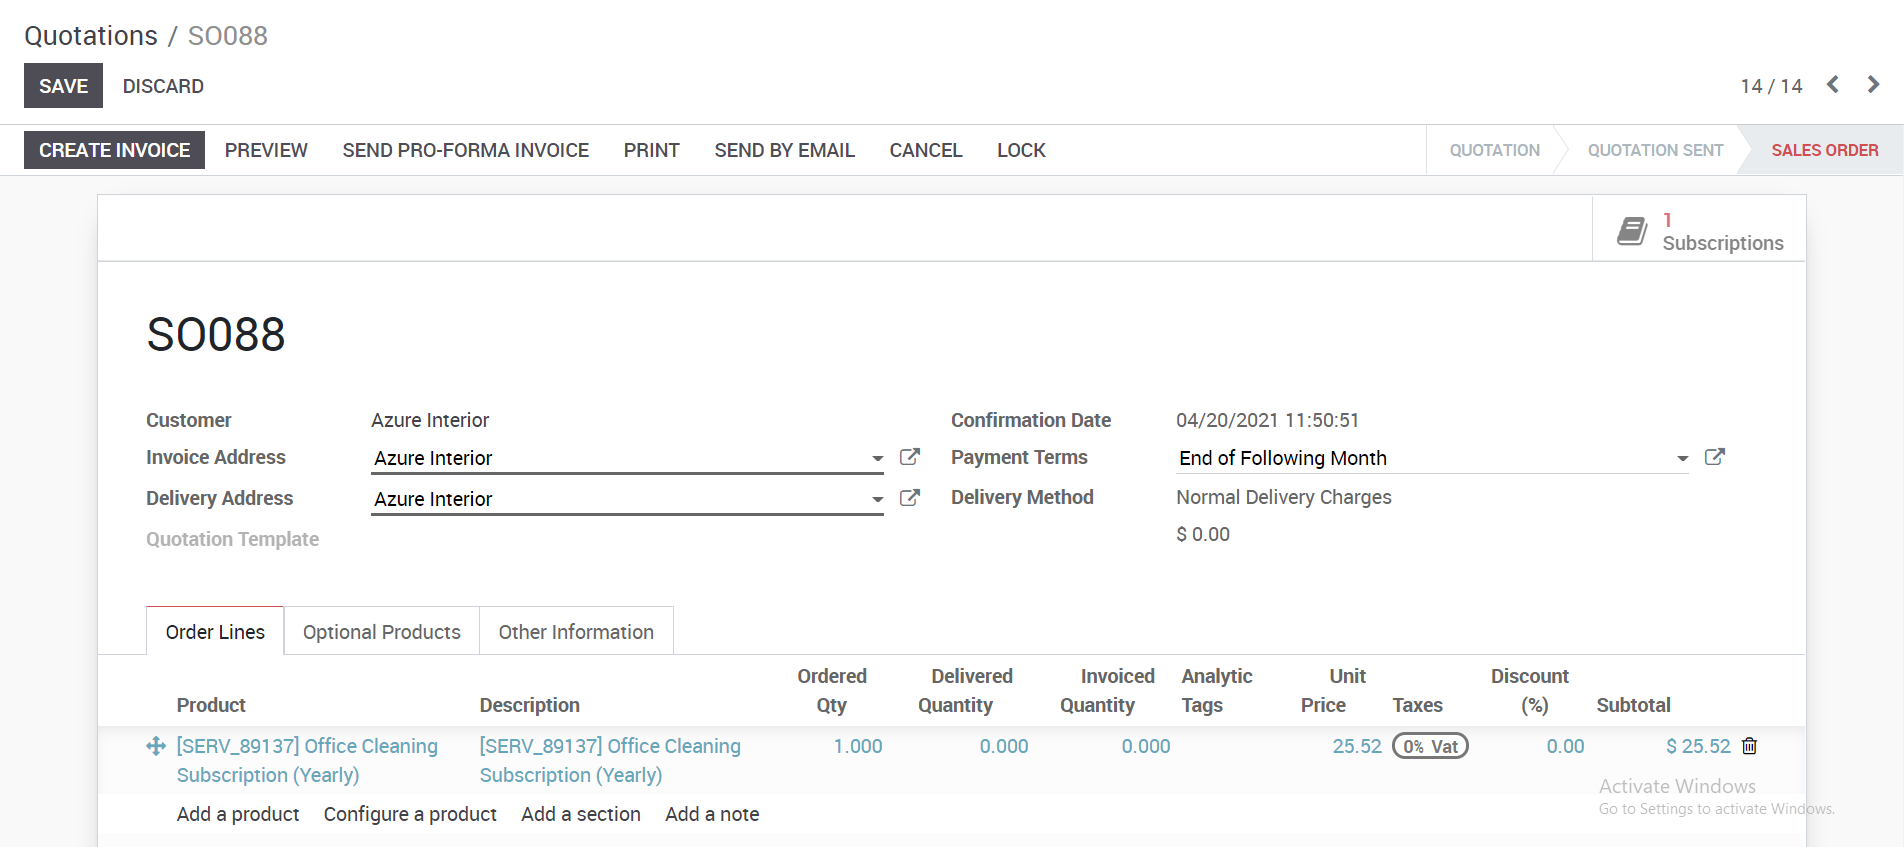
Back on the expense, add the original sale order in the expense to submit.

It can then be submitted to the manager, approved and finally posted.

It will then be in the sales order and ready to be invoiced.