5.4.5. How to return and refund products on POS?

To return a product and refund to customer, from POS main view, you need to insert negative values: Select the product your customer wants to return, use the +/- button and enter the quantity they need to return. If they need to return multiple products, repeat the process.

As you can see, the total is negative, to end the refund you simply have to process the payment:

5.4.4. How to discount on POS

You can apply manual discounts in two different ways. You can directly set a discount on the product (discount on order lines) or you can set a global discount (discount on total bill) on the whole cart.

→ Discount on order lines

  • Configuration: If you want to set a global discount, you need to go to Configuration ‣ Settings and tick “Allow discounts on order lines only”

Back to dashboard, click on “New session”, you will get into the main point of sale interface:

Click on “Disc” and then type the discount (in percent). This is how you insert a manual discount on a specific product.

→ Discount on total bill

Configuration: If you want to set a global discount, you need to go to Configuration ‣ Settings and tick Allow global discounts

  • Then from the dashboard, click on More ‣ Settings

  • You have to activate Order Discounts and create a product that will be added as a product with a negative price to deduct the discount:

  • On the product used to create the discount, set the price to 0, choose Income account and do not forget to define all the relating taxes:

  • Now when you come back to the dashboard and start a new session, a Discount button appears and by clicking on it you can set a discount: 

  • You can choose discount percentage as per promotion programme: 

By clicking Ok button, the discount line appears on the order and you can now process to the payment:

5.4.3. How to split the bill

This feature only works in POS for restaurant. In configuration for a restaurant POS in Point of Sale ‣ Configuration ‣ Point of Sale, activate Bill Splitting function.

An order can be split in 2 ways: One is based on product, and the other is based on the amount of payment. Let’s place an order and split it for example.

Start a New Session.

Choose a table and register an order.

  • Splitting based on product

 In the calculation screen, click Split.

Select products and their quantities the first customer wants to pay and click on Payment when you get the total for this split bill.

Process the payment.

Print receipt and move to Next Order.

Follow the same procedure for the next customer of the same table.

  • Splitting based on the amount of payment

Process the Payment. You only have to insert the money tendered by each customer.

Click on the payment method (cash, credit card,…) and enter the amount. Repeat it for each customer.


5.4.2. How to pay a bill both by card and in cash?

  • Press Payment on POS ‣ to go to Payment interface 
  • Choose Cash payment method ‣ Input amount paid in cash 
  • Choose Credit Card payment method ‣ Input amount paid by Credit Card ‣ Swipe the card and input amount paid by Credit Card again ‣ Press enter on swiping machine ‣ Customer sign
  • Press Validate Payment on Kiu POS to finish the transaction.

5.4.1. How to process a payment of the order

Once the order is completed, click on Payment. You can choose the customer payment method.

In this example, the customer owes you VND 5,744,200 and pays VND 5,750,000. When it’s done, click on Validate.

Your ticket is printed and you are now ready to make your second order.

5.3.3. How to create and run loyalty & reward program

→ Configuration: 

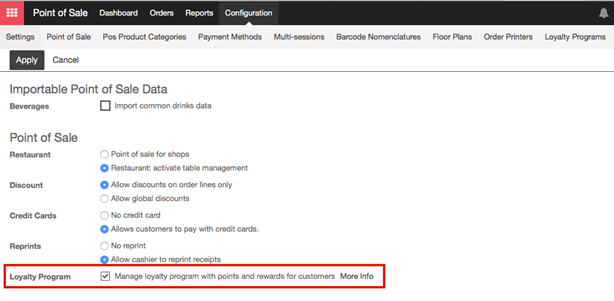
In the Point of Sale Module, go to Configuration ‣ Settings. You can tick Manage loyalty program with point and reward for customers.

→ Create loyalty program: 

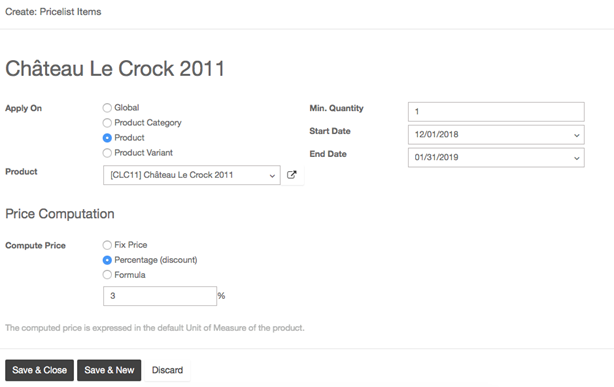
After you apply, go to Configuration ‣ Loyalty Programs and click on Create

Set a name and an amount of points given by currency, by order or by product. Extra rules can also be added such as extra points on a product.

To do this click on Add an item under Rules

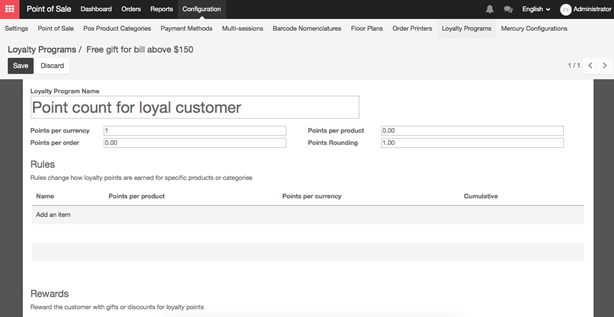
You can configure any rules by setting some configuration values.

  • Name: An internal identification for this loyalty program rule
  • Type: Does this rule affect products, or a category of products?
  • Target Product: The product affected by the rule
  • Target Category: The category affected by the rule
  • Cumulative: The points won from this rule will be won in addition to other rules
  • Points per product: How many points the product will earn per product ordered
  • Points per currency: How many points the product will earn per value sold

Your new rule is now created and rewards can be added by clicking on Add an Item under Rewards.

  • Resale: convert your points into money. Set a product that represents the value of 1 point.

Three types of reward can be given:

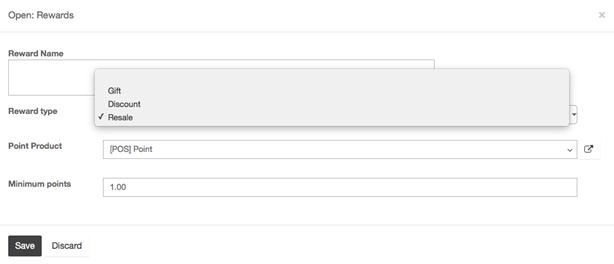
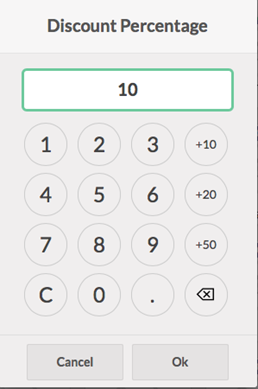
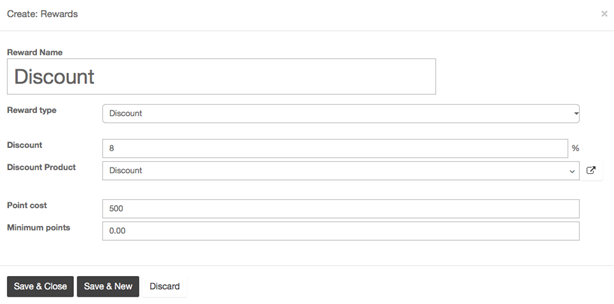
  • Discount: give a discount for an amount of points. Set a product with a price of 0 

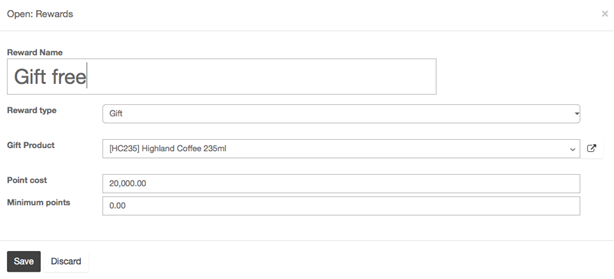
  • Gift: give a gift for an amount of points

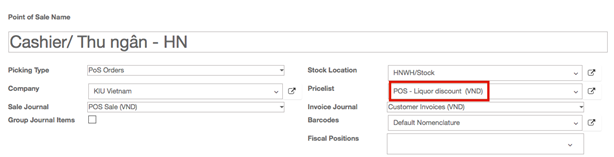
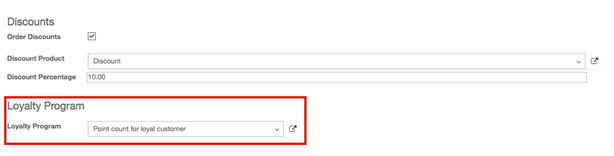
→ Apply loyalty program to a point of sale: 

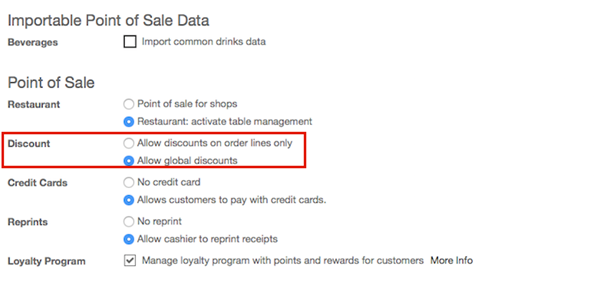
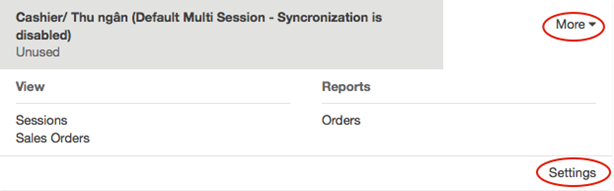
  • On the Dashboard, click on More ‣ Settings

Next to loyalty program, set the program you want to set

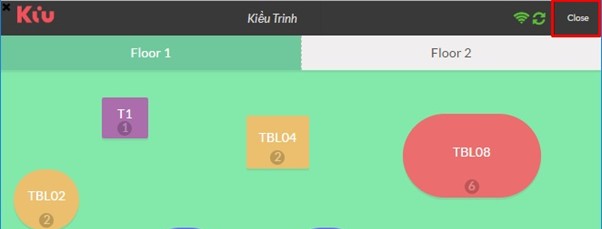
→ Gathering and consuming points

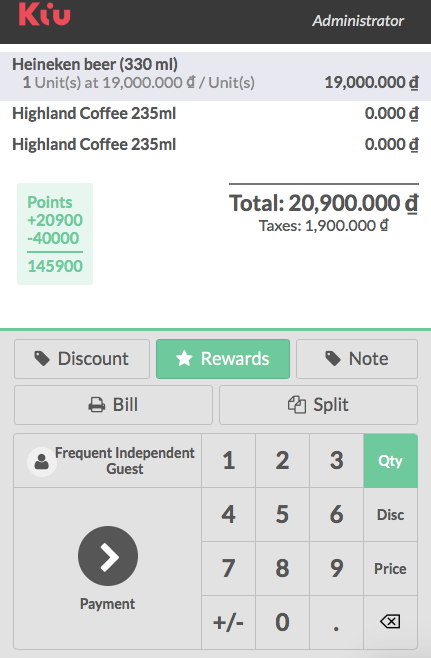
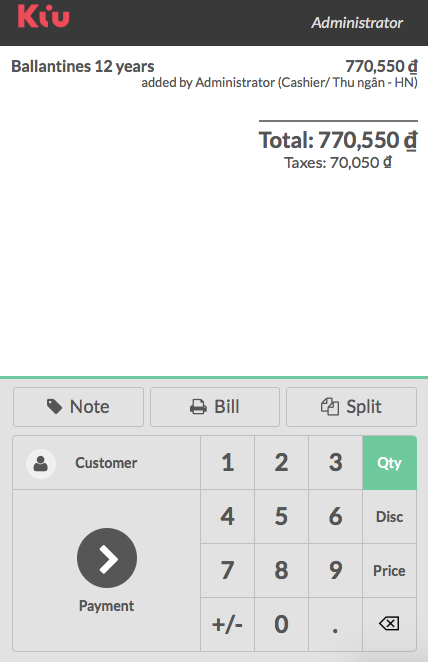
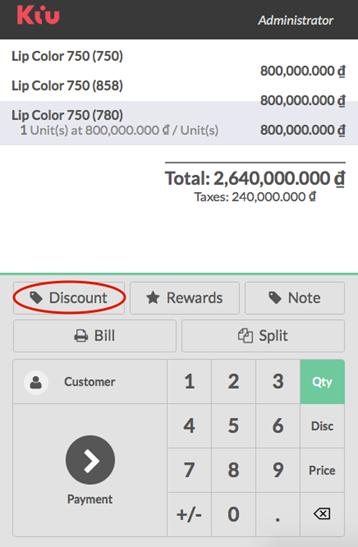
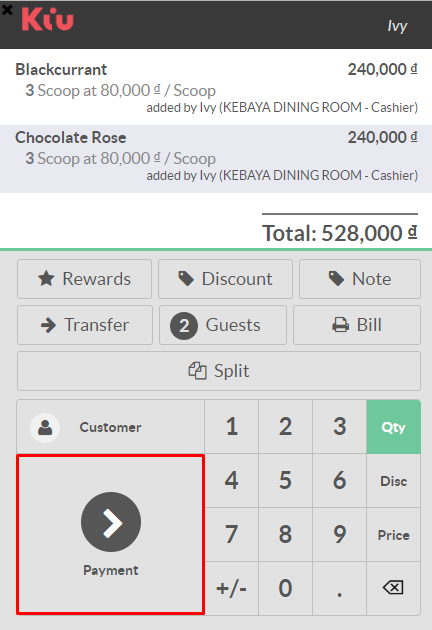
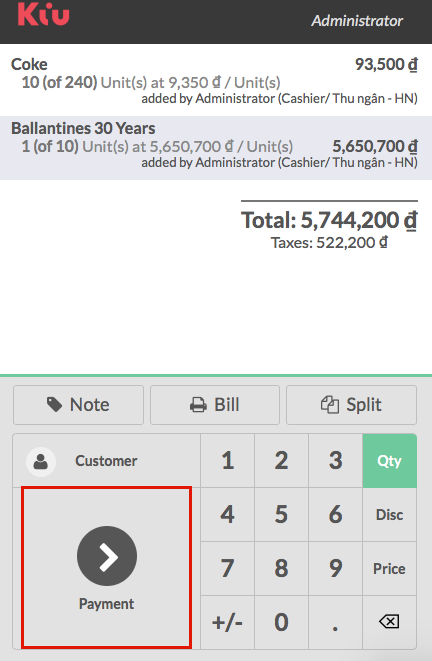
To start gathering points you need to set a customer on the order.

Click on Customer and select the right one.

Loyalty points will appear on screen.

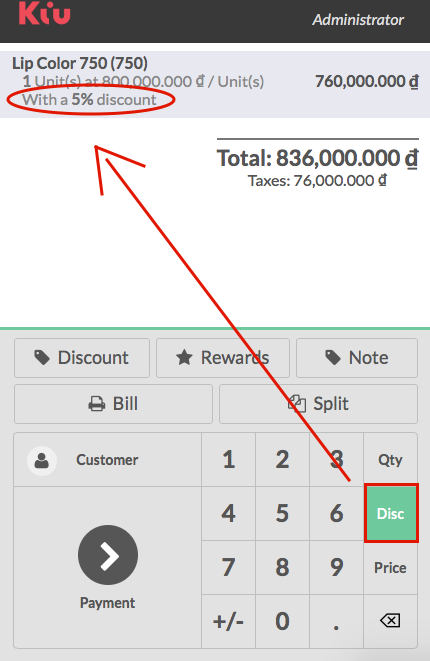
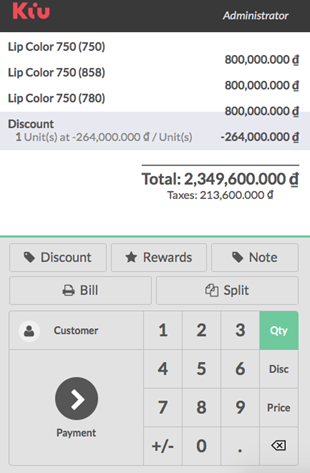
The next time the customer comes to your shop and has enough points to get a reward, the Rewards button is highlighted and gifts can be given.

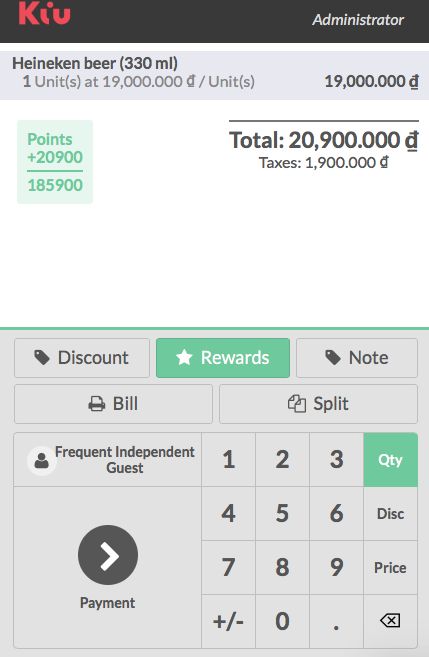
The reward is added and of course points are subtracted from the total

5.3.2. How to apply Time-limited or seasonal discounts?

To apply time-limited or seasonal discount, please use the pricelists. You have to create it and apply it on the point of sale.

→ For configuration: In Sales Module, go to ConfigurationSettings. Tick Advanced pricing based on formula.

Once the setting has been applied, a Price list section appears under the configuration menu on the sales module

Click on it, and then on Create

Create a Price list for your point of sale. Each pricelist can contain several items with different prices and different dates. It can be done on all products or only on specific ones. Click on Add an item

For example, the price of oranges costs VND 1,634,500 but we want to give a 3% discount to our PoS customers from December 2018 to the end of January 2019.

You can do it by adding the product or its category and applying a percentage discount. Other price computation can be done for the pricelist.

After you save and close, your pricelist is ready to be used.

→ Applying Price list to POS: 

  • From the dashboard, click on More ‣ Settings

  • When you start a new session, you can see that the price have automatically been updated

5.3.1. How to transfer table

Please be noted that this feature only works on POS configured for restaurant.

From Point of Sale ‣ Dashboard, begin your New Session.

Choose a table, table 4 (T4) for example, and place an order.

For some reason, after order registration, customer wants to move table 13 (T13). Press Transfer in the main screen to move this order.

Select the table to which you want to transfer customers. It is table 13 (T13) in this example.

The order has been added next to the current order of table 13 (T13).

5.2.3. How to manage multi-session

The purpose of multi-session is to facilitate the synchronization of multiple concurrent sessions. For instance, an order that is placed on the waiter’s device will appear on the cashier’s device as long as their POS configurations contain the same multi-session, which is established by the restaurant’s owner/manager.

The owner/manager should create relevant POSes in Point of Sales ‣ Configuration ‣ Point of Sales before starting a multi-session in Point of Sales ‣ Configuration ‣ Multi-session Settings

Noted that only unused POS can be added/removed from a multi-session (as KIU has warned in the footer).

After a multi-session is saved, it will appear in the related POSes configurations

5.2.2. How to close a session

  • For Cashier

Click on Close in the top-right corner of the screen.

Confirm your decision.

Close your session on dashboard.

In session detail, you can use functions Put Money In or Take Money Out to control the remaining cash on your cash-drawer.

Here is an example for Take Money Out option.

Set Closing Balance to identify types and the number of banknotes in your cash-drawer. Noted that:

  • Opening Balance: The amount of money in the cash-drawer at the beginning of your session. This can be set by using Set Opening Balance function.
  • Transactions: The total amount of payments collected from customers during your latest session. This field can be modified manually by using Put Money In (add more cash) and Take Money Out (withdraw cash).
  • Theoretical Closing Balance (= Opening Balance + Transactions): The amount of money theoretically stored in your cash-drawer after a period of operation.

Real Closing Balance: The amount of money left in your cash-drawer in reality at the end of your session. This can be set by using Set Closing Balance function.

An example for Set Closing Balance is illustrated in the following picture.

Then Validate Closing & Post Entries to set off various operations in Accounting, Stock,…

  • For Waiter

Choose Close in the upper-right corner of your screen.

Confirm your decision.

When you are back on dashboard, click Close.

Validate closing & Post entries to trigger relevant operations in Accounting, Inventory,…