7. INVENTORY

7.1. Create opening balance

7.2. Products settings
7.2.1. How to use different units of measure?
7.2.2. Using product variants
7.2.3. When should you use packages, units of measure or kits?
7.2.4. How to use packages?

7.3. Warehouse settings
7.3.1. What is the difference between warehouses and locations?
7.3.2. How to create a new warehouse?
7.3.3. How to create a new location?
7.3.4. How to choose between minimum stock rule and make to order?

7.4. Delivery order
7.4.1. How to choose the right inventory flow to handle delivery orders?
7.4.2. How to process delivery orders in one step (shipping)?
7.4.3. How to process delivery orders in two steps (pick + ship)?
7.4.4. How to process delivery orders in three steps (pick + pack + ship)?
7.4.5. How is the scheduled delivery date computed?
7.4.6. How to change the packaging type for your sale order?
7.4.7. How to cancel a delivery order?

7.5. Inventory process from procurement to delivery
7.5.1. How to process a receipt
7.5.2. How to process a delivery

7.6. Inventory report

7.7. Miscellaneous Operations
7.7.1. How to scrap products?
7.7.2. How to manage stock that you don’t own?
7.7.3. How to configure and run schedulers?

7.8. Lots and Serial Numbers
7.8.1. What’s the difference between lots and serial numbers?
7.8.2. How to work with serial numbers?
7.8.3. How to manage lots of identical products?

7.9. Valuation Methods
7.9.1. Overview
7.9.2. How to do an inventory valuation? (Continental Accounting)
7.9.3. How to do an inventory valuation? (Anglo-Saxon Accounting)

7.10. Shipping
7.10.1. How to set up a delivery method?
7.10.2. How to invoice the shipping cost to the customer?


3. SALES

3.1. Overview & Workflows

3.2. Configuration
3.2.1. How to create a Salable product
3.2.2. How to Publish product on website

3.3. CRM – Customer Relationship Management
3.3.1. How to setup your teams, sales process and objectives
3.3.2. How to set up and organize your sales pipeline
3.3.3. How to create a contact
3.3.4. How to import contacts to the CRM
3.3.5. How to generate leads from incoming emails
3.3.6. How to generate leads from my website

3.4. Sales Process
3.4.1. Regular Sale Process
3.4.2. Dropshipping Process

3.5. Price list
3.5.1. How to create a Price list
3.5.2. How to apply a Price list for a particular customer/ group of customers
3.5.3. How to adapt your prices to your customers and apply discounts

3.6. Sale Report
3.6.1. How to analyze the sales performance of your team and get customized reports
3.6.2. How to review my personal sales activities (new sales dashboard)

1. GENERAL SETTINGS

1.1. Get started with KIU BMP
1.1.1. How to update company info
1.1.2. How to create a user account & grant access right.
1.1.3. Change the password

1.2. How to create a new contact in KIU BMP
1.2.1. Definitions
1.2.2. How to access Contacts list
1.2.3. How to create new contact

1.3. Products in KIU BMP
1.3.1. Definitions
1.3.2. How to access the Product list
1.3.3. How to create a product

1.4. Filter and group information in BMP

1.5. Report in KIU BMP

1.6. Import data in KIU BMP
1.6.1. How to import data on KIU BMP

10.8. Project Reports

Kiu BMP provides the summary of all projects as well as task analysis in Projects >> Reporting.

Users can view and customize reports using multiple measures and variants to have a quick check of all projects and the corresponding tasks.

10.5. Manage Project Tasks

Project module enables employees to record time spent on each task and enables employers to track the total effort of processing each project. From that, users will be able to calculate the total cost of the project based on the timesheet entries and be sure to invoice customers the exact amount

-> Record timesheet on task

When employees are assigned a new task, they will receive an email from Kiu BMP notifying the assigned task

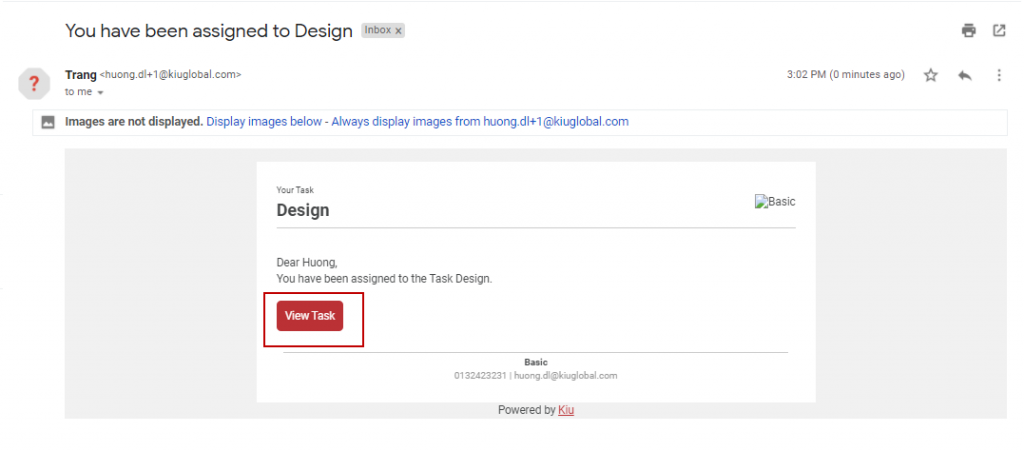
Click [View Task] to open the assigned task screen, under tab Timesheet, specify the Plan Hours and click [Add a line] to key in the duration

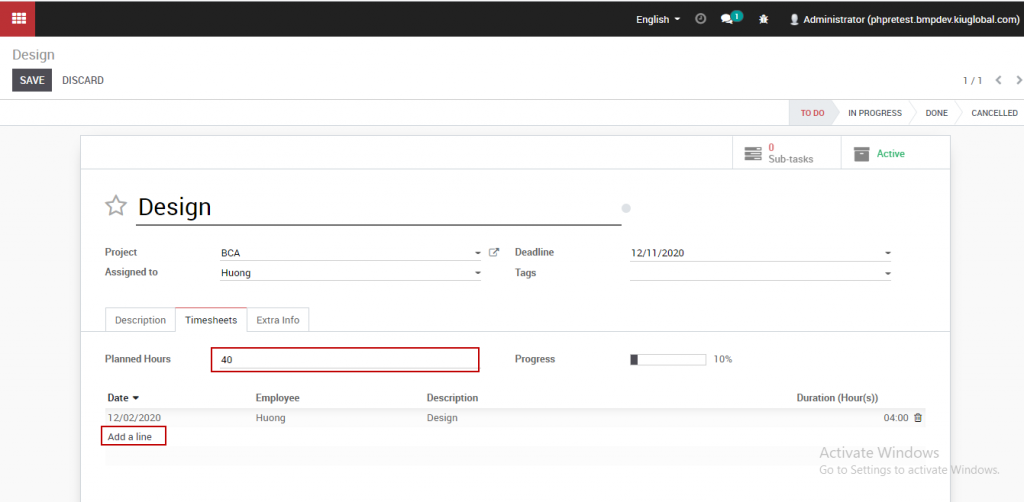
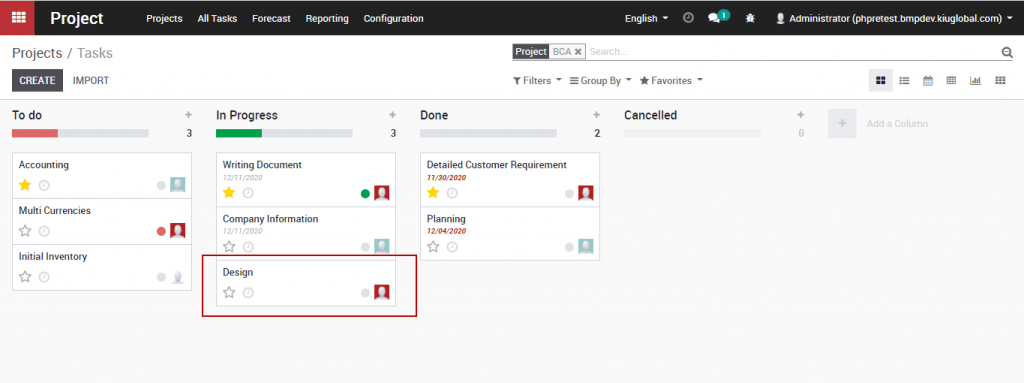
-> Update the task status

After logging in the time spent to process the task, you can change the task status to the corresponding stage by clicking on the status button on the status bar at the top right of the screen.

The task will be moved to the corresponding stage column so that employers can view the overall progress of the project.